NSA-220 Network Storage Appliance User’s Guide Version 2.10 11/2007 Edition 1 DEFAULT LOGIN Web Address nsa220 Password 1234 www.zyxel.
About This User's Guide About This User's Guide Intended Audience This manual is intended for people who want to configure the NSA using the web configurator. A basic knowledge of TCP/IP networking concepts and topology will be helpful. Related Documentation • Quick Start Guide The Quick Start Guide is designed to help you get up and running right away. It contains information on setting up your network and configuring for Internet access.
Document Conventions Document Conventions Warnings and Notes These are how warnings and notes are shown in this User’s Guide. 1 " Warnings tell you about things that could harm you or your device. Notes tell you other important information (for example, other things you may need to configure or helpful tips) or recommendations. Syntax Conventions • The NSA may be referred to as the “NSA”, the “device” or the “system” in this User’s Guide.
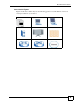
Document Conventions Icons Used in Figures Figures in this User’s Guide may use the following generic icons. The NSA icon is not an exact representation of your device.
Safety Warnings Safety Warnings 1 For your safety, be sure to read and follow all warning notices and instructions. • Do NOT use this product near water, for example, in a wet basement or near a swimming pool. • Do NOT expose your device to dampness, dust or corrosive liquids. • Do NOT store things on the device. • Do NOT install, use, or service this device during a thunderstorm. There is a remote risk of electric shock from lightning. • Connect ONLY suitable accessories to the device.
Safety Warnings NSA-220 User’s Guide 7
Safety Warnings 8 NSA-220 User’s Guide
Contents Overview Contents Overview Introduction ............................................................................................................................ 23 Getting to Know Your NSA ........................................................................................................ 25 Web Configurator Basics ........................................................................................................... 29 Tutorials ........................................................
Contents Overview 10 NSA-220 User’s Guide
Table of Contents Table of Contents About This User's Guide .......................................................................................................... 3 Document Conventions............................................................................................................ 4 Safety Warnings........................................................................................................................ 6 Contents Overview .......................................................
Table of Contents 2.6.1 Global Administration Icons ....................................................................................... 41 2.6.2 Navigation Panel ........................................................................................................ 42 2.6.3 Main Window .............................................................................................................. 43 2.6.4 Status Messages ...................................................................................
Table of Contents 6.5.1 Choosing A Storage Method For a Volume ................................................................ 77 6.5.2 Volume Status ............................................................................................................ 77 6.6 Disk Replacement Restrictions ............................................................................................ 78 6.6.1 Resychronizing or Recovering a RAID 1 Volume ....................................................... 79 6.6.
Table of Contents 8.14 Adding or Editing a Broadcatching Channel .................................................................... 108 8.15 Printer Sharing ................................................................................................................. 109 8.16 Print Server Screen ..........................................................................................................110 8.17 Print Server Rename ..........................................................................
Table of Contents 12.1 Protection Methods .......................................................................................................... 135 12.1.1 Configuration File Backup and Restoration ............................................................ 135 12.1.2 Memeo Autobackup ............................................................................................... 136 Chapter 13 Media Client Software.......................................................................................
Table of Contents Part VI: Appendices and Index ........................................................... 163 Appendix A Setting up Your Computer’s IP Address............................................................ 165 Appendix B Pop-up Windows, JavaScripts and Java Permissions ...................................... 179 Appendix C Common Services ............................................................................................ 187 Appendix D Open Source Licences ...........................
List of Figures List of Figures Figure 1 Example of the NSA in a Home Network ................................................................................. 25 Figure 2 NSA Front Panel ..................................................................................................................... 26 Figure 3 NSA Rear Panel ...................................................................................................................... 27 Figure 4 NDU Main Screen ...............................
List of Figures Figure 39 Download Service Tutorial: Paste Link .................................................................................. 55 Figure 40 Download Service Tutorial: Apply Pasted Link ...................................................................... 55 Figure 41 Download Service Tutorial: Download Task Added ............................................................... 55 Figure 42 Broadcatching Link Example .......................................................................
List of Figures Figure 82 Applications > Print Server ...................................................................................................110 Figure 83 Applications > Print Server > Rename .................................................................................110 Figure 84 Users .....................................................................................................................................115 Figure 85 Users > Add or Edit an Account ............................
List of Figures Figure 125 Internet Options: Security ................................................................................................... 182 Figure 126 Security Settings - Java Scripting ....................................................................................... 183 Figure 127 Security Settings - Java ...................................................................................................... 183 Figure 128 Java (Sun) ..................................................
List of Tables List of Tables Table 1 LEDs ......................................................................................................................................... 27 Table 2 User-level Global Labels and Icons .......................................................................................... 32 Table 3 My NSA ..................................................................................................................................... 34 Table 4 My NSA Share Browsing ........
List of Tables Table 39 Shares ................................................................................................................................... 120 Table 40 Shares > Add Share (or Change Share Properties) ............................................................. 121 Table 41 Shares > Share Path Browse ................................................................................................ 123 Table 42 Maintenance > Log .........................................................
P ART I Introduction Getting to Know Your NSA (25) Web Configurator Basics (29) Tutorials (45) Status Screen (63) 23
CHAPTER 1 Getting to Know Your NSA This chapter covers the main features and applications of the NSA. 1.1 NSA Overview Use the NSA (Network Storage Appliance) to do the following. • Share files between computers on your network. • Back up files from your computers to the NSA. • Use the COPY button to copy files directly to the NSA from USB devices like card readers, MP3 players, memory sticks, and digital cameras without using a computer. • Have the NSA handle large file downloads.
Chapter 1 Getting to Know Your NSA Place the NSA behind a firewall and/or IDP (Intrusion Detection and Prevention) device to protect it from attacks from the Internet. " See Chapter 16 on page 155 for a more detailed list of NSA features and lists of compatible hard drives and USB devices. Refer to the Quick Start Guide for hardware connections and how to install and remove hard drives from the disk trays. " Turn off and disconnect the NSA before you install or remove internal hard drives. 1.1.
Chapter 1 Getting to Know Your NSA Figure 3 NSA Rear Panel This table describes the NSA’s LEDs. Table 1 LEDs LED COLOR POWER Blue HDD1/ HDD2 Green OrangeA Red SYS Green Red NSA-220 User’s Guide STATUS DESCRIPTION On The NSA is turned on and receiving power. Off The NSA is turned off. On The hard disk drive is connected properly to the NSA. Blinking The NSA is saving data to the hard disk drive. On The NSA detected an error on the hard disk drive (like a bad sector for example).
Chapter 1 Getting to Know Your NSA Table 1 LEDs (continued) LED COLOR STATUS DESCRIPTION LAN Green On The NSA has a successful 10/100 Mbps Ethernet connection. Blinking The 100M LAN is sending or receiving packets. Off The NSA does not have a 10/100 Mbps Ethernet connection. On The NSA has a successful 1000 Mbps Ethernet connection. Blinking The 1000 M LAN is sending or receiving packets. Off The NSA does not have a 1000 Mbps Ethernet connection. On A USB device is connected to the NSA.
CHAPTER 2 Web Configurator Basics This chapter describes how to access the NSA web configurator and provides an overview of its screens. 2.1 Web Configurator Overview The web configurator is an HTML-based management interface that allows easy NSA setup and management using an Internet browser. Use Internet Explorer 6.0, Mozilla Firefox 1.07, Netscape Navigator 7.0 or later versions of these browsers. The recommended screen resolution is 1024 by 768 pixels or higher.
Chapter 2 Web Configurator Basics Figure 4 NDU Main Screen From the NDU main page click an icon under Admin to see the web configurator screen login screen. 2.2.2 Web Browser Access Open your browser and type in the server name of the NSA (“nsa220” is the default). Figure 5 NSA URL 2.3 Login The default username and password are ‘admin’ and ‘1234’ respectively. Enter your username and password, then click Login. See Chapter 9 on page 115 for how to create other user accounts.
Chapter 2 Web Configurator Basics Figure 6 NSA Login Screen You should see a screen asking you to change your password (highly recommended) as shown next. Type a new password (and retype it to confirm) and click Apply or click Ignore. Figure 7 Change Password Screen 2.4 User-level Screens Overview All users (including the administrator) first see the user-level access My NSA screen after login.
Chapter 2 Web Configurator Basics Figure 8 My NSA " The web configurator management session automatically times out if it is left idle for 15 minutes. Simply log back into the NSA if this happens to you. The icons and language label at the top-right of the screen ( 1 ) are visible from most screens. Use the tabs at the top of the screen to navigate between the user-level screens and menus. The following table describes the ‘global’ icons and tabs in the user-level screens.
Chapter 2 Web Configurator Basics 2.5 My NSA Screen Use the My NSA screens to manage your shares and access the files in folders to which you have access. A share is a set of user access permissions for a specific folder on a volume (gives someone access to a folder). It is equivalent to the Windows concept of a shared folder, but the access rights are independent of the folder (you configure the share and the folder separately).
Chapter 2 Web Configurator Basics The following table describes the labels in this screen. Table 3 My NSA LABEL DESCRIPTION My Own Shares These are the shares that you own (and manage). The share icons are folder shaped. Click a share icon to access the share’s contents. A plain share icon displays for a share on a volume on the internal hard drives. A USB symbol displays on the icon for a share on an external (USB) device.
Chapter 2 Web Configurator Basics The following table describes the labels in this screen. Table 4 My NSA Share Browsing LABEL DESCRIPTION Current location This is the name of the share and folder path that you are in. Move to Select a folder or file and click this button to move it to another location within this share or another share that you can access.
Chapter 2 Web Configurator Basics 2.5.3 My NSA Management Overview Screen Use the My NSA management overview screens to see and configure share management details. Click My NSA and then the Manage It button of one of your shares to open the following screen. This screen displays a share’s management details. Figure 12 My NSA Management Overview The following table describes the labels in the this screen.
Chapter 2 Web Configurator Basics Figure 13 My NSA Change Share Properties The following table describes the labels in the this screen. Table 7 My NSA Change Share Properties LABEL DESCRIPTION Share Name Configure a name to identify this share. Type a share name from 1 to 255 singlebyte (no Chinese characters allowed for example) ASCII characters. The name cannot be the same as another existing local share. See Section 2.5.5 on page 38 for more information on share names.
Chapter 2 Web Configurator Basics Table 7 My NSA Change Share Properties (continued) LABEL DESCRIPTION Read Only This appears when you set the Share Access to Advanced. Select this column’s radio button in a user account’s row to give the user read-only access to the share. This allows the user to view or copy files in the share, but not delete files in the share or save files to the share. Select the check box at the top of the column to give all of the users read-only access to the share.
Chapter 2 Web Configurator Basics 2.5.6 Share Paths A share path is the full path to a folder on a volume that will be shared, for example, /mynsa/ topsecret/ugs/. This is independent from a “share name” which is the name shown for this share when accessing the share via CIFS or FTP. The path should start with a '/' (forward slash) followed by a parent folder, child folders leading to the folder that is to be shared.
Chapter 2 Web Configurator Basics Figure 14 Password The following table describes the labels in this screen. Table 8 Password LABEL DESCRIPTION Account Name Type the user name of the account for which you want to change the password. Old Password Type the user’s current password. New Password Create a new password for the user. You can type from one to 14 singlebyte (no Chinese characters allowed for example) ASCII characters.
Chapter 2 Web Configurator Basics Figure 15 Status 1 3 2 4 2.6.1 Global Administration Icons The icons and language label at the top-right of the screen ( 1 ) are visible from most of the administration screens. The following table describes the ‘global’ icons and labels. Table 9 Global Labels and Icons LABEL/ICON DESCRIPTION Language Select the web configurator language from the drop-down list box. Click this Help icon to open a web help page specific to the screen you are currently configuring.
Chapter 2 Web Configurator Basics 2.6.2 Navigation Panel The navigation panel on the left of the screen ( 2 ) contains screen links. Click a link to display sub-links. There are no sub-links for the Status screen. Certain screens also contain hyper links that allow you to jump to another screen. Click the Status icon to open the Status screens. Figure 16 Navigation Panel Links The following table describes the navigation panel screens.
Chapter 2 Web Configurator Basics Table 10 Screens Summary (continued) LINK SCREEN FUNCTION Applications FTP Enable FTP file transfer to/from the NSA, set the number of FTP connections allowed, an FTP idle timeout, and the character set. Media Server Enable or disable the sharing of media files and select which shares to share. Download Service Have the NSA handle large file downloads. Web Publishing Let people use a web browser to access files in shares without logging into the My NSA screens.
Chapter 2 Web Configurator Basics Table 11 Common Configuration Screen Icons (continued) ICON DESCRIPTION Click the Edit icon to jump to related item’s configuration screen. This is a user icon. See the chapter on user accounts for detailed information on variants of this icon. This is a share icon. See the chapter on shares for detailed information on variants of this icon. This icon represents a Healthy volume. This icon represents a Degraded RAID 1 volume. Replace the faulty disk.
CHAPTER 3 Tutorials This chapter provides tutorials that show how to use the NSA. 3.1 File Sharing Tutorials The following sections cover using the NSA for file sharing. This chapter assumes you have already followed the Quick Start Guide instructions to perform initial setup and configuration (so you have a working volume). See the Quick Start Guide for how to play media files using the included DLNA-compliant media client software.
Chapter 3 Tutorials Figure 18 Users 3 Configure the screen as follows and write down the username and password to give to Jimmy. If the username and password are the same as Jimmy’s Windows login, Jimmy will not need to enter a username and password when he logs into his share from his computer. Set the Account Type to User so Jimmy doesn’t get to configure the whole NSA. Click Apply to create the account. Figure 19 Users > Create Example 4 The account now displays in the Users screen.
Chapter 3 Tutorials 3.1.2 Creating a Share Suppose Bob has already created separate accounts for his sons Jimmy and Kevin. Now Bob wants to create a share for each son. He also wants to make sure that each son can only access his own share (to keep them from deleting each other’s files). This is how he would do it. 1 In the NSA’s administration web configurator screens, click Shares > Add Share. Figure 21 Shares 2 Specify a name for the share and select which volume it should be on. Then click Browse.
Chapter 3 Tutorials Figure 23 Shares > Create > Browse > Create Folder Example 4 Select the new folder and click Apply. Figure 24 Shares > Create > Browse > New Folder Example 5 Configure the screen as follows and click Apply. (Make sure you also set the anonymous-ftp access to Deny).
Chapter 3 Tutorials Figure 25 Shares > Create Example Now that Bob has created Jimmy’s share, he can go through the steps again to create another share for Kevin. Then he can see the rest of the tutorials for how to use the shares. 3.1.3 Accessing a Share From Windows Explorer If you map a NSA share (where data is stored) to a Windows network drive, you can use Windows Explorer to transfer files to and from the NSA as if it was another folder on your computer.
Chapter 3 Tutorials 4 Enter the username and password for Jimmy’s account and click OK. You do not need to do this if the username and password are the same as Jimmy’s Windows login. Figure 28 Enter Network Password 5 After the mapping is done, you can then simply copy and paste or drag and drop files from/to your local computer’s drives to or from this network folder. Just like the NSA’s share was another folder on your computer.
Chapter 3 Tutorials Figure 30 FTP Example: Typing the FTP Target 2 Enter your password and click Login. Figure 31 FTP Example: Enter the Password 3 Now you can access files and copy files from/to your local computer’s drives to or from this network folder. 1 Figure 32 FTP Example: Logged In 3.1.5 Accessing a Share Through the Web Configurator You can browse and access files through the web configurator. 1 Log into the NSA web configurator (see Section 2.3 on page 30) using your username and password.
Chapter 3 Tutorials Figure 33 My NSA User Login 2 Click a share to see the top level of the share’s contents. Here is the Jimmy share. Figure 34 My NSA User Login 3 Click a folder’s file name to browse the folder. You can open files or copy them to your computer. However at the time of writing you cannot use the web configurator to upload files to the NSA (use CIFS or FTP to upload files, see Section 3.1.3 on page 49 and Section 3.1.4 on page 50).
Chapter 3 Tutorials 1 Open your Internet browser (this example uses Internet Explorer). 2 Find a download link for the file you want. In this example, www.zyxel.com has a Download Now link for downloading a datasheet for ZyXEL’s P-2301RL-P1C (a device for making phone calls over the Internet). Figure 35 Download Link Example " Make sure the link opens either the file you want or a pop-up window about how to handle the file. It is also OK for the link to open a .torrent file.
Chapter 3 Tutorials Figure 36 Copy Shortcut 4 Log into the NSA web configurator (see Section 2.3 on page 30) using the administrator account and click Download Service. Figure 37 Download Service Tutorial: My NSA 5 Click Add. Figure 38 Download Service Tutorial: Download Service 6 Right-click the URL field and select Paste.
Chapter 3 Tutorials Figure 39 Download Service Tutorial: Paste Link 7 The URL displays in the URL field. Click Apply. Figure 40 Download Service Tutorial: Apply Pasted Link 8 After a few moments, the download task appears in the Download Service screen’s Active tab. Figure 41 Download Service Tutorial: Download Task Added The download appears in the Completed tab when it is done. By default the NSA stores all downloads in the admin share’s download folder. See Section 3.1.3 on page 49, Section 3.1.
Chapter 3 Tutorials 3.3 Broadcatching Tutorial Use broadcatching to have the NSA download frequently updated digital content like TV programs, radio talk shows, Podcasts (audio files), and blogs. This example shows how to subscribe the NSA to the CNET TV Internet television channel. See Section 8.12 on page 105 for more on the broadcatching service. 1 Open your Internet browser (this example uses Firefox). 1 Find the link for the RSS feed containing the channel you want to add.
Chapter 3 Tutorials Figure 43 Copy Link Location 3 Log into the NSA web configurator (see Section 2.3 on page 30) using the administrator account and click Administration > Applications > Broadcatching. Figure 44 Broadcatching Tutorial: My NSA 4 Click Add Channel.
Chapter 3 Tutorials Figure 45 Broadcatching Tutorial: Broadcatching 5 Right-click the URL field and select Paste. Figure 46 Broadcatching Tutorial: Paste Link 6 The URL displays in the URL field. 7 Select a policy for what items to download. This example uses Manual so you will be able to select individual items to download later. 8 Select a policy for what items to delete. This example keeps the most recent 10 items. 9 Click Apply.
Chapter 3 Tutorials 3.4 Printer Server Tutorial Do the following to have the NSA let computers on your network share a printer. See www.zyxel.com for a list of compatible printers. 1 Make sure the NSA is on and the SYS light is on steady (not blinking). 2 Use a USB cable to connect the printer’s USB port to one of the NSA’s USB ports. Make sure the printer is also connected to an appropriate power source. Figure 48 Printer Sharing 3 Turn on the printer. 4 The NSA detects the printer after a few moments.
Chapter 3 Tutorials Figure 51 Printer Driver Needed 8 Use the wizard screens to install the printer driver on the computer. You may need to get the file from the printer’s CD or the printer manufacturer’s website (the driver is not installed on the NSA). " You must install the printer driver on each computer that will use the printer. Figure 52 Applications > Print Server After the driver installation finishes, the computer is ready to use the printer.
Chapter 3 Tutorials " Repeat steps 5 to 8 on your other computers so they can also use the printer.
Chapter 3 Tutorials 62 NSA-220 User’s Guide
CHAPTER 4 Status Screen This chapter introduces the NSA Status screen. 4.1 Status Screen The Status screen is the first main web configurator screen you see after you enter the administrator screens. To view the status screens, click Status on the top-left of the navigation panel.
Chapter 4 Status Screen The following table describes the labels in this screen. Table 12 Status LABEL DESCRIPTION Status Click Status to refresh the status screen statistics. System Information Server Name This displays the name which helps you find the NSA on the network. Click the edit icon to go to the screen where you can configure this. Model Name This displays which model this NSA device is. Firmware Version This is the NSA firmware version.
Chapter 4 Status Screen Table 12 Status (continued) LABEL DESCRIPTION Username This displays the name of the user connected to the NSA if one is defined. ANONYMOUS CIFS or ANONYMOUS FTP display if a username is not defined for the user’s connection. Connected At This displays the date and time the user last connected to the NSA in year, month, day, hour, minute, second format. IP Address This displays the IP address of the computer connected to the NSA. 4.1.
Chapter 4 Status Screen 66 NSA-220 User’s Guide
P ART II System Setting and Applications System Setting Screens (69) Storage Screens (73) Network Screen (85) Application Screens (89) 67
CHAPTER 5 System Setting Screens This chapter discusses the system setting screens. 5.1 System Setting Screens This section gives an overview of the various features included in the system setting screens. Use the system setting screens to: • Specify the NSA’s Windows/CIFS server name and workgroup name. • Chose a time zone and/or allow the NSA to synchronize with a time server. • Create and edit volumes (see Chapter 6 on page 73 for details). 5.1.
Chapter 5 System Setting Screens Figure 56 System Setting > Server Name The following table describes the labels in these screens. Table 13 System Setting > Server Name LABEL DESCRIPTION Server Name Enter a name to identify your NSA on the network in this field. You can enter up to 15 alphanumeric characters with minus signs allowed but not as the last character. The name must begin with an alphabetic character (a-z) and is NOT case sensitive.
Chapter 5 System Setting Screens Figure 57 System Setting > Date/Time The following table describes the labels in this screen. Table 14 System Setting > Date/Time LABEL DESCRIPTION Current System Date Time Setting Current Time This field displays the time of your NSA. Current Date This field displays the date of your NSA. Current Time Zone This field displays the time zone of your location. This will set the time difference between your time zone and Greenwich Mean Time (GMT).
Chapter 5 System Setting Screens Table 14 System Setting > Date/Time (continued) LABEL DESCRIPTION Time Server Address Select a time server from the drop-down list box or select Specify my own time server and enter the time server you wish to use in the field below. Check with your ISP/network administrator if you are unsure of this information. Synchronize Now Click this button for the NSA to retrieve the correct time from the configured time server right away.
CHAPTER 6 Storage Screens This chapter covers storage systems, volumes and disks on the NSA. 6.1 Storage Introduction Use the System > Storage screens to manage volumes and disks (both internal and external). " Several NSA features require a valid internal volume. • Volumes are storage areas on disks. See Section 6.5 on page 76 for details. • For details on replacing internal disks, see Section 6.6 on page 78. • For details about external disks, see Section 6.8 on page 80. 6.
Chapter 6 Storage Screens The following table describes the labels in this screen. Table 15 System > Storage LABEL DESCRIPTION Internal/External Volume These tables display information on all internal volumes (created on NSA internal disk drives) and external volumes (created on external disk drives attached to the NSA USB ports). See the volume screen for field details. Create an Internal Volume Click this to format internal hard drives and create a new volume. All data on the disk(s) will be lost.
Chapter 6 Storage Screens " Creating a volume formats the hard drive. All data on the disk will be lost. Figure 60 System > Storage > Create an Internal Volume The following table describes the labels in this screen. Table 16 System > Storage > Create an Internal Volume LABEL DESCRIPTION Volume Name Type a volume name from 1 to 31 characters. The name cannot be the same as another existing external volume.
Chapter 6 Storage Screens 6.4 Editing a Volume Click an internal volume’s Edit icon in the System > Storage screen as shown in Figure 58 on page 73 to open the following screen. Use this screen to change the volume’s name. Figure 61 System > Storage > Edit The following table describes the labels in this screen. Table 17 System > Storage > Edit LABEL DESCRIPTION Volume Name For an internal volume, type a volume name from 1 to 31 characters.
Chapter 6 Storage Screens Storage efficiency assumes all drives are of identical size. Performance rankings are approximations. Table 18 RAID Quick Comparison RAID Level 0 1 Number of Disks 2 2 S*N S*N/2 Storage Efficiency 100% 50% Fault Tolerance None YYYY Y YYYY Read Performance YYYY YYY Write Performance YYYY YYY Capacity Availability 6.5.
Chapter 6 Storage Screens • OK means the USB connected device is functioning properly. • Resync when you create a RAID volume. • Recovering appears when repairing a RAID 1 volume. (A RAID1 volume was once degraded, but you have installed a new disk and the NSA is restoring the RAID1 volume to a healthy state.) • Degraded when a volume is currently down, but can be fixed.
Chapter 6 Storage Screens 6.6.1 Resychronizing or Recovering a RAID 1 Volume Resychronizing or recovering a RAID 1 volume that was down is done block-by-block, so the time it takes depends more on the size of your hard drive(s) than the amount of data you have on them. " " Do not restart the NSA while the NSA is resychronizing or recovering a volume as this will cause the synchronization to begin again after the NSA fully reboots.
Chapter 6 Storage Screens " Creating a volume formats the drive. All data on the disk will be lost. Figure 62 System > Storage > Create an External Volume The following table describes the labels in this screen. Table 19 System > Storage > Create an External Volume LABEL DESCRIPTION Volume Name Type a volume name from 1 to 31 characters. The name cannot be the same as another existing external volume. Acceptable characters are all alphanumeric characters and " " [spaces], "_" [underscores], and ".
Chapter 6 Storage Screens 6.9 RAID This section contains theoretical background on JBOD and the RAID levels used on the NSA. Skip to the next section if you already understand RAID and know what storage system you want to use on the NSA. Redundant Array of Independent Disks (RAID) is a method of storing data on multiple disks to provide a combination of greater capacity, reliability, and/or speed. JBOD (Just a Bunch Of Disks) is not a RAID storage method but it is included in this discussion.
Chapter 6 Storage Screens 6.9.1 JBOD JBOD allows you to combine multiple physical disk drives into a single virtual one, so they appear as a single large disk. JBOD can be used to turn multiple different-sized drives into one big drive. For example, JBOD could convert 80 GB and 100 GB drives into one large logical drive of 180 GB. If you have two JBOD volumes (with one disk in each), a failure of one disk (volume) should not affect the other volume (disk).
Chapter 6 Storage Screens 6.9.3 RAID 1 RAID 1 creates an exact copy (or mirror) of a set of data on another disk. This is useful when data backup is more important than data capacity. The following figure shows two disks in a single RAID 1 volume with mirrored data. Data is duplicated across two disks, so if one disk fails, there is still a copy of the data.
Chapter 6 Storage Screens 84 NSA-220 User’s Guide
CHAPTER 7 Network Screen This chapter discusses the network configuration screen. 7.1 Network Settings Use the network configuration screen to assign the NSA a dynamic or static IP address and DNS information. 7.1.1 IP Address The NSA needs an IP address to communicate with the media servers on your network. The NSA can get an IP address automatically if you have a device on your network that gives them out. Or you can assign the NSA a static (fixed) IP address. 7.1.
Chapter 7 Network Screen In the following example, the NSA has jumbo frames enabled and set to 8KB frames. This means the computer, notebook computer, and switch must also have jumbo frames enabled and be capable of supporting 8KB frames. Figure 63 Jumbo Frames 1 Gbps Ethernet 8KB 8KB 8KB 8KB 7.2 Network Config Screen Click System Setting > Network > TCP/IP in the navigation panel to open the following screen.
Chapter 7 Network Screen Figure 64 System Setting > Network > TCP/IP The following table describes the labels in this screen. Table 23 System Setting > Network > TCP/IP LABEL DESCRIPTION IP Address Dynamic Select this option to have the NSA get IP address information automatically. If no IP address information is assigned, the NSA uses Auto-IP to assign itself an IP address and subnet mask. For example, you could connect the NSA directly to your computer.
Chapter 7 Network Screen Table 23 System Setting > Network > TCP/IP LABEL Secondary DNS Server Jumbo Frames DESCRIPTION Type a secondary DNS server IP address. Jumbo frames improve network performance. You must have a 1 Gbps (Gigabit Ethernet) network that supports jumbo frames. Select the largest size of frame that all of your network devices (including computer Ethernet cards and switches, hubs, or routers) support.
CHAPTER 8 Application Screens This chapter discusses the application screens. 8.1 Application Screens Use the application screens to: • • • • Configure settings for FTP file transfers to/from the NSA. See Section 8.2 on page 89. Share files with media clients. See Section 8.3 on page 90. Download files from the Internet. See Section 8.5 on page 93. Download frequently updated digital content like TV programs, radio talk shows, Podcasts (audio files), and blogs. See Section 8.12 on page 105.
Chapter 8 Application Screens Figure 65 Applications > FTP The following table describes the labels in this screen. Table 24 Applications > FTP LABEL DESCRIPTION FTP Enable FTP You can use FTP to send files to the NSA or get files from the NSA. Select the Enable FTP check box to allow users to connect to the NSA via FTP; otherwise clear the check box. Connection Limit Enter the maximum number of concurrent FTP connections allowed on the NSA in this field.
Chapter 8 Application Screens • The media server is a convenient way to share files you download using the broadcatching service (see Chapter 8 on page 105). • Media client software is included on the CD. • Hardware-based media clients like the DMA-1000 can also play the files. See Appendix on page 160 for the supported multimedia file formats. " Anyone on your network can play the media files in the published shares. No user name and password or other form of security is used.
Chapter 8 Application Screens 8.3.2 Songs and Videos from the iTunes Store After using iTunes on your computer to download songs and videos from Apple’s iTunes Store, you can copy them to the NSA. Many of these songs and videos have DRM (Digital Rights Management). At the time of writing, you can use your Apple account ID and password to authorize up to a total of five computers to play the files. To authorize a computer, open iTunes and click Store > Authorize Computer. 8.
Chapter 8 Application Screens Table 25 Applications > Media Server LABEL DESCRIPTION Disable / Enable transcoding Disable transcoding to improve the performance of the NSA. However, disabling may cause certain media clients to fail when displaying non-JPEG photos. In the case of the media client included on the CD with the NSA, TIFF and GIF images will not be properly displayed. Enabling transcoding allows these files to be shown properly, but slows down the NSA’s performance.
Chapter 8 Application Screens 8.5.1 BitTorrent The NSA includes a BitTorrent client for fast downloading and sharing of large files (such as educational public domain videos). With BitTorrent, you share while you’re downloading the file. BitTorrent breaks up the file and distributes it in hundreds of chunks. You start sharing the file as soon as you have downloaded a single chunk. 8.5.1.1 Torrent Files Before using BitTorrent to download a file, you must first obtain a “torrent” file.
Chapter 8 Application Screens Figure 68 Firewall Hacking Malicious Packets Viruses • Stateful packet inspection to control access between the Internet and your network and protect your NSA (and computers) from hacking attacks. • IDP (Intrusion Detection and Prevention) to detect malicious packets within normal network traffic and take immediate action against them. • Anti-virus to check files you download for computer viruses. 8.5.2.
Chapter 8 Application Screens Figure 70 Firewall Configured to Allow Incoming BitTorrent Requests Incoming BitTorrent Requests Allowed Other Incoming Traffic Blocked 8.6 Download Service Screen Click Applications > Download Service to open the following screen. Use this screen to manage the NSA’s file downloads. " 96 By default, the NSA saves downloads in the admin share’s download folder.
Chapter 8 Application Screens Figure 71 Applications > Download Service The following table describes the labels in this screen. Table 26 Applications > Download Service LABEL DESCRIPTION Enable Download Service Use this option (and the Apply button) to turn the download service off or on. If you turn off the service, all downloads are paused. The files that were downloading are treated as queued.
Chapter 8 Application Screens Table 26 Applications > Download Service LABEL DESCRIPTION Refresh Click this button to update the information displayed on the screen. Preferences Click this button to open a screen where you can set the default location for saving downloads and configure your BitTorrent settings. The table lists your downloads. Click a column’s heading to sort the entries by that criteria.
Chapter 8 Application Screens Table 26 Applications > Download Service LABEL DESCRIPTION Time Left This is how much longer (in hours, minutes, and seconds) it should take to finish the download at the current download speed. Priority This is the download’s priority on the NSA. You can set a currently downloading or queued download to high or automatic priority. You can set a download to high priority to have the NSA try to download it before the other files.
Chapter 8 Application Screens Table 27 Applications > Download Service > Add LABEL DESCRIPTION Default Destination This shows where the NSA stores files after downloading them. Volume This is the volume where the NSA saves downloaded files. Path This is the location of the share where the NSA will save the downloaded files. Click Edit to go to a screen where you can set the default location for saving downloads and configure your BitTorrent settings.
Chapter 8 Application Screens Table 28 Applications > Download Service > Preferences LABEL DESCRIPTION Keep sharing files for x minutes after the download is completed With BitTorrent, the NSA starts sharing a file while you are downloading it. Set how long to continue sharing a file after the NSA finishes the download. Continuing to share a file helps other BitTorrent users finish downloading it. Sharing out at least as much as you download helps keep you in good standing in the BitTorrent community.
Chapter 8 Application Screens 8.9.2 Web Publishing Port Number If the web-published shares use a port number other than 80 (the normal port for web traffic), users must include it after the NSA’s IP address in order to access the NSA’s web-published shares. For example, say you specified port 8080, the NSA’s IP address is 192.168.1.23, and the name of the web-published share is FamilyPhotos. You would have to enter “http:// 192.168.1.
Chapter 8 Application Screens Figure 75 Applications > Web Publishing The following table describes the labels in this screen. Table 29 Applications > Web Publishing LABEL DESCRIPTION Disable / Enable Web Publishing Turn on web publishing to let people access files in the published shares using a web browser, without having to log into the My NSA screens. Port Number Specify a port number for accessing the published share websites hosted on the NSA.
Chapter 8 Application Screens 8.11 Web Publishing Example This example covers how to configure the Web Publishing screen to let people use a web browser to access a share named FamilyPhotos without logging into the My NSA screens and shows how to access the share through the Internet. 1 Click Applications > Web Publishing and configure the screen as shown (enable the web publishing and move FamilyPhotos over to Published Shares) and click Apply.
Chapter 8 Application Screens Figure 77 Browsing to an NSA Share Example • Click a file’s link to open the file. • Right-click a file’s link and select Save Target As.. (in Internet Explorer) to save a copy of the file. • Click a label in the heading row to sort the files by that criteria. • To customize how the page looks and works, create an index.html or index.htm file and store it in the share. 8.12 Broadcatching Broadcatching is the downloading of digital content from Internet feeds.
Chapter 8 Application Screens RSS (Really Simple Syndication) is a format for delivering frequently updated digital content. At the time of writing, the NSA supports RSS 2.0 feeds. Websites with a feed usually display a feed icon (shown next). Copy and paste the feed’s URL into the Applications > Broadcatching > Add screen and you can download new files as they are added. Figure 78 Feed Icon A channel uses a feed to deliver its contents (items).
Chapter 8 Application Screens Figure 79 Applications > Broadcatching The following table describes the labels in this screen. Table 30 Applications > Broadcatching LABEL DESCRIPTION Add Channel When you find a channel to subscribe to, copy the URL of the channel’s feed and click this button. A screen opens for you to subscribe to the feed. When you are done, the feed’s channel and contents display in the Applications > Broadcatching screen.
Chapter 8 Application Screens Table 30 Applications > Broadcatching LABEL DESCRIPTION Item Name These are the downloadable files. The icon shows the file’s status in the NSA. A ... indicates an abbreviated name. Hold your cursor over the name to display the full name. Completed: The NSA has downloaded the whole file. Double-click the item to go to the Download Service screen where you can see the file’s name and location.
Chapter 8 Application Screens The following table describes the labels in this screen. Table 31 Applications > Broadcatching > Add LABEL DESCRIPTION Subscribe to Channel Feed Paste (or type) the URL of the feed for the channel to which you want to subscribe into this field. This is read-only in the Preferences screen. Note: Make sure the link goes to the actual RSS feed instead of to another list of links or information about the channel. One way to test this is by clicking the link.
Chapter 8 Application Screens 8.16 Print Server Screen Click Applications > Print Server to open the following screen. Use this screen to view and manage the NSA’s list of printers and print jobs. Figure 82 Applications > Print Server The following table describes the labels in this screen. Table 32 Applications > Print Server LABEL DESCRIPTION Refresh Click Refresh to update the list of printers and print jobs. The table lists printers and their queued print jobs.
Chapter 8 Application Screens Table 33 Applications > Print Server > Rename LABEL DESCRIPTION Apply Click Apply to save your changes back to the NSA. Cancel Click Cancel to close this screen without saving your changes.
Chapter 8 Application Screens 112 NSA-220 User’s Guide
P ART III User Accounts and Shares Users (115) Shares (119) 113
CHAPTER 9 Users This chapter introduces the Users screens of the NSA. 9.1 User Accounts Introduction Use the Users screens to create and manage administrator and user accounts. Administrators can: • Configure and manage the NSA. • Create volumes, shares, and user accounts. • Assign individual users specific access rights for specific shares. Users are people who have access rights to the NSA and can store files there for later retrieval. A user can: • Manage shares that he owns.
Chapter 9 Users The following table describes the labels in this screen. Table 34 Users LABEL DESCRIPTION Users Add Account Click this button to open a screen where you can configure a new user account. This screen lists the users configured on the NSA. Click a user icon to see details about the user. Administrator account icons are green. User account icons are blue. Account Type This field displays whether the selected account is an administrator account or a user account.
Chapter 9 Users The following table describes the labels in this screen. Table 36 Users > Add or Edit an Account LABEL DESCRIPTION Account Name Type a name from 1 to 32 single-byte (no Chinese characters allowed for example) ASCII characters. See Section 9.3.1 on page 117 for more details on usernames. Password Create a password associated with this user. You can type from one to 14 single-byte (no Chinese characters allowed for example) ASCII characters.
Chapter 9 Users • pc-guest • admin • password 9.4 Delete Account Screen In the Users screen, select an account and click Delete Account to open the following screen. Use this screen to remove a user account. Figure 86 Users > Delete Account The following table describes the labels in this screen. Table 37 Users > Delete Account 118 LABEL DESCRIPTION Yes Click Yes to remove the user account. Management of any shares that belonged to the account passes to the default administrator account.
CHAPTER 10 Shares This chapter introduces the Shares screens of the NSA. 10.1 Shares Introduction Use the Shares screens to create and manage shares. A share is a set of user access permissions mapped to a specific folder on a volume. It is equivalent to the Windows concept of a shared folder, but is independent of the folder. You can map a share to a network drive for easy and familiar file transfer for Windows users. 10.1.1 Share Icons These are the share icons.
Chapter 10 Shares Figure 87 Shares The following table describes the labels in this screen. See Table 38 on page 119 for icon details. Table 39 Shares LABEL DESCRIPTION Add Share Click this button to create a new share. Internal Shares These are shares on the internal hard drives. External Shares These are shares on the external (USB) devices. Share Owner This is the name of the user account to which this share belongs. Share Type This field displays built-in for system shares.
Chapter 10 Shares Figure 88 Shares > Add Share The following table describes the labels in this screen. Table 40 Shares > Add Share (or Change Share Properties) LABEL DESCRIPTION Share Name Type a share name from 1 to 255 single-byte (no Chinese characters allowed for example) ASCII characters. The name cannot be the same as another existing local share. See Section 2.5.5 on page 38 for more information on share names.
Chapter 10 Shares Table 40 Shares > Add Share (or Change Share Properties) (continued) LABEL DESCRIPTION Full Select this check box next to a user to give him or her full access (read, write and execute) to all files contained within this share. Select the check box in the heading row to select all users. Read Only Select this check box next to a user to give him or her read-only access (they cannot modify nor execute) to all files contained within this share.
Chapter 10 Shares The following table describes the labels in this screen. Table 41 Shares > Share Path Browse LABEL DESCRIPTION Create Folder Type a folder name and click Create Folder to make a new folder. The name can be 1 to 255 single-byte (no Chinese characters allowed for example) ASCII characters. The name cannot be the same as another existing folder in the same path. See Section 2.5.5 on page 38 for more information on folder names.
Chapter 10 Shares 124 NSA-220 User’s Guide
P ART IV Maintenance, Protecting Data, and Media Client Maintenance Screens (127) Protecting Your Data (135) Media Client Software (137) 125
CHAPTER 11 Maintenance Screens This chapter discusses the Maintenance screens. 11.1 Maintenance Overview Use the maintenance screens to: • • • • View logs Manage the NSA configuration file Upload new firmware Restart or shut down your NSA 11.2 Log Click Maintenance > Log to display the following screen. The Log screen displays all NSA logs. There are at most 128 entries in the log. Older logs are removed by the system. You cannot download the log file via FTP or CIFS.
Chapter 11 Maintenance Screens The following table describes the labels in this screen. Table 42 Maintenance > Log LABEL DESCRIPTION Display The screen always shows all logs by default. Choose a specific log category to view logs for just that category. Refresh Click this button to update the log display. Purge all Logs Click this button to erase all logs from the NSA. # This is the log entry’s number in the list according to the currently selected sort order.
Chapter 11 Maintenance Screens Table 44 Log Severity Levels (continued) LEVEL DESCRIPTION 4 Warning 5 Notice 6 Info 11.5 Log Messages Here are some example log messages. Table 45 Log Messages CLASS SEVERITY MESSAGE Network NOTICE %s is active because of changing Port Group. Enable DHCP client. Network NOTICE %s is inactive because of changing Port Group. Disable DHCP client. Network NOTICE %s MTU > (%s MTU - 8), %s may not work correctly.
Chapter 11 Maintenance Screens Table 45 Log Messages (continued) 130 CLASS SEVERITY MESSAGE Services WARNING Reaching Maximum Allowed Rules Services WARNING Rule is empty Services WARNING The Rule Does Not Exist Services NOTICE FTP server stops Services NOTICE FTP server starts Services INFO Clock timezone is set to GMT%s Services INFO Clock timezone is set to default Services INFO Clock daylight saving is enabled Services INFO Clock daylight saving is disabled Shares NOTIC
Chapter 11 Maintenance Screens 11.6 Configuration Click Maintenance > Configuration to open the following screen. Use the Configuration screen to back up or restore the NSA configuration settings and enable or disable the hardware reset button. Figure 91 Maintenance > Configuration The following table describes the labels in this screen.
Chapter 11 Maintenance Screens Figure 92 Maintenance > FW Upgrade The following table describes the labels in this screen. Table 47 Maintenance > FW Upgrade LABEL DESCRIPTION Firmware Upgrade Firmware File Browse Type the location of the firmware file you want to upload Click Browse to find the file on your computer Upload Click Upload to upload the new firmware. The NSA automatically restarts after you upgrade. Wait until the restart completes before accessing the NSA again.
Chapter 11 Maintenance Screens When you click the Restart button a pop-up screen will appear asking you to confirm. Click OK to continue or Cancel to quit the restart. Figure 94 Maintenance > Shutdown > Confirm Restart When you click the Shutdown button a pop-up screen will appear asking you to confirm. Click OK to continue or Cancel to quit the shutdown.
Chapter 11 Maintenance Screens 134 NSA-220 User’s Guide
CHAPTER 12 Protecting Your Data This chapter compares the different ways of protecting data on the NSA and explains how to use backup management software included on the CD. 12.1 Protection Methods There are a variety of ways to protect your data on the NSA. Below is a summary table of what can be done in each situation.
Chapter 12 Protecting Your Data " Configuration File Backup and Restoration does not affect data (your files and folders), volumes on the NSA. 12.1.2 Memeo Autobackup Use the Memeo Autobackup software (included on the CD) on your computer to schedule and manage backups. You can backup from your computer to the NSA. You can also backup from one NSA on your network to another.
CHAPTER 13 Media Client Software This chapter introduces the media client software included on the CD. 13.1 Media Client Introduction The NSA can function as a server to allow DLNA (Digital Living Network Alliance) compliant media clients to play files. The DLNA is a group of leading personal computer and electronics companies that works to make products compatible and able to work in a home network in order to make digital living easy and seamless.
Chapter 13 Media Client Software 138 NSA-220 User’s Guide
CHAPTER 14 Memeo Autobackup Software This chapter introduces the Memeo Autobackup software included on the CD. 14.1 Memeo Autobackup Introduction Use the Memeo Autobackup software included on the CD to automatically back up selected files from your computer to the NSA whenever you modify the files. You can have Memeo backup specific files, folders of files, or types of files.
Chapter 14 Memeo Autobackup Software 140 NSA-220 User’s Guide
P ART V Troubleshooting and Specifications Troubleshooting (143) Product Specifications (155) 141
CHAPTER 15 Troubleshooting 15.1 Troubleshooting Overview This chapter offers some suggestions to solve problems you might encounter. The potential problems are divided into the following categories. • • • • • • • • Power, Hardware, Connections, and LEDs NSA Login and Access Reset the NSA I Cannot Access The NSA External USB Drives Media Server Functions Download Service and Broadcatching Functions Web Publishing 15.
Chapter 15 Troubleshooting V An HDD LED is orange. Orange means that the NSA detected an error on the hard drive (like a bad sector for example). The NSA automatically tries to recover a bad sector, but the LED stays orange until the NSA restarts. Even if the hard drive still functions, it is recommended that you replace it since errors are a sign that the hard drive may fail soon. See Installing or replacing a hard drive V An HDD LED is red.
Chapter 15 Troubleshooting V The LAN LED (by the LAN port) is off. • Make sure the Ethernet cable is connected properly to the NSA and connected to another (Ethernet) device. Make sure the other device is turned on. If it’s connected directly to a computer, make sure that the computer network card is working (ping 127.0.0.1 on the computer). • Use another Ethernet cable. If you’re connecting to a Gigabit Ethernet, make sure you’re using an 8-wire Ethernet cable.
Chapter 15 Troubleshooting • By default, the NSA gets an IP address automatically. The NSA assigns itself an IP address if no device assigns one. If your computer is also set to get an IP address automatically, the computer and the NSA can both assign themselves IP addresses and communicate. See Chapter 7 on page 85 if you need to configure the NSA with a static IP address. • Make sure your computer’s IP address is in the same subnet as the NSA’s IP address.
Chapter 15 Troubleshooting • Confirm that the computer running the NDU has a network connection. See the section on the NSA’s LAN connection for related information. • The computer running the NDU can only discover NSAs in the same subnet. NSAs connected to the same switch or router as your NDU computer are usually in the same subnet unless the router is doing subnetting or the switch is implementing VLAN. • The Memeo Autobackup program uses the same network port as the NDU to discover the NSA.
Chapter 15 Troubleshooting Figure 97 Security Settings - Script Safe ActiveX Controls V I can see the login screen, but I cannot log in to the NSA. • Make sure you have entered the username and password correctly. The default username is admin, and the default password is 1234. These fields are case-sensitive, so make sure [Caps Lock] is not on. • Turn the NSA off and on. • If this does not work, see Section 15.3.1 on page 146 to reset the device.
Chapter 15 Troubleshooting • Check that the NSA is turned on and connected to the network. Try to ping the NSA or use the NDU to discover it. • Check that you entered your login name and password correctly. • Check that the share exists and check its access settings. • Check if the shared folder is a subfolder of another (parent) share. Check that the parent share’s access rights do not conflict with the subfolder share. It is recommended that you do not create subfolder shares.
Chapter 15 Troubleshooting 15.6 Some Features’ Screens Do Not Display V Many NSA features require a valid internal volume. Features like the print server, download service, broadcatching, FTP and Windows/CIFS access will not work without a valid internal volume. Make sure you have a volume on an internal disk and that the volume is in the healthy state. • Install an internal disk if one is not installed yet or has failed. See the Quick Start Guide for how to install an internal disk.
Chapter 15 Troubleshooting 2 Go to Applications > Media Server. Make sure the share containing the music and video files is published and the iTunes server option is enabled. 3 If an iTunes client is connected, the NSA’s iTunes server function scans the published media server folders for files every three minutes. Leave iTunes connected to the NSA for three minutes. Then use the NSA’s eject button (as shown next) to disconnect. Figure 98 iTunes Eject Button 4 Then click the NSA’s link to reconnect.
Chapter 15 Troubleshooting 1 Make sure the files are a format supported by iTunes. See Section 16.5 on page 160. 2 If you have files from the iTunes Store that use DRM, you need to use your Apple account ID and password to authorize other computers to play the files. Apple permits you to authorize up to five computers at a time. To authorize a computer, open iTunes and click Store > Authorize Computer.
Chapter 15 Troubleshooting • Web publishing uses TCP protocol and the port number you specify. Make sure there is not another service using TCP protocol with the same port number. See Appendix C on page 187 for a list of common services and their associated protocols and port numbers. • If Firefox access to the share does not work, check that you did not set the Web publishing feature to use one of the following ports. (Firefox blocks these ports by default.
Chapter 15 Troubleshooting 154 NSA-220 User’s Guide
CHAPTER 16 Product Specifications See also Chapter 1 on page 25 for a general overview of the key features. 16.1 Physical Features These are the main external physical features. Table 51 Physical Features USB Ports 2 USB (version 2) ports. Copy files directly to the NSA from compatible USB devices like card readers, MP3 players, memory sticks, and digital cameras without using a computer. Expand the NSA’s storage capacity with compatible USB devices (like hard drives).
Chapter 16 Product Specifications Table 52 Firmware Features RAID File Storage Use RAID 0 if you want pure write speed and/or maximum capacity for your drives, and/or you have other means of protecting your data. Use RAID 1 if you have two drives and want to mirror primary data to the second drive. If one drive fails, replace it and then re-synchronize to recover all data. User Passwords Configure a password for an individual User to restrict access to the NSA.
Chapter 16 Product Specifications Table 53 NSA Hardware Specifications (continued) Compatible Hard DisksA SATA I and SATA 3.0 Gbit/s (Serial Advanced Technology Attachment) compatible hard drives. Maximum Storage Capacity 1.5 TB (with two 750 GB hard drives installed) is the largest storage capacity that has been tested as of this writing. The NSA theoretically supports up to 17.6 TB per volume for a maximum possible capacity of 35.2 TB with two 17.6 TB drives configured as JBOD volumes.
Chapter 16 Product Specifications Table 54 NSA Firmware Specifications (continued) Supported Clients Windows 2000 Professional/Server Windows XP Home/Professional Windows 2003 Windows Vista Linux Maximum Number of Users Allowed 100A Maximum Number of Concurrent FTP Sessions 20A Maximum Number of Concurrent CIFS Sessions 20A System Management Remote Management via Web Configurator (HTTP) NSA Discovery Utility (NDU) Logging/Monitoring Centralized Logs Firmware Upgrade Web Configurator Web Brows
Chapter 16 Product Specifications Table 55 Supported Standards and Recommendations ISO 15740 Picture Transfer Protocol (PTP) from the International imaging Industry Association allows you to transfer pictures from digital cameras or other devices without needing additional device drivers.
Chapter 16 Product Specifications 16.4 Supported Media Server Content Formats The following describes the details about the files that the NSA media server can publish.
Chapter 16 Product Specifications " This table is a laboratory test of NSA power consumption for your reference only. Table 57 Power Consumption in Watts (W) POWER SOURCE SYSTEM BOOT UP SYSTEM READ/WRITE SYSTEM IDLE 240V/50Hz 58.14W 31.2W 23.9W 120V/60Hz 57.76W 29.3W 25.1W 100V/60Hz 58.14W 30.0W 25.1W 16.7 Compatible Hard Disks The following hard disks have been tested and are known to be compatible with the NSA.
Chapter 16 Product Specifications 162 NSA-220 User’s Guide
P ART VI Appendices and Index Setting up Your Computer’s IP Address (165) Open Source Licences (191) Legal Information (221) Customer Support (223) Index (229) 163
APPENDIX A Setting up Your Computer’s IP Address All computers must have a 10M or 100M Ethernet adapter card and TCP/IP installed. Windows 95/98/Me/NT/2000/XP, Macintosh OS 7 and later operating systems and all versions of UNIX/LINUX include the software components you need to install and use TCP/ IP on your computer. Windows 3.1 requires the purchase of a third-party TCP/IP application package.
Appendix A Setting up Your Computer’s IP Address Figure 100 WIndows 95/98/Me: Network: Configuration Installing Components The Network window Configuration tab displays a list of installed components. You need a network adapter, the TCP/IP protocol and Client for Microsoft Networks. If you need the adapter: 1 In the Network window, click Add. 2 Select Adapter and then click Add. 3 Select the manufacturer and model of your network adapter and then click OK.
Appendix A Setting up Your Computer’s IP Address Configuring 1 In the Network window Configuration tab, select your network adapter's TCP/IP entry and click Properties 2 Click the IP Address tab. • If your IP address is dynamic, select Obtain an IP address automatically. • If you have a static IP address, select Specify an IP address and type your information into the IP Address and Subnet Mask fields. Figure 101 Windows 95/98/Me: TCP/IP Properties: IP Address 3 Click the DNS Configuration tab.
Appendix A Setting up Your Computer’s IP Address Figure 102 Windows 95/98/Me: TCP/IP Properties: DNS Configuration 4 Click the Gateway tab. • If you do not know your gateway’s IP address, remove previously installed gateways. • If you have a gateway IP address, type it in the New gateway field and click Add. 5 Click OK to save and close the TCP/IP Properties window. 6 Click OK to close the Network window. Insert the Windows CD if prompted. 7 Restart your computer when prompted.
Appendix A Setting up Your Computer’s IP Address Figure 103 Windows XP: Start Menu 2 In the Control Panel, double-click Network Connections (Network and Dial-up Connections in Windows 2000/NT). Figure 104 Windows XP: Control Panel 3 Right-click Local Area Connection and then click Properties.
Appendix A Setting up Your Computer’s IP Address Figure 105 Windows XP: Control Panel: Network Connections: Properties 4 Select Internet Protocol (TCP/IP) (under the General tab in Win XP) and then click Properties. Figure 106 Windows XP: Local Area Connection Properties 5 The Internet Protocol TCP/IP Properties window opens (the General tab in Windows XP). • If you have a dynamic IP address click Obtain an IP address automatically.
Appendix A Setting up Your Computer’s IP Address Figure 107 Windows XP: Internet Protocol (TCP/IP) Properties 6 If you do not know your gateway's IP address, remove any previously installed gateways in the IP Settings tab and click OK. Do one or more of the following if you want to configure additional IP addresses: • In the IP Settings tab, in IP addresses, click Add. • In TCP/IP Address, type an IP address in IP address and a subnet mask in Subnet mask, and then click Add.
Appendix A Setting up Your Computer’s IP Address Figure 108 Windows XP: Advanced TCP/IP Properties 7 In the Internet Protocol TCP/IP Properties window (the General tab in Windows XP): • Click Obtain DNS server address automatically if you do not know your DNS server IP address(es). • If you know your DNS server IP address(es), click Use the following DNS server addresses, and type them in the Preferred DNS server and Alternate DNS server fields.
Appendix A Setting up Your Computer’s IP Address Figure 109 Windows XP: Internet Protocol (TCP/IP) Properties 8 Click OK to close the Internet Protocol (TCP/IP) Properties window. 9 Click Close (OK in Windows 2000/NT) to close the Local Area Connection Properties window. 10 Close the Network Connections window (Network and Dial-up Connections in Windows 2000/NT). 11 Restart your computer (if prompted). Verifying Settings 1 Click Start, All Programs, Accessories and then Command Prompt.
Appendix A Setting up Your Computer’s IP Address Figure 110 Macintosh OS X: Apple Menu 2 Click Network in the icon bar. • Select Automatic from the Location list. • Select Built-in Ethernet from the Show list. • Click the TCP/IP tab. 3 For dynamically assigned settings, select Using DHCP from the Configure list. Figure 111 Macintosh OS X: Network 4 For statically assigned settings, do the following: • From the Configure box, select Manually. • Type your IP address in the IP Address box.
Appendix A Setting up Your Computer’s IP Address Verifying Settings Check your TCP/IP properties in the Network window. Linux This section shows you how to configure your computer’s TCP/IP settings in Red Hat Linux 9.0. Procedure, screens and file location may vary depending on your Linux distribution and release version. " Make sure you are logged in as the root administrator. Using the K Desktop Environment (KDE) Follow the steps below to configure your computer IP address using the KDE.
Appendix A Setting up Your Computer’s IP Address Figure 113 Red Hat 9.0: KDE: Ethernet Device: General • If you have a dynamic IP address, click Automatically obtain IP address settings with and select dhcp from the drop down list. • If you have a static IP address, click Statically set IP Addresses and fill in the Address, Subnet mask, and Default Gateway Address fields. 3 Click OK to save the changes and close the Ethernet Device General screen.
Appendix A Setting up Your Computer’s IP Address Figure 115 Red Hat 9.0: KDE: Network Configuration: Activate 7 After the network card restart process is complete, make sure the Status is Active in the Network Configuration screen. Using Configuration Files Follow the steps below to edit the network configuration files and set your computer IP address. 1 Assuming that you have only one network card on the computer, locate the ifconfigeth0 configuration file (where eth0 is the name of the Ethernet card).
Appendix A Setting up Your Computer’s IP Address Figure 118 Red Hat 9.0: DNS Settings in resolv.conf nameserver 172.23.5.1 nameserver 172.23.5.2 3 After you edit and save the configuration files, you must restart the network card. Enter./network restart in the /etc/rc.d/init.d directory. The following figure shows an example. Figure 119 Red Hat 9.0: Restart Ethernet Card [root@localhost init.
APPENDIX B Pop-up Windows, JavaScripts and Java Permissions In order to use the web configurator you need to allow: • Web browser pop-up windows from your device. • JavaScripts (enabled by default). • Java permissions (enabled by default). " Internet Explorer 6 screens are used here. Screens for other Internet Explorer versions may vary. Internet Explorer Pop-up Blockers You may have to disable pop-up blocking to log into your device.
Appendix B Pop-up Windows, JavaScripts and Java Permissions 2 Clear the Block pop-ups check box in the Pop-up Blocker section of the screen. This disables any web pop-up blockers you may have enabled. Figure 122 Internet Options: Privacy 3 Click Apply to save this setting. Enable Pop-up Blockers with Exceptions Alternatively, if you only want to allow pop-up windows from your device, see the following steps. 1 In Internet Explorer, select Tools, Internet Options and then the Privacy tab.
Appendix B Pop-up Windows, JavaScripts and Java Permissions Figure 123 Internet Options: Privacy 3 Type the IP address of your device (the web page that you do not want to have blocked) with the prefix “http://”. For example, http://192.168.167.1. 4 Click Add to move the IP address to the list of Allowed sites.
Appendix B Pop-up Windows, JavaScripts and Java Permissions 5 Click Close to return to the Privacy screen. 6 Click Apply to save this setting. JavaScripts If pages of the web configurator do not display properly in Internet Explorer, check that JavaScripts are allowed. 1 In Internet Explorer, click Tools, Internet Options and then the Security tab. Figure 125 Internet Options: Security 2 3 4 5 6 182 Click the Custom Level... button. Scroll down to Scripting.
Appendix B Pop-up Windows, JavaScripts and Java Permissions Figure 126 Security Settings - Java Scripting Java Permissions 1 2 3 4 5 From Internet Explorer, click Tools, Internet Options and then the Security tab. Click the Custom Level... button. Scroll down to Microsoft VM. Under Java permissions make sure that a safety level is selected. Click OK to close the window.
Appendix B Pop-up Windows, JavaScripts and Java Permissions JAVA (Sun) 1 From Internet Explorer, click Tools, Internet Options and then the Advanced tab. 2 Make sure that Use Java 2 for
Appendix B Pop-up Windows, JavaScripts and Java Permissions Figure 129 Mozilla Firefox: Tools > Options Click Content.to show the screen below. Select the check boxes as shown in the following screen.
Appendix B Pop-up Windows, JavaScripts and Java Permissions 186 NSA-220 User’s Guide
APPENDIX C Common Services The following table lists some commonly-used services and their associated protocols and port numbers. For a comprehensive list of port numbers, ICMP type/code numbers and services, visit the IANA (Internet Assigned Number Authority) web site. • Name: This is a short, descriptive name for the service. You can use this one or create a different one, if you like. • Protocol: This is the type of IP protocol used by the service.
Appendix C Common Services Table 59 Commonly Used Services (continued) 188 NAME PROTOCOL PORT(S) DESCRIPTION FTP TCP TCP 20 21 File Transfer Program, a program to enable fast transfer of files, including large files that may not be possible by e-mail. H.323 TCP 1720 NetMeeting uses this protocol. HTTP TCP 80 Hyper Text Transfer Protocol - a client/ server protocol for the world wide web. HTTPS TCP 443 HTTPS is a secured http session often used in e-commerce.
Appendix C Common Services Table 59 Commonly Used Services (continued) NAME PROTOCOL PORT(S) DESCRIPTION RTSP TCP/UDP 554 The Real Time Streaming (media control) Protocol (RTSP) is a remote control for multimedia on the Internet. SFTP TCP 115 Simple File Transfer Protocol. SMTP TCP 25 Simple Mail Transfer Protocol is the message-exchange standard for the Internet. SMTP enables you to move messages from one e-mail server to another. SNMP TCP/UDP 161 Simple Network Management Program.
Appendix C Common Services 190 NSA-220 User’s Guide
APPENDIX D Open Source Licences Notice Information herein is subject to change without notice. Companies, names, and data used in examples herein are fictitious unless otherwise noted. No part may be reproduced or transmitted in any form or by any means, electronic or mechanical, for any purpose, except the express written permission of ZyXEL Communications Corporation. This Product includes software developed by the Apache Software Foundation under Apache License. Apache License Version 2.
Appendix D Open Source Licences “Derivative Works” shall mean any work, whether in Source or Object form, that is based on (or derived from) the Work and for which the editorial revisions, annotations, elaborations, or other modifications represent, as a whole, an original work of authorship. For the purposes of this License, Derivative Works shall not include works that remain separable from, or merely link (or bind by name) to the interfaces of, the Work and Derivative Works thereof.
Appendix D Open Source Licences distributed as part of the Derivative Works; within the Source form or documentation, if provided along with the Derivative Works; or, within a display generated by the Derivative Works, if and wherever such third-party notices normally appear. The contents of the NOTICE file are for informational purposes only and do not modify the License.
Appendix D Open Source Licences Redistribution and use in source and binary forms, with or without modification, are permitted provided that the following conditions are met: Redistributions of source code must retain the above copyright notice, this list of conditions and the following disclaimer. Redistributions in binary form must reproduce the above copyright notice, this list of conditions and the following disclaimer in the documentation and/or other materials provided with the distribution.
Appendix D Open Source Licences The licenses for most software are designed to take away your freedom to share and change it. By contrast, the GNU General Public Licenses are intended to guarantee your freedom to share and change free software--to make sure the software is free for all its users. This license, the Lesser General Public License, applies to some specially designated software packages--typically libraries--of the Free Software Foundation and other authors who decide to use it.
Appendix D Open Source Licences We call this license the “Lesser” General Public License because it does Less to protect the user's freedom than the ordinary General Public License. It also provides other free software developers Less of an advantage over competing non-free programs. These disadvantages are the reason we use the ordinary General Public License for many libraries. However, the Lesser license provides advantages in certain special circumstances.
Appendix D Open Source Licences 1. You may copy and distribute verbatim copies of the Library's complete source code as you receive it, in any medium, provided that you conspicuously and appropriately publish on each copy an appropriate copyright notice and disclaimer of warranty; keep intact all the notices that refer to this License and to the absence of any warranty; and distribute a copy of this License along with the Library.
Appendix D Open Source Licences compelled to copy the source along with the object code. 5. A program that contains no derivative of any portion of the Library, but is designed to work with the Library by being compiled or linked with it, is called a “work that uses the Library”. Such a work, in isolation, is not a derivative work of the Library, and therefore falls outside the scope of this License.
Appendix D Open Source Licences required form of the “work that uses the Library” must include any data and utility programs needed for reproducing the executable from it. However, as a special exception, the materials to be distributed need not include anything that is normally distributed (in either source or binary form) with the major components (compiler, kernel, and so on) of the operating system on which the executable runs, unless that component itself accompanies the executable.
Appendix D Open Source Licences contest validity of any such claims; this section has the sole purpose of protecting the integrity of the free software distribution system which is implemented by public license practices.
Appendix D Open Source Licences END OF TERMS AND CONDITIONS. This Product includes apcid, apcupsd, autofs, device-mapper, evms, exim. Lm_sensors, mdadm, pam_mount, raidtools, samba, sg_utils, smartmontools, vsftpd, xfsprogs and Linux kernel software under GPL license. GNU GENERAL PUBLIC LICENSE Version 2, June 1991 Copyright (C) 1989, 1991 Free Software Foundation, Inc.
Appendix D Open Source Licences 0. This License applies to any program or other work which contains a notice placed by the copyright holder saying it may be distributed under the terms of this General Public License.
Appendix D Open Source Licences 3.
Appendix D Open Source Licences directly or indirectly through you, then the only way you could satisfy both it and this License would be to refrain entirely from distribution of the Program. If any portion of this section is held invalid or unenforceable under any particular circumstance, the balance of the section is intended to apply and the section as a whole is intended to apply in other circumstances.
Appendix D Open Source Licences INABILITY TO USE THE PROGRAM (INCLUDING BUT NOT LIMITED TO LOSS OF DATA OR DATA BEING RENDERED INACCURATE OR LOSSES SUSTAINED BY YOU OR THIRD PARTIES OR A FAILURE OF THE PROGRAM TO OPERATE WITH ANY OTHER PROGRAMS), EVEN IF SUCH HOLDER OR OTHER PARTY HAS BEEN ADVISED OF THE POSSIBILITY OF SUCH DAMAGES. END OF TERMS AND CONDITIONS All other trademarks or trade names mentioned herein, if any, are the property of their respective owners.
Appendix D Open Source Licences Open SSL License LICENSE ISSUES =============== The OpenSSL toolkit stays under a dual license, i.e. both the conditions of the OpenSSL License and the original SSLeay license apply to the toolkit. See below for the actual license texts. Actually both licenses are BSD-style Open Source licenses. In case of any license issues related to OpenSSL please contact openssl-core@openssl.org. OpenSSL License ======== Copyright (c) 1998-2004 The OpenSSL Project. All rights reserved.
Appendix D Open Source Licences Original SSLeay License -------------------------------Copyright (C) 1995-1998 Eric Young (eay@cryptsoft.com) All rights reserved. This package is an SSL implementation written by Eric Young (eay@cryptsoft.com). The implementation was written so as to conform with Netscape’s SSL. This library is free for commercial and non-commercial use as long as the following conditions are adhered to.
Appendix D Open Source Licences This Product include mod_ssl software under BSD license BSD Copyright (c) [dates as appropriate to package] The Regents of the University of California. All rights reserved. Redistribution and use in source and binary forms, with or without modification, are permitted provided that the following conditions are met: Redistributions of source code must retain the above copyright notice, this list of conditions and the following disclaimer.
Appendix D Open Source Licences 5. The PHP Group may publish revised and/or new versions of the license from time to time. Each version will be given a distinguishing version number. Once covered code has been published under a particular version of the license, you may always continue to use it under the terms of that version. You may also choose to use such covered code under the terms of any subsequent version of the license published by the PHP Group.
Appendix D Open Source Licences 1.2. “Contributor Version” means the combination of the Original Code, prior Modifications used by a Contributor, and the Modifications made by that particular Contributor. 1.3. “Covered Code” means the Original Code or Modifications or the combination of the Original Code and Modifications, in each case including portions thereof. 1.4.
Appendix D Open Source Licences The Initial Developer hereby grants You a world-wide, royalty-free, non-exclusive license, subject to third party intellectual property claims under intellectual property rights (other than patent or trademark) Licensable by Initial Developer to use, reproduce, modify, display, perform, sublicense and distribute the Original Code (or portions thereof) with or without Modifications, and/or as part of a Larger Work; and under Patents Claims infringed by the making, using or se
Appendix D Open Source Licences Any Modification which You create or to which You contribute must be made available in Source Code form under the terms of this License either on the same media as an Executable version or via an accepted Electronic Distribution Mechanism to anyone to whom you made an Executable version available; and if made available via Electronic Distribution Mechanism, must remain available for at least twelve (12) months after the date it initially became available, or at least six (6)
Appendix D Open Source Licences Contributor. You must make it absolutely clear than any such warranty, support, indemnity or liability obligation is offered by You alone, and You hereby agree to indemnify the Initial Developer and every Contributor for any liability incurred by the Initial Developer or such Contributor as a result of warranty, support, indemnity or liability terms You offer. 3.6. Distribution of Executable Versions.
Appendix D Open Source Licences Once Covered Code has been published under a particular version of the License, You may always continue to use it under the terms of that version. You may also choose to use such Covered Code under the terms of any subsequent version of the License published by Netscape. No one other than Netscape has the right to modify the terms applicable to Covered Code created under this License. 6.3.
Appendix D Open Source Licences any software, hardware, or device, other than such Participant's Contributor Version, directly or indirectly infringes any patent, then any rights granted to You by such Participant under Sections 2.1(b) and 2.2(b) are revoked effective as of the date You first made, used, sold, distributed, or had made, Modifications made by that Participant. 8.3.
Appendix D Open Source Licences As between Initial Developer and the Contributors, each party is responsible for claims and damages arising, directly or indirectly, out of its utilization of rights under this License and You agree to work with Initial Developer and Contributors to distribute such responsibility on an equitable basis. Nothing herein is intended or shall be deemed to constitute any admission of liability. 13.
Appendix D Open Source Licences The above copyright notice and this permission notice shall be included in all copies or substantial portions of the Software. THE SOFTWARE IS PROVIDED “AS IS”, WITHOUT WARRANTY OF ANY KIND, EXPRESS OR IMPLIED, INCLUDING BUT NOT LIMITED TO THE WARRANTIES OF MERCHANTABILITY, FITNESS FOR A PARTICULAR PURPOSE AND NONINFRINGEMENT.
Appendix D Open Source Licences 4.Restrictions You may not publish, display, disclose, sell, rent, lease, modify, store, loan, distribute, or create derivative works of the Software, or any part thereof. You may not assign, sublicense, convey or otherwise transfer, pledge as security or otherwise encumber the rights and licenses granted hereunder with respect to the Software.
Appendix D Open Source Licences DOCUMENTATION OR OTHERWISE SHALL BE EQUAL TO THE PURCHASE PRICE, BUT SHALL IN NO EVENT EXCEED $1,000. BECAUSE SOME STATES/COUNTRIES DO NOT ALLOW THE EXCLUSION OR LIMITATION OF LIABILITY FOR CONSEQUENTIAL OR INCIDENTAL DAMAGES, THE ABOVE LIMITATION MAY NOT APPLY TO YOU. 8.
Appendix D Open Source Licences 220 NSA-220 User’s Guide
APPENDIX E Legal Information Copyright Copyright © 2007 by ZyXEL Communications Corporation. The contents of this publication may not be reproduced in any part or as a whole, transcribed, stored in a retrieval system, translated into any language, or transmitted in any form or by any means, electronic, mechanical, magnetic, optical, chemical, photocopying, manual, or otherwise, without the prior written permission of ZyXEL Communications Corporation. Published by ZyXEL Communications Corporation.
Appendix E Legal Information This device has been tested and found to comply with the limits for a Class B digital device pursuant to Part 15 of the FCC Rules. These limits are designed to provide reasonable protection against harmful interference in a residential installation. This device generates, uses, and can radiate radio frequency energy, and if not installed and used in accordance with the instructions, may cause harmful interference to radio communications.
APPENDIX F Customer Support Please have the following information ready when you contact customer support. Required Information • • • • Product model and serial number. Warranty Information. Date that you received your device. Brief description of the problem and the steps you took to solve it. “+” is the (prefix) number you dial to make an international telephone call. Corporate Headquarters (Worldwide) • • • • • • • Support E-mail: support@zyxel.com.tw Sales E-mail: sales@zyxel.com.
Appendix F Customer Support • Regular Mail: ZyXEL Communications, Czech s.r.o., Modranská 621, 143 01 Praha 4 Modrany, Ceská Republika Denmark • • • • • • Support E-mail: support@zyxel.dk Sales E-mail: sales@zyxel.dk Telephone: +45-39-55-07-00 Fax: +45-39-55-07-07 Web: www.zyxel.dk Regular Mail: ZyXEL Communications A/S, Columbusvej, 2860 Soeborg, Denmark Finland • • • • • • Support E-mail: support@zyxel.fi Sales E-mail: sales@zyxel.fi Telephone: +358-9-4780-8411 Fax: +358-9-4780-8448 Web: www.zyxel.
Appendix F Customer Support India • • • • • • Support E-mail: support@zyxel.in Sales E-mail: sales@zyxel.in Telephone: +91-11-30888144 to +91-11-30888153 Fax: +91-11-30888149, +91-11-26810715 Web: http://www.zyxel.in Regular Mail: India - ZyXEL Technology India Pvt Ltd., II-Floor, F2/9 Okhla Phase -1, New Delhi 110020, India Japan • • • • • • Support E-mail: support@zyxel.co.jp Sales E-mail: zyp@zyxel.co.jp Telephone: +81-3-6847-3700 Fax: +81-3-6847-3705 Web: www.zyxel.co.
Appendix F Customer Support • Regular Mail: ZyXEL Communications Inc., 1130 N. Miller St., Anaheim, CA 928062001, U.S.A. Norway • • • • • • Support E-mail: support@zyxel.no Sales E-mail: sales@zyxel.no Telephone: +47-22-80-61-80 Fax: +47-22-80-61-81 Web: www.zyxel.no Regular Mail: ZyXEL Communications A/S, Nils Hansens vei 13, 0667 Oslo, Norway Poland • • • • • E-mail: info@pl.zyxel.com Telephone: +48-22-333 8250 Fax: +48-22-333 8251 Web: www.pl.zyxel.com Regular Mail: ZyXEL Communications, ul.
Appendix F Customer Support Sweden • • • • • • Support E-mail: support@zyxel.se Sales E-mail: sales@zyxel.se Telephone: +46-31-744-7700 Fax: +46-31-744-7701 Web: www.zyxel.se Regular Mail: ZyXEL Communications A/S, Sjöporten 4, 41764 Göteborg, Sweden Thailand • • • • • • Support E-mail: support@zyxel.co.th Sales E-mail: sales@zyxel.co.th Telephone: +662-831-5315 Fax: +662-831-5395 Web: http://www.zyxel.co.th Regular Mail: ZyXEL Thailand Co., Ltd.
Appendix F Customer Support 228 NSA-220 User’s Guide
Index Index A about icon 41 accessing share contents 34 accessing the web configurator 29 administration screens 32, 40 anonymous access rights 122 ANONYMOUS FTP 122 anonymous FTP access 90 anti-virus 95 apache license 191 B BitTorrent 94 blogs 105 broadcatching 105 C certifications 157, 221 notices 222 viewing 222 change password 31 changing configuration settings 43 channel 106 channel guides 106 character set 90 checking disks 44 common screen icons 43 compatible hard disks 157 computer virus 95 compu
Index entry removal 43 everyone access rights 122 exiting the web configurator 32, 41 external devices 34 external disks 80 external hard drive removal hard drives external 44 external hard drives 64 external shares 34 F FAT16 80 FAT32 80 faulty hard disk 44 replacement 44 FCC interference statement 221 feeds 106 file path 36, 37 file storage system 157 file system errors 44 File Transfer Protocol (FTP) 89 finding external storage devices 44 finding the NSA 64 firewall 94 firmware specifications 157 firmw
Index IDP (Intrusion Detection and Prevention) 95 inactive 78 install drives 26 internal hard drives 34, 64 iTunes 90 J JavaScript 29 jumbo frames 85 configuration 137 software 137, 158 status 64 Memeo AutoBackup 156 messages 43 MIT License 216 model name 41, 64 moving share contents 35 Mozilla Public License 209 My NSA 32 Change Share Properties screen 36 management overview screens 36 My NSA screens 33 My Own Shares 34 L LAN LEDs 28 language 41 language encoding 90 LEDs 26 liability 221 license 221 li
Index pop-ups 29 power consumption 160, 161 POWER LED 27 print server 109 private shares 37 proof of purchase 222 public shares 37 publish shares 90 publishing shares to the web 101 radio shows 105 RAID type 64 RAID file storage 156 RAID volume repair 44 recovering 78 related documentation 3 remove hard drives 26 removing entries 43 removing external hard drives 44 repair icon 44 replacing faulty hard disks 44 reset button 155 restart 132 restrictions on folder names 38 on share names 38 on volume names 3
Index torrent file 94 troubleshooting external disks 149 forgot password 145 LED indicators 143 LAN 145 login 148 media files 150 NDU discovery 147 overview 143 user share access 149 web configurator access 145 TV programs 105 type 64 U web browsers supported 158 web configurator 29 browsers 29 logout 32, 41 web help 41 web help icon 32 web publishing 101 troubleshooting 152 Web publishing status 64 Z ZyXEL Communications Corporation 221 ZyXEL Limited Warranty Note 222 BSD 208 USB devices 34 USB hard d
Index 234 NSA-220 User’s Guide