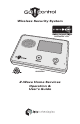
Wireless Security System 2GIG-CNTRL2 Z-Wave Home Services Operation & User’s Guide
The Go!Control Security System Congratulations on your ownership of an Go!Control Security System! This wireless system offers protection for your property against burglary, protection for yourself and family with 24-hour emergency monitoring, and optionally fire and carbon monoxide detection for your home. With the system’s built-in Z-Wave® home automation capability, you can control your Z-Wave® enabled household lights and appliances from the Control Panel or from a portable Z-Wave remote controller.
Table of Contents Home Control Network Overview The Z-Wave Network . . . . . . . . . . . . . . . 2 Home Services Access Home Services Button . . . . . . . . . . . . . . 3 Device Management . . . . . . . . . . . . . . . . 3 Toolbox . . . . . . . . . . . . . . . . . . . . . . . . . . . 3 Network Setup Adding Devices . . . . . . . . . . . . . . . . . . . . 4 Naming Devices . . . . . . . . . . . . . . . . . . . . 5 Basic Operation Binary Switches . . . . . . . . . . . . . . . . . . . . Multi-level Switches . .
Home Control Network Overview The Z-Wave Network Z-Wave® is “interoperable, two-way RF mesh networking technology”. In plain English, Z-Wave® allows you to remotely control Z-Wave® enabled devices in your home. Z-Wave is a registered trademark of Zensys Inc. and/or its subsidiaries. Z-Wave enabled devices are remote control modules that lights or appliances plug into or accessories with built-in Z-Wave capabilities that are designed to work with all other Z-Wave enabled devices in a home control network.
Home Services Access Home Services Button Home Services are accessed through the system’s Home Screen. The Home Screen shows the system status with icons to indicate system conditions. It also displays the time and date. The Home Screen displays the SECURITY and HOME SERVICES buttons. The Home Screen is normally displayed when the system is disarmed. If it is not currently being displayed, pressing the button on the Control Panel will display the Home Screen.
Network Setup Adding Devices Before a device will work in the home control network, it must be added (also called included) into the network. To add one or more switch or thermostat devices into the network, use the following steps: 1. Install the Z-Wave Device as directed by the device’s instructions. If it is a lamp or appliance module, connect the lamp or load to the module and be sure the power switch on the lamp or load is ON. Add Z-Wave Devices Screen PRESS Z-WAVE DEVICE BUTTON 2.
Network Setup Naming Devices Devices in the home control network can be named to make it easy to identify the individual lamp or appliance being controlled. The custom name will show on the Control Panel’s display. To name each installed switch or thermostat device, use the following steps: Manage Z-Wave Devices Screen 1. From the Manage Z-Wave Devices Screen, press the SWITCHES or THERMOSTATS button. 2. A list of installed devices will display.
Basic Operation Binary Switches Binary switch modules can be turned ON or OFF. They cannot be set to in-between levels as multi-level (dimmer) switch modules can. To control a binary switch module, use the following steps: 1. From the Home Screen press the HOME SERVICES button. Press SWITCHES button Manage Z-Wave Devices Screen 2. From the Manage Z-Wave Devices Screen, press the SWITCHES button. 3. A list of all installed switches will be displayed.
Basic Operation Multi-level Switches Multi-level (dimmer) switch modules can be turned ON, OFF, or set to 12 different dimming levels. To control a multi-level switch module, use the following steps: 1. From the Home Screen press the HOME SERVICES button. Press SWITCHES button Manage Z-Wave Devices Screen 2. From the Manage Z-Wave Devices Screen, press the SWITCHES button. 3. A list of all installed switches will be displayed.
Basic Operation Viewing Thermostats Z-Wave compatible thermostats can be controlled using the Home Services feature. ✓ NOTE: Several types of Z-Wave compatible thermostats are available. Each type provides different features. The Control Panel’s Home Services Z-Wave control will adjust to the thermostat model type, but may not support all of the thermostat’s features. Press THERMOSTATS button Manage Z-Wave Devices Screen To view the thermostat control, use the following steps: 1.
Basic Operation Controlling Thermostats To adjust a thermostat’s settings, use the following steps. ✓ NOTE: Several types of Z-Wave compatible thermostats are available. Each type will display different supported options. Setting the Mode Thermostat Settings Screen 1. Use the ← or → arrows on each side of the mode display to choose between OFF, HEAT, COOL, ENERGY SAVE HEAT, or ENERGY SAVE COOL modes. Use arrows to select mode 2. The thermostat will immediately switch to the mode selected.
Scenes & Rules Controlling Multiple Devices Beyond simple controlling of a single device, multiple device control commands can be assigned using a “Scene”. A Scene can be run on its own, or “Rules” can be assigned to trigger a Scene after a Control Panel “event” such as arming your system or when an alarm occurs. Press ADD SCENE button Z-Wave Scenes Screen Creating Scenes Scenes are created by assigning one or more device actions to the Scene.
Scenes & Rules Editing Scenes Scenes can be edited to change a device’s action, remove a device’s action, or rename the Scene. To edit a Scene, use the following steps. Changing a Device’s Action 1. From the Home Screen press the HOME SERVICES button. Press scene button Scenes Screen with RUN Button 2. From the Manage Z-Wave Devices Screen, press the SCENES button. 3. A list of programmed Scenes will be displayed. Press the name of the Scene to edit. Press action to edit 4.
Scenes & Rules Running Scenes Scenes can be run by hand manually, or be automatically run when triggered by a Rule. To run a Scene manually, use the following steps: 1. From the Home Screen press the HOME SERVICES button. Press ADD SCENE button RUN Button on Scenes Screen 2. From the Manage Z-Wave Devices Screen, press the SCENES button. 3. A list of programmed Scenes will be displayed. 4. Press the RUN button next to the desired Scene. 5.
Scenes & Rules Triggering Devices from Events A Scene can be run on its own, or “Rules” can be assigned to trigger a Scene after a Control Panel “event” such as arming your system or when an alarm occurs. Press RULES button Creating Rules Rules are created by assigning a Scene to run for an event that occurs. Manage Z-Wave Devices Screen To create a Rule, use the following steps: 1. From the Home Screen press the HOME SERVICES button. Press ADD RULE button 2.
Scenes & Rules Editing Rules Rules can be edited to change an event that triggers the Rule or to change the Scene that the Rule runs. Changing a Rule’s Action To change a Rule’s action, use the following steps: Press rules button Manage Z-Wave Devices Screen 1. From the Home Screen press the HOME SERVICES button. 2. From the Manage Z-Wave Devices Screen, press the RULES button. 3. A list of programmed Rules will be displayed. Press the name of the Rule to edit. 4.
Network Maintenance Removing Devices When a device will no longer be used in the home control network, it should be removed (also called excluded) from the network so the system will not try to communicate with the missing device. To remove one or more devices from the network, use the following steps: 1. From the Toolbox Screen, press the REMOVE DEVICES button. The Control Panel will display “Discovering devices” and wait for a signal from a device.
Network Maintenance Network Diagnostics The Home Services Z-Wave network periodically checks to determine if a network device has become un-plugged, has failed, or is missing. The network can also be checked manually by pressing the CHECK NETWORK button on the Home Services Toolbox screen. Home Services button turns orange Home Screen with Orange Button If there is a network issue, the HOME SERVICES button on the Home Screen will display as orange instead of blue.
Advanced Setup Advanced Toolbox The Advanced Toolbox is used to add a secondary controller, reset and view installed controllers, view the currently installed network devices, or rediscover the network devices. On the Z-Wave Toolbox Screen, press ADVANCED TOOLBOX to access the Advanced Toolbox functions. Advanced Z-Wave Toolbox Learn Controller The Control Panel can be added to an existing Z-Wave network as a “secondary” controller.
Advanced Setup Advanced Toolbox (cont.) View Controllers The Control Panel can display each Z-Wave controller programmed into the network. Use the following steps to display the controllers. 1. From the Advanced Toolbox Screen, press the VIEW CONTROLLERS button. 2. Each programmed controller will be displayed. Use the ↑ or ↓ arrows to scroll the display if more than three controllers are listed. The controller listings will show the controller’s name, manufacturer, and network node number.
Advanced Setup Advanced Toolbox (cont.) Rediscover Network During normal operation the network decides the best path to route signals from one device to another. If devices are moved to different positions in the installation, it is recommended to rediscover the network so the routing path will be re-configured. Use the following steps to rediscover the network: Rediscovering Network Screen 1. From the Advanced Toolbox Screen, press the REDISCOVER NETWORK button.
Index A R Adding devices 4 ADD RULE button 13 ADD SCENES button 10 Advanced setup 17, 18, 19 Advanced toolbox 17, 18, 19 ADVANCED TOOLBOX button 17 Radio compatibility 21 Rediscover network 19 REDISCOVER NETWORK button 19 Refresh button 6 REFRESH button 7, 8 REMOVE DEVICES button 15, 17 REMOVE FAILED DEVICE button 16 Removing a device’s action 11 Removing devices 15 RENAME button 5, 11 Repeater 2 Reset controller 17 RESET CONTROLLER button 17 RESET Z-WAVE CONTROLLER button 17 Rules 2, 10, 13 RULES button
Important Information Limited Warranty This 2gig Technologies Inc. product is warranted against defects in material and workmanship for twelve (12) months. This warranty extends only to wholesale customers who buy through 2gig Technologies Inc. authorized distribution channels. 2gig Technologies Inc. does not warrant this product to consumers. Consumers should inquire from their selling dealer as to the nature of the dealer’s warranty, if any.
YOUR LOCAL ALARM INSTALLATION AND SERVICE PROFESSIONAL: Copyright © 2010 230786 A