
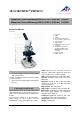
User guide


2
3. Unpacking and assembly
The microscope is packed in a molded styro-
foam container.
• Take the container out of the carton remove
the tape and carefully lift the top half off the
container. Be careful not to let the optical
items (objectives and eyepieces) drop down.
• To avoid condensation on the optical com-
ponents, leave the microscope in the original
packing to allow it to adjust to room tem-
perature.
• Using both hands (one around the pillar and
one around the base), lift the microscope
from the container and put it on a stable
desk.
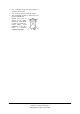
• The objectives will be found within individual
protective vials. Install the objectives into the
microscope nosepiece from the lowest
magnification to the highest, in a clockwise
direction from the rear.
• Insert the eyepiece into the tube.
4. Operation
4.1 General information
• Set the microscope on a level table.
• Place the object to be observed in the center
of the object plate. Use the clips to fasten it
into place. Make certain that the specimen is
centered over the opening in the stage.
• Connect the mains cable to the net and turn
on the switch to get the object illuminated.
• Make certain that the specimen is centered
over the opening in the stage.
• Adjust the aperture of the iris diaphragm to
get the background brightness suitable for a
high contrast image.
• Rotate the nosepiece until the objective with
the lowest magnification is pointed at the
specimen. There is a definite “click” when
each objective is lined up properly.
NOTE: It is best to begin with the lowest power
objective. This is important to reveal general
structural details with the largest field of view
first. Than you may increase the magnification
as needed to reveal small details.
To determine the magnification at which you are
viewing a specimen, multiply the power of the
eyepiece by the power of the objective.
• Adjust the coarse-focusing-knob which
moves the stage up until the specimen is fo-
cused. Be careful that the objective does not
make contact with the slide at any time. This
may cause damage to the objective and/or
crack your slide.
• Adjust the fine-focusing-knob to get the im-
age more sharp and more clear.
• Colour filters may be inserted into the filter
holder for definition of specimen parts.
Swing the filter holder out and insert colour
filters.
• Always turn off the light immediately after
use.
• Be careful not to spill any liquids on the mi-
croscope.
• Do not mishandle or impose unnecessary
force on the microscope.
• Do not wipe the optics with your hands.
• Do not attempt to service the microscope
yourself.
4.2 Changing the lamp and fuse
4.2.1 Changing the lamp
• Turn off the power switch, unplug the mains
plug and let the lamp cool down to avoid be-
ing burnt.
• Do not touch the bulb with the bare hand.
• To change the lamp screw the lamp-housing
off the base.
• Press the bulb into the base and remove it
by turning it clockwise.
• Insert the new bulb by lightly pressing it
downwards and secure it by turning it coun-
terclockwise.
• Remount the lamp-housing.
4.2.2 Changing the fuse
• Turn off the power switch and unplug the
mains plug.
• Unscrew the fuse holder on the back of the
stand base with a screwdriver.
• Replace the fuse and reinsert the holder in
its socket.
5. Storage, cleaning, disposal
• Keep the microscope in a clean, dry and
dust free place.
• When not in use always cover the micro-
scope with the dust cover.
• Do not expose it to temperatures below 0°C
and above 40°C and a max. relative humid-
ity of over 85%.
• Always unplug the mains plug before clean-
ing or maintenance.
• Do not clean the unit with volatile solvents or
abrasive cleaners.
• Do not disassemble objective or eyepieces
to attempt to clean them.