3C16700.
3C16700.book Page ii Wednesday, July 7, 1999 5:46 PM 3Com Corporation ■ 5400 Bayfront Plaza Copyright © 1999, 3Com Technologies. All rights reserved. No part of this documentation may be reproduced in any form or by any means or used to make any derivative work (such as translation, transformation, or adaptation) without written permission from 3Com Technologies.
C16700.
3C16700.
3C16700.book Page 5 Wednesday, July 7, 1999 5:46 PM INTRODUCTION Welcome to the world of networking with 3Com® . In the modern business environment, communication and sharing information is crucial. Computer networks have proved to be one of the fastest modes of communication but, until recently, only large businesses could afford the advantage of networking. The OfficeConnect® product range from 3Com has changed this, bringing networks into the small office.
3C16700.book Page 6 Wednesday, July 7, 1999 5:46 PM CREATING YOUR NETWORK 2 An operating system (for example, Netware or What Else Do I Need? Windows 95/98) with network support configured, running on your workstations. Your OfficeConnect hub comes with: ■ One power adapter for use with the OfficeConnect hub. ■ A Product Registration card for you to fill out and return. ■ Four rubber feet. ■ A stacking clip. ■ Two unit labels and eight cable ties. ■ An OfficeConnect Network Assistant CD-ROM.
3C16700.book Page 7 Wednesday, July 7, 1999 5:46 PM Hub Connections 10BASE-T Depending on what ports your hub has, you can use either 10BASE-T or 10BASE-2 to connect your hubs together: If you have additional hubs you want to connect using 10BASE-T, you need: ■ With 10BASE-2 you can connect up to 30 hubs on a single segment, leaving all of the 10BASE-T ports free. ■ ■ With 10BASE-T you can connect up to four hubs in series.
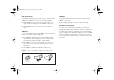
3C16700.book Page 8 Wednesday, July 7, 1999 5:46 PM To fit another unit: Stacking the Units Together 1 Rest the second unit on top of the clip and align it with the front of the unit below. The Rubber Feet 2 Press down gently on the unit to secure it onto the clip, The four self-adhesive rubber feet prevent your hub from moving around on your desk. Only stick the feet to the marked areas at each corner of the underside of your hub if you intend to place the unit directly on top of the desk.
3C16700.book Page 9 Wednesday, July 7, 1999 5:46 PM Remove any connections to the hub and locate it over the screw heads. When in line, gently push the hub on to the wall and move it downwards to secure. When making connections, be careful not to push the hub up and off the wall. Positioning Your Hub When installing your OfficeConnect hub, ensure: ■ It is out of direct sunlight and away from sources of heat.
3C16700.book Page 10 Wednesday, July 7, 1999 5:46 PM THE OFFICECONNECT ETHERNET HUB 4 AND 4C Ethernet Hub 4 and 4C—Front Alert LED Activity LED 10BASE-T Port Status LEDs Network Utilization LEDs (Hub 4C only) orange Alerts you to excessive network use or an isolated (partitioned) 10BASE-T port. (Hub 4 only) yellow Flashes each time a packet is received on a port. green/yellow Indicates the status of each 10BASE-T port. green — The link between the port and the next piece of network equipment is OK.
3C16700.book Page 11 Wednesday, July 7, 1999 5:46 PM Ethernet Hub 4 and 4C—Rear Power Adapter socket AUI port (Hub 4C only) Four 10BASE-T RJ-45 ports Only use the power adapter that is supplied with this OfficeConnect hub. Do not use any other adapter. Allows 10Mbps transceivers of different media types to be connected to the hub. Connecting a transceiver automatically disables the 10BASE-2 port. Use 10BASE-T cable with RJ-45 connectors.
3C16700.book Page 12 Wednesday, July 7, 1999 5:46 PM The hub detects all port connections, so you can start using your network immediately. When you need more ports, simply add more OfficeConnect hubs. Connecting Workstations and Other Equipment to Your Hub WARNING: Please read the ‘Important Safety Information’ section before you start. Connecting Transceivers to the AUI Port You can connect a 10Mbps Ethernet transceiver to your hub (Hub 4C only), using a standard AUI cable.
3C16700.book Page 13 Wednesday, July 7, 1999 5:46 PM Figure 4 Connecting Hubs Using 10BASE-2 Connect a 10BASE-2 ‘Y’ piece to each of your hubs (Hub 4C only). Connect the ‘Y’ pieces with 10BASE-2 cable to form a single segment, as shown in Figure 4. Remember to terminate the two free ends of the segment by fitting terminators (end pieces).
3C16700.book Page 14 Wednesday, July 7, 1999 5:46 PM If you suspect there is a problem, refer to “Problem Solving for the Hub 4 and 4C” on page 15. Connecting Hubs Using 10BASE-T You can connect hubs together with 10BASE-T in a number of ways, but for simplicity we recommend the following method, as shown in Figure 5: Figure 5 Correct Hub Connections Using 10BASE-T 1 Starting from the bottom, connect the port 4 of the Switch set to Normal (out) lower hub to port 3 of the hub immediately above.
3C16700.book Page 15 Wednesday, July 7, 1999 5:46 PM PROBLEM SOLVING FOR THE HUB 4 AND 4C The OfficeConnect hub has been designed to aid you when detecting and solving possible problems with your network. These problems are rarely serious, the cause is usually a disconnected or damaged cable, or incorrect configuration. If this section does not solve your problem, contact your supplier for information on what to do next. Port Status LED yellow for a 10BASE-T port.
3C16700.book Page 16 Wednesday, July 7, 1999 5:46 PM Port Status LED not lit for a 10BASE-T port that has a connection. There is a problem with this connection. Check that you are using a straight-through 10BASE-T cable which is properly connected at both ends, and is not damaged. If the cable is connected to port 4, ensure that the Uplink/Normal switch is set to Normal (out). Also check that the equipment being connected to the hub is powered on and operating correctly.
3C16700.book Page 17 Wednesday, July 7, 1999 5:46 PM THE OFFICECONNECT ETHERNET HUB 8 AND 8C Ethernet Hub 8 and 8C—Front Alert LED Activity LED Port Status LEDs orange Alerts you to excessive network use or an isolated (partitioned) 10BASE-T port. (Hub 8 only) yellow Flashes each time a packet is received on a port. green/yellow Indicates the status of each port. green — The link between the port and the next piece of network equipment is OK.
3C16700.book Page 18 Wednesday, July 7, 1999 5:46 PM Ethernet Hub 8 and 8C—Rear POWER 10BASE-2 port (Hub 8C only) Eight 10BASE-T RJ-45 ports Can be used to connect your hub to other OfficeConnect hubs and equipment with 10BASE-2 cabling. If used, it is effectively a ninth port. Refer to “Connecting Hubs Using 10BASE-2” on page 20. Use 10BASE-T cable with RJ-45 connectors. You can connect the OfficeConnect hub to any workstation or piece of equipment that has a 10BASE-T port.
3C16700.book Page 19 Wednesday, July 7, 1999 5:46 PM The hub detects all port connections, so you can start using your network immediately. When you need more ports, simply add more OfficeConnect hubs. Connecting Workstations and Other Equipment to Your Hub WARNING: Please read the ‘Important Safety Information’ section before you start.
3C16700.book Page 20 Wednesday, July 7, 1999 5:46 PM Figure 7 Connecting Hubs Using 10BASE-2 Correct Hub Connections Using 10BASE-2 Connect a 10BASE-2 ‘Y’ piece to each of your hubs (Hub 8C only). Connect the ‘Y’ pieces with 10BASE-2 cable to form a single segment, as shown in Figure 7. Remember to terminate the two free ends of the segment by fitting terminators (end pieces). To disconnect a 10BASE-2 cable, twist each connector counter-clockwise to unlock it, and remove it.
3C16700.book Page 21 Wednesday, July 7, 1999 5:46 PM If you suspect there is a problem, refer to “Problem Solving for the Hub 8 and 8C” on page 22. Connecting Hubs Using 10BASE-T You can connect hubs together with 10BASE-T in a number of ways, but for simplicity we recommend the following method, as shown in Figure 8: Figure 8 Correct Hub Connections Using 10BASE-T 1 Starting from the bottom, connect the port 8 of the lower hub to port 7 of the hub immediately above. Repeat this for each hub.
3C16700.book Page 22 Wednesday, July 7, 1999 5:46 PM PROBLEM SOLVING FOR THE HUB 8 AND 8C The OfficeConnect hub has been designed to aid you when detecting and solving possible problems with your network. These problems are rarely serious, the cause is usually a disconnected or damaged cable, or incorrect configuration. If this section does not solve your problem, contact your supplier for information on what to do next. loop. Each piece of equipment needs only one connection to your OfficeConnect hub.
3C16700.book Page 23 Wednesday, July 7, 1999 5:46 PM Port Status LED not lit for a 10BASE-T port that has a connection. There is a problem with this connection. Check that you are using a straight-through 10BASE-T cable which is properly connected at both ends, and is not damaged. If the cable is connected to port 8, ensure that the Uplink/Normal switch is set to Normal (out). Also check that the equipment being connected to the hub is powered on and operating correctly.
3C16700.book Page 24 Wednesday, July 7, 1999 5:46 PM NETWORKING TERMINOLOGY A Network is a collection of workstations (for example, IBM-compatible personal computers) and other equipment (for example, printers), connected for the purpose of exchanging information. Networks vary in size, some are within a single room, others span continents. A segment is the length of Ethernet cable connected to a port, whether this cable is 10BASE-T, 10BASE-2, or other type.
3C16700.book Page 25 Wednesday, July 7, 1999 5:46 PM DIMENSIONS AND STANDARDS Dimensions and Operating Conditions Standards Functional: ISO 8802/3 IEEE 802.3 Safety: UL 1950, EN 60950 CSA 22.2 #950 IEC 950 EMC: EN 55022 Class B† EN 50082-1 FCC Part 15 Class B†* ICES-003 Class B VCCI Class B† 225mm (9in.) 0-40°C (32-105°F) operating temperature 35.8mm (1.4in.) 0-90% (non-condensing) humidity 135.4mm (5.3in.) + 15.2mm (0.6in.
3C16700.book Page 26 Wednesday, July 7, 1999 5:46 PM ENVIRONMENTAL STATEMENTS It is the policy of 3Com Corporation to be environmentally-friendly in all operations. To uphold our policy, we are committed to: End Of Life Statement 3Com processes allow for the recovery, reclamation and safe disposal of all end-of-life electronic components. ■ Establishing environmental performance standards that comply with national legislation and regulations.
3C16700.book Page 27 Wednesday, July 7, 1999 5:46 PM IMPORTANT SAFETY INFORMATION WARNING: Warnings contain directions that you must follow for your personal safety. Follow all directions carefully. You must read the following safety information carefully before you install or remove the unit: ■ Exceptional care must be taken during installation and removal of the unit. ■ Only stack the OfficeConnect hub with other OfficeConnect units.
3C16700.book Page 28 Wednesday, July 7, 1999 5:46 PM WICHTIGE SICHERHEITSHINWEISE WARNHINWEIS: Warnhinweise enthalten Anweisungen, die Sie zu Ihrer eigenen Sicherheit befolgen müssen. Alle Anweisungen sind sorgfältig zu befolgen. Sie müssen die folgenden Sicherheitsinformationen sorgfältig durchlesen, bevor Sie das Geräts installieren oder ausbauen: ■ Bei der Installation und beim Ausbau des Geräts ist mit höchster Vorsicht vorzugehen.
3C16700.book Page 29 Wednesday, July 7, 1999 5:46 PM CONSIGNES IMPORTANTES DE SÉCURITÉ AVERTISSEMENT: Les avertissements présentent des consignes que vous devez respecter pour garantir votre sécurité personnelle. Vous devez respecter attentivement toutes les consignes. Nous vous demandons de lire attentivement les consignes suivantes de sécurité avant d’installer ou de retirer l’appareil: ■ Faites très attention lors de l'installation et de la dépose du groupe.
3C16700.book Page 30 Wednesday, July 7, 1999 5:46 PM TECHNICAL SUPPORT 3Com provides easy access to technical support information through a variety of services. This section describes these services. This service provides access to online support information such as technical documentation and software, as well as support options that range from technical education to maintenance and professional services. Information contained in this section is correct at time of publication.
3C16700.book Page 31 Wednesday, July 7, 1999 5:46 PM Support from Your Network Supplier Support from 3Com If you require additional assistance, contact your network supplier. Many suppliers are authorized 3Com service partners who are qualified to provide a variety of services, including network planning, installation, hardware maintenance, application training, and support services.
3C16700.book Page 32 Wednesday, July 7, 1999 5:46 PM Here is a list of worldwide technical telephone support numbers: Country Telephone Number Country Telephone Number Asia, Pacific Rim Australia Hong Kong India Indonesia Japan Malaysia New Zealand Pakistan Philippines 1 800 678 515 800 933 486 +61 2 9937 5085 001 800 61 009 0031 61 6439 1800 801 777 0800 446 398 +61 2 9937 5085 1235 61 266 2602 P.R. of China 10800 61 00137 or 021 6350 1590 800 6161 463 Singapore S. Korea From anywhere in S.
3C16700.
3C16700.book Page 34 Wednesday, July 7, 1999 5:46 PM Returning Products for Repair Before you send a product directly to 3Com for repair, you must first obtain a Return Material Authorization (RMA) number. Products sent to 3Com without authorization numbers will be returned to the sender unopened, at the sender’s expense.
3C16700.book Page 35 Wednesday, July 7, 1999 5:46 PM 3Com Corporation Limited Warranty media with software which substantially conforms to applicable 3Com published specifications. Customer assumes responsibility for the selection of the appropriate applications program and associated reference materials.
3C16700.book Page 36 Wednesday, July 7, 1999 5:46 PM pre-authorized by 3Com with a Return Material Authorization (RMA) number marked on the outside of the package, and sent prepaid and packaged appropriately for safe shipment, and it is recommended that they be insured or sent by a method that provides for tracking of the package. The repaired or replaced item will be shipped to Customer, at 3Com's expense, not later than thirty (30) days after 3Com receives the defective product.
3C16700.book Page 37 Wednesday, July 7, 1999 5:46 PM DISCLAIMER Some countries, states, or provinces do not allow the exclusion or limitation of implied warranties or the limitation of incidental or consequential damages for certain products supplied to consumers, or the limitation of liability for personal injury, so the above limitations and exclusions may be limited in their application to you.
3C16700.book Page 38 Wednesday, July 7, 1999 5:46 PM ELECTROMAGNETIC COMPATIBILITY VCCI STATEMENT FCC STATEMENT This equipment has been tested and found to comply with the limits for a Class B digital device, pursuant to Part 15 of the FCC Rules, and the Canadian Department of Communications Equipment Standards entitled, “Digital Apparatus,” ICES-003. These limits are designed to provide reasonable protection against harmful interference in a residential installation.
3C16700.book Page 39 Wednesday, July 7, 1999 5:46 PM Wall mounting screw hole guide 150 mm (5.
Part No. DUA 1670-0AAA04 Published June 1999 3C16700.