User Guide 10/100 PCI Network Interface Card with 3XP Processor 3C990B-TX-M 3C990BSVR 10/100 Mbps PCI Client/Server Network Interface Cards http://www.3com.com htt;://www.3com.
3Com Corporation ■ 5400 Bayfront Plaza ■ Santa Clara, California ■ 95052-8145 ■ U.S.A. Copyright © 2001 3Com Corporation. All rights reserved. No part of this documentation may be reproduced in any form or by any means or used to make any derivative work (such as translation, transformation, or adaptation) without written permission from 3Com Corporation.
Contents About This Guide Conventions 1 1 Introduction Onboard 3XP Processor 3 Data Encryption 3 High Encryption Pack for Windows 2000 4 3C990B Client and Server NIC Features 4 Windows 2000 Offload Features 5 Remote Wake-Up 5 Remote Wake-Up Requirements 6 Remote Wake-Up and Multiple NIC Installations 6 Integrated Boot ROM with Managed PC Boot Agent (MBA) Desktop Management Interface (DMI) 2.
Contents Installing From Diskette 15 Making a DOS-Bootable Diskette 15 Creating Installation Diskettes 15 Product Registration 16 Preparing the NIC and the Computer 16 Installing and Connecting the NIC 18 Connecting the Remote Wake-Up Cable 19 Installing Software 20 3 Installing NIC Drivers and Diagnostics For Windows Software Installation Requirements 21 Getting Help 21 Installing the Network Driver Using the EtherCD 21 Before Installing the Network Driver 21 Windows 2000 22 Installing the Driver 22 Ver
Contents Configuring IPSec In Windows 2000 Creating a Security Policy 38 Defining the Console 38 Creating the Policy 39 Creating a Filter 39 Binding the Filter 40 Creating the Filter Action 40 Binding the Filter Action 41 Enabling Encryption 41 Disabling Encryption 41 5 38 Installing 3Com Advanced Server Features For Windows Installing 3Com Advanced Server Software 43 Verifying Successful Installation 44 Configuring Groups and VLANs for a Server NIC 44 Planning the Configuration 45 Working With Server F
Contents Installing the NetWare 3.12 Server Driver 57 Installing the Server Driver for NetWare 4.11 and 5.x Using INETCFG 58 Installing the Server Driver and Advanced Server Features Using AUTOEXEC.
Contents 8 Troubleshooting the NIC Interpreting the NIC LEDs 81 Viewing the NIC LEDs in the Diagnostics Program 82 Troubleshooting Problems with the LEDs 82 Accessing 3Com Support Databases 82 Accessing the 3Com Knowledgebase 82 Accessing the 3Com NIC Help System 82 Accessing Release Notes and Frequently Asked Questions 83 Troubleshooting the NIC Installation 83 Problems/Error Messages 83 Cleaning Up a Broken Installation 83 Troubleshooting the Network Connection 84 Troubleshooting Remote Wake-Up 85 Troub
Contents C EtherCD Content and Navigation Root Subdirectories List 104 Enabling Auto Insert 104 Text Files List 105 D Installing a 3Com NIC While Installing the NOS Windows Fresh Installation 107 Windows NT 107 Windows 2000 107 NetWare Fresh Installation 107 Requirements 107 Installation Instructions 107 E Technical Support Online Technical Services 109 World Wide Web Site 109 3Com Knowledgebase Web Services 109 3Com FTP Site 109 Support from Your Network Supplier 110 Support from 3Com 110 Returning P
About This Guide This guide describes how to install, configure, and troubleshoot the following 3Com® 10/100 PCI network interface cards (NICs): NIC/Description Model Number 3Com 10/100 Mbps PCI NIC with 3XP processor 3C990B-TX-M Client NIC for 3DES (168-bit) and DES (56-bit) encryption 3Com 10/100 Mbps PCI Server NIC with 3XP processor 3C990BSVR Server NIC for 3DES (168-bit) and DES (56-bit) encryption This guide is intended for those who install and configure Ethernet NICs.
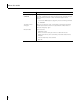
About This Guide Convention Description Screen displays This typeface represents information as it appears on the screen. Commands The word “command” means that you must enter the command exactly as shown and then press Return or Enter. Commands appear in bold. Example: To launch the DOS diagnostics program, enter the following command: a: install The words “enter” and “type” When you see the word “enter” in this guide, you must type something, and then press Return or Enter.
1 Introduction This chapter describes the following 3Com® 10/100 Mbps PCI network interface card (NIC) models from the 3C990B NIC family.
1 Introduction High Encryption Pack for Windows 2000 Microsoft Windows 2000 features a built-in VPN client. The Windows 2000 High Encryption Pack allows you to enhance your system with the highest available encryption level (168-bit). You can download the High Encryption Pack from the following Microsoft World Wide Web site: http://www.microsoft.com/WINDOWS2000/downloads/recommended/ encryption/default.asp NOTE: The Windows 2000 High Encryption Pack is eligible for export from the U.S.
3C990B Client and Server NIC Features ■ ■ ■ ■ ■ ■ ■ ■ Desktop Management Interface (DMI) 2.0 — Enables managed computers and net computers to report details about themselves and their peripheral devices across the network to a DMI 2.0-compliant management application. Remote System Alerts (heartbeat packets) — Can signal a possible computer power loss or theft. Remote Control — Lets you troubleshoot and resolve system issues across the network.
1 Introduction If the computer complies with PCI 2.2, Remote Wake-Up is automatically enabled through the PCI bus. If the computer complies with PCI 2.1, Remote Wake-Up support is enabled by connecting a Remote Wake-Up cable from the NIC’s Remote Wake-Up (RWU) connector to a 3-pin Remote Wake-Up connector on the computer motherboard. NOTE: The NIC provides a network connection with or without the Remote Wake-Up cable installed.
3C990B Client and Server NIC Features The 3Com DMI Agent allows any DMI management application to access information such as: ■ NIC driver location, version, and size ■ Packets-sent statistics ■ Cyclic Redundancy Check (CRC) receive errors A network administrator can then use this type of information to remotely configure and manage a client or server computer.
1 Introduction Hot Plug NIC Installation If your computer supports PCI hot plug specifications, you can add a new 3Com NIC or remove and replace a 3Com NIC without turning off power to the computer. Hot plug NIC installation allows you to expand connections without taking the computer out of service. It makes troubleshooting faster and easier because you do not need to wait for the computer to reboot. For instructions on performing a hot plug NIC installation, refer to your computer documentation.
3C990BSVR Server NIC Features 3C990BSVR Server NIC Features The 3C990BSVR NIC and accompanying software provide a variety of features that relieve network congestion and ensure high performance and maximum bandwidth availability. NOTE: Advanced server features are available for the 3C990BSVR server NIC only. They are not available for the 3C990B-TX-M client NIC. Only system administrators should configure these features.
1 Introduction Failover In addition to load balancing, RSLs provide failover fault tolerance between a server and a switch—if one NIC in a group fails, the others assume the network load of the failed NIC. The failover behavior of secondary NICs depends on how you set load balancing: ■ In a transmit load balancing arrangement, the primary NIC is the only one that receives packets.
3C990BSVR Server NIC Features ■ ■ It helps to control traffic. With traditional networks, congestion can be caused by broadcast traffic that is directed to all network devices whether they require it or not. Each VLAN can be set up to contain only those devices that need to communicate with each other, increasing network efficiency. It provides extra security. Devices within each VLAN can communicate only with member devices in the same VLAN.
2 Installing and Connecting the NIC This chapter describes how to install the NIC in your PC and connect it to an Ethernet or Fast Ethernet network. Before starting the installation procedure, you can gain some familiarity with the directory structure and various files on the EtherCD supplied with the 3C990B NIC by reading Appendix C, "EtherCD Content and Navigation.
2 Installing and Connecting the NIC Installation Requirements The following items are required for hardware and software installation.
Installing From Diskette Upgrading Windows 98 to Windows Me If you are upgrading a computer from Windows 98 to Windows Me, and the computer already has a 3Com 10/100 PCI NIC installed, follow the instructions in the WINME.TXT file located in the HELP directory on the EtherCD. Updating the Network Driver and NIC Software If you already have a 3Com 10/100 PCI NIC installed and want to update the network driver, follow the instructions in “Updating the Network Driver and NIC Software” on page 31.
2 Installing and Connecting the NIC 7 Insert a blank, formatted diskette labeled Disk 1 in the PC, and then click Next. Files are copied. Disk 1 contains the installation files and driver files for Windows 2000, Windows NT, and Windows 95/98. 8 Remove the disk and insert the disk labeled Disk 2 when prompted, and then click OK. Files are copied. Disk 2 contains the diagnostic and firmware images. 9 Remove the disk and insert the disk labeled Disk 3 when prompted, and then click OK. Files are copied.
Preparing the NIC and the Computer 2 Make sure that cable requirements are met. The RJ-45 port provides a 10 Mbps or 100 Mbps connection automatically, depending on the speed of the connected hub or switch. The following table shows the cable requirements and maximum network cable lengths for the RJ-45 port.
2 Installing and Connecting the NIC Installing and Connecting the NIC Observe the safety precautions listed in “Safety Precautions” on page 13. Prepare the NIC and the computer as described in “Preparing the NIC and the Computer” on page 16. The following instructions apply to installing the NIC in most computers. If these instructions are not appropriate for your computer, refer to the documentation that accompanied the computer.
Connecting the Remote Wake-Up Cable 3 Plug the RJ-45 connector on the twisted-pair network cable into the RJ-45 port on the NIC backplate as shown in the figure. S TU STA T AC 4 Connect the other end of the network cable to an active network port. The next step is to install the software, as described in “Installing Software” on page 20. NOTE: If you are installing multiple 3Com 10/100 PCI NICs in one computer running Windows, see the instructions in “Installing Multiple NICs” on page 31.
2 Installing and Connecting the NIC To connect the Remote Wake-Up cable: 1 Make sure that the NIC is properly installed in a PCI slot. 2 Insert the Remote Wake-Up cable into the RWU connector on the NIC as shown in the next figure. Twist the cable twice before attaching the cable to the PC. 3 Attach the other end of the cable to the connector on the PC motherboard. Refer to your PC documentation if you need help locating the connector. 4 Replace the PC cover and plug in the power cord.
3 Installing NIC Drivers and Diagnostics For Windows This chapter explains the following tasks on a computer running Windows 2000, Windows NT, Windows Millennium Edition (Windows Me), Windows 98, or Windows 95: ■ Install the network driver and NIC software using EtherCD ■ Update the network driver or NIC diagnostics program ■ Install multiple NICs To obtain the latest version of a driver, go to: http://www.3com.com/ Search for “3C990B” and “drivers.
3 Installing NIC Drivers and Diagnostics For Windows ■ You have the Windows installation files (for Windows 95, 98, Me only). These files may be on a CD or diskettes, or they may have been copied to your hard drive when Windows was installed on your PC. NOTE: If you encounter problems during the installation, refer to the TROUBLE.TXT file (located in the HELP directory on the EtherCD) for troubleshooting tips.
Installing the Network Driver Using the EtherCD Verifying the Driver Installation 1 Right-click the My Computer icon, and then click Properties. 2 Select the Hardware tab, and then click Device Manager in the middle panel. 3 Double click Network Adapters and make sure that the name of the 3Com 10/100 PCI NIC appears. If a red X or a yellow exclamation point (!) appears by the name of the NIC, the installation was not successful. See “Troubleshooting the NIC” on page 81 for troubleshooting help.
3 Installing NIC Drivers and Diagnostics For Windows 12 Click OK. Files are copied. The Network screen appears with the 3Com NIC name listed in the Network Adapters list box. 13 Click Close. If the Microsoft TCP/IP Properties screen appears, enter the requested information for your network environment. Refer to your system administrator or the Windows NT documentation for assistance. After entering the appropriate TCP/IP information and clicking OK, the Network Settings Change window appears.
Installing the Network Driver Using the EtherCD Windows Me This section describes how to install the network driver and NIC software in a PC client or server running Windows Me. Installing the Driver 1 Turn the PC power on. Windows detects the NIC. The Add New Hardware Wizard starts and displays the following message: Windows has found the following new hardware: PCI Ethernet Controller Windows can automatically search for and install software that supports your hardware.
3 Installing NIC Drivers and Diagnostics For Windows Windows 98 This section describes how to install the network driver and NIC software in a PC client or server running Windows 98. Installing the Driver 1 Turn the PC power on. Windows detects the NIC. The Add New Hardware Wizard starts. 2 Click Next. The Add New Hardware Wizard screen prompts you to select an option. 3 Select the Search for the best driver for your device (Recommended) option, and then click Next.
Installing the Network Driver Using the EtherCD Windows 95 This section describes how to install the network driver and NIC software in a PC client or server running Windows 95. CAUTION: Do not install a 3C990B NIC while installing Windows 95 OSR2 using the “Custom” option. Install Windows 95 OSR2 first, then install the 3C990B NIC. Before installing the NIC software: ■ Make sure that the NIC is installed in the PC and connected to the network. ■ Make sure that you have the Windows 95 installation files.
3 Installing NIC Drivers and Diagnostics For Windows 5 Do one of the following: ■ If the Windows 95 files were not copied to your hard drive, remove the EtherCD from the CD-ROM drive, insert the Windows 95 CD, enter the path to the CD-ROM drive, and then click OK. ■ If the Windows 95 files were copied to your hard drive, enter the path to the directory containing these files, and then click OK. Files are copied. The Systems Settings Change screen appears, prompting you to restart your computer.
Installing the 3Com NIC Diagnostics Program 7 Do one of the following: ■ If the Windows 95 files were not copied to your hard drive, remove the EtherCD from the CD-ROM drive, insert the Windows 95 CD, enter the path to the CD-ROM drive, and then click OK. ■ If the Windows 95 files were copied to your hard drive, enter the path to the directory containing these files, and then click OK. Files are copied. The Systems Settings Change screen appears, prompting you to restart your computer. 8 Click Yes.
3 Installing NIC Drivers and Diagnostics For Windows To install the 3Com NIC Diagnostics program: 1 Turn on the power to the PC and start Windows. 2 Insert the EtherCD in the CD-ROM drive. The EtherCD Welcome screen appears. NOTE: If the EtherCD Welcome screen does not appear, auto insert is probably not enabled for your CD-ROM drive. See “Enabling Auto Insert” on page 104 for instructions. 3 Click NIC Software. 4 Click NIC Drivers and Diagnostics. 5 Click Update NIC Driver.
Updating the Network Driver and NIC Software Updating the Network Driver and NIC Software The latest 3Com network drivers can be downloaded from: http://www.3com.com/ Search for “3C990B” and “drivers.” To update the network driver and NIC diagnostic software: 1 Turn on the power to the PC and start Windows. 2 Insert the EtherCD (or disk 1 downloaded from the Web or created from the EtherCD) in the appropriate drive in the PC. The EtherCD Welcome screen appears. 3 Click NIC Software.
3 Installing NIC Drivers and Diagnostics For Windows 6 After the PC restarts, exit Windows and turn the power off. Make sure that the PC is unplugged. 7 Install the second NIC in your PC and connect it to the network. 8 Plug in the PC power cord, turn on the power, and then start Windows. Windows detects the second NIC. The second NIC uses the same network driver as the first NIC. You are not prompted for the EtherCD.
4 Installing and Configuring Data Encryption Offloads The 3C990B NIC performs data encryption processing offloads in a Windows 2000 environment. The 3C990B NIC does not encrypt the data itself: the operating system performs that function. Encryption processing is handled entirely by the 3XP processor on the NIC. The 3XP processor enables true end-to-end network security at the data capacity of the connected network cable, without sacrificing performance.
4 Installing and Configuring Data Encryption Offloads Selecting Basic or Strong Encryption Processing The 3C990B NIC provides Data Encryption Standard (DES) 56-bit encryption processing and 3DES (3DES 168-bit) encryption processing. You can configure the 3C990B NIC to process data packets encrypted with either DES (basic) or 3DES (strong) algorithms. DES and 3DES are IPSec bulk encryption algorithms for coding data. DES encrypts 64-bit data blocks using a 56-bit key. DES can be applied in several modes.
Enabling Data Encryption 4 Select your desired language. All subsequent pages will be displayed in the selected language. An introduction to the 3C990B NIC appears. Follow the prompts. 5 The 3Com 3C990 Security Software Utility Download screen appears, prompting you to select the level of data encryption that you want to use on your system: ■ 56-bit DES Encryption Version ■ 168-bit 3DES Encryption Version 6 Select either 56-bit or 168-bit encryption and then click Download.
4 Installing and Configuring Data Encryption Offloads 9 Read the Eligibility Certificate, scroll to the bottom of the screen, and click I Agree to continue. You must agree to the certification conditions to download the 3Com Security Software Utility. The 3Com End User Software License Agreement appears. 10 Read the license agreement, scroll to the bottom of the screen, and click I Agree to continue. You must agree to the software license conditions to download the 3Com Security Software Utility.
Disabling Data Encryption 3 Select Enable to install data encryption. The 3Com Security Software Utility will install data encryption on the 3C990B NIC at the level you specified when you downloaded the 3Com Security Software Utility. Data encryption will not be enabled on the 3C990B NIC until you restart the computer. 4 Restart the computer to enable data encryption. Keep the 3Com Security Software Utility in an accessible location.
4 Installing and Configuring Data Encryption Offloads Configuring IPSec In Windows 2000 The 3C990B NIC accelerates IP security (IPSec) data encryption from supported operating systems that provide this offload capability. This feature is currently available in the Microsoft Windows 2000 operating system.
Configuring IPSec In Windows 2000 3 In the menu click Console, and then Add/Remove Snap-in. The Add/Remove Snap-in screen appears. 4 Click Add. The Add Standalone Snap-in screen appears. 5 Select IP Security Policy Management, and then click Add. The Select which computer this Snap-in will manage screen appears. 6 Enable the Local computer option. 7 Click Finish, Close, and then OK. Creating the Policy This sequence creates and names the new security policy.
4 Installing and Configuring Data Encryption Offloads 2 Enter a name for the filter, and then click Add. The IP Filter Wizard starts. 3 Click Next. The IP Traffic Source screen appears. 4 Click Next. The IP Traffic Destination screen appears. 5 Select A Specific IP Address in the pull-down list. The IP Address entry box appears on the IP Traffic Destination screen. 6 Enter destination IP address, and then click Next. The IP Protocol Type screen appears. 7 Accept the default, and then click Next.
Configuring IPSec In Windows 2000 Binding the Filter Action This sequence attaches the new filter action to the filter and policy. The Filter Action screen appears. 1 Enable the filter action option and make sure that the filter name is selected. (In this example, we used the filter name: 3DES to the Server.) 2 Click Next, Finish, and then Close. The newly created policy appears in the right pane of the Console Root\IP Security Policies on Local Machine screen.
5 Installing 3Com Advanced Server Features For Windows This chapter explains the following tasks for a computer running Windows 2000 or Windows NT with the 3Com 10/100 PCI Server NIC (3C990BSVR) with 3XP processor installed.
5 Installing 3Com Advanced Server Features For Windows 7 Select the appropriate menu option for your operating system (Windows NT 4.0 or Windows 2000). Do one of the following: ■ To select Windows NT 4.0, click Install 3Com DynamicAccess Technology for Windows NT 4.0 Only. ■ To select Windows 2000, click Install 3Com DynamicAccess Technology for Windows 2000 Only.
Configuring Groups and VLANs for a Server NIC Planning the Configuration Consider these items when planning groups and VLANs: ■ Decide whether you want to use bidirectional load balancing, or transmit load balancing. To use bidirectional load balancing, you must assign a dedicated IP address for each load balancing group. This address must be unique (not used elsewhere on the network). For details, see “Specifying a Dedicated IP Address” on page 48. ■ Decide which NICs are to be part of each group.
5 Installing 3Com Advanced Server Features For Windows ■ ■ ■ To avoid problems associated with blocked multicast streams, configure end stations that support the IEEE 802.1p GARP Multicast Registration Protocol specification (GMRP) on separate switch segments from stations that do not support it. Under Windows 2000, when VLANs are enabled, the Windows 2000 802.1p Support property must be disabled for all the underlying miniports. The following memory requirements are for multiple VLAN configurations.
Configuring Groups and VLANs for a Server NIC Windows NT Start 3Com Advanced Server features under Windows NT as follows: 1 Log in to the Windows NT Administrator account. 2 From the Windows Start menu, select Settings/Control Panel. 3 Double-click the DynamicAccess SW Server icon. The DynamicAccess Resilient Server Link/Load Balance/VLAN Configuration window appears. Click the appropriate tab to configure server features. Creating a Group 1 Click the Load Balance/RSL tab.
5 Installing 3Com Advanced Server Features For Windows Specifying a Dedicated IP Address Bidirectional load balancing requires that you specify a dedicated IP address for the load balancing group. This address specifies a Network ID and a Host ID, and it must be unique (not used elsewhere on the network).
Configuring Groups and VLANs for a Server NIC Creating a VLAN 1 Click the VLANs tab. 2 In the VLANs window, select a NIC or group from the VLANs list and click Create VLAN. 3 In the VLAN ID dialog box, type a VLAN ID number and click OK. Valid VLAN ID numbers are from 1 – 511 and from 768 – 4095. Numbers in the range 512 – 767 are reserved. The new VLAN is added to the VLANs list.
5 Installing 3Com Advanced Server Features For Windows Disabling Load Balancing for a Group Follow these steps to disable load balancing for a group: 1 Click the Load Balance/RSL tab. 2 In the Load Balance/RSL window: ■ Select a group from the Load Balancing/RSL Groups list. ■ Click Properties. 3 In the Group Properties dialog box: To disable receive load balancing only—Clear the Receive Load Balance Enabled check box.
Configuring Groups and VLANs for a Server NIC Displaying NIC Properties Follow these steps to display NIC properties: 1 Click the Load Balance/RSL tab. 2 In the Load Balance/RSL window, select a NIC. 3 Click Properties. The NIC Properties window appears, showing the properties of the selected NIC. Displaying Group Properties Follow these steps to display group properties: 1 Click the Load Balance/RSL tab. 2 In the Load Balance/RSL window, select a group in the Load Balancing/RSL Groups list box.
5 Installing 3Com Advanced Server Features For Windows Changing Windows 2000 Property Settings If you receive warnings about inconsistent property settings (for example, the 802.1p Support property) while creating a group, use the following procedure to change a NIC property: 1 Right-click the My Computer icon and select Properties from the menu. 2 Click the Hardware tab, then click Device Manager. 3 Double-click Network Adapters.
Using Windows 2000 Offload Features Enabling Offloads Windows 2000 provides the capability to individually enable or disable each of the four offload features. (The default setting for these features is enabled.) To enable or disable individual offload settings in Windows 2000: 1 Right-click the My Network Places desktop icon and select Properties. The Network and Dial-up Connections screen appears. 2 Right-click the Local Area Connection icon and select Properties.
5 Installing 3Com Advanced Server Features For Windows Configuring Offloads for a Group of Different NICs Your computer may contain a combination of installed NICs (including one or more 3Com 10/100 PCI NICs with the 3XP processor (3C990Bs)) with varying offload capabilities. If you have a mix of dissimilar NICs configured in a group, then 3Com DynamicAccess Advanced Server software will support only those offload functions that are supported by all the NICs in the group.
6 Installing NetWare Drivers This chapter describes how to install drivers for Novell NetWare versions 3.12, 4.11, and 5.x. To obtain the latest shipping version of a driver, go to: http://www.3com.com/ Search for “3C990B” and “drivers.” Installing and Configuring the NetWare Driver This section describes how to install the NetWare driver on a Novell server running NetWare 3.12, 4.11, or 5.x. The \NWSERVER directory contains the network driver file (3C99X.LAN) to be used for servers running NetWare 3.
6 Installing NetWare Drivers Obtaining NetWare Loadable Modules You can obtain current NLMs for the NetWare servers listed in the table below from the \NWSERVER directory on the EtherCD, or from the Novell Web site: http://www.support.novell.com NetWare Server NLM Name NetWare 3.12 ETHERTSM.NLM MSM31X.NLM NBI31X.NLM NetWare 4.11, 5.x ETHERTSM.NLM TCPIP.NLM NBI.NLM MSM.
Installing and Configuring the NetWare Driver Slot Numbers for Multiple NICs If you are installing more than one NIC on a server, you must know which NIC corresponds to a given PCI slot in order to connect a cable from the NIC to the appropriate port on the hub or switch. You can correlate slots with physical NICs by the NIC MAC addresses. (The MAC address is written on a bar code label on the top component side of the NIC.
6 Installing NetWare Drivers Installing the Server Driver for NetWare 4.11 and 5.x Using INETCFG To install the driver in a NetWare 4.11or 5.x server: 1 Copy the MSM.NLM, ETHERTSM.NLM, and NBI.NLM files from the \NWSERVER directory on the EtherCD to the directory on your hard drive where other NLM files are located. NOTE: Copy the NLM files only if the versions existing on the server are older than the versions supplied on the EtherCD.
Installing and Configuring the NetWare Driver 13 Press Insert. The Select From the List of Configured Protocols screen appears. For NetWare 5.x: ■ The default To a Network Interface is selected. Press Enter. The Select a Configured Network Interface screen appears. ■ Select the board. For example, enter: 3c99x_1, and then press Enter. 14 When prompted, enter the network number, and then press Enter. 15 In the Frame Type field, press Enter to display a list of frames, choose a frame, and press Enter.
6 Installing NetWare Drivers Copying the Driver 1 Enter this command at the prompt: ■ NetWare 4.11: load install ■ NetWare 5.x: load nwconfig 2 In the Configuration Options screen, select Driver options. 3 In the Driver Options screen, select Configure network drivers. 4 In the Additional Driver Actions screen, select Select a driver. The Select a Driver screen appears, listing all previously saved drivers in the system.
Installing and Configuring the NetWare Driver Setting Up Another NIC 1 Follow the prompts for another NIC: a Select the driver b Enter the slot number c Save parameters and load the driver 2 Repeat the process for all NICs to be set up. 3 After all NICs are set up, press Esc several times to return to the Installation Options screen. Installing Multiple Server NICs To support more than one NIC in a NetWare server, change the AUTOEXEC.NCF file to the following format: load 3C99X.
6 Installing NetWare Drivers 3 NetWare lists the valid slot number(s) for the NIC, depending on how many NICs are installed. The values appearing in the list are the slot values that you should use. Example: After you issue the command, a message appears. At the end of the message, additional text similar to the following appears: Total of 2 3C99x PCI adapter card(s) found. Supported slot values are 2,3.
Installing and Configuring the NetWare Driver CAUTION: Do not set Novell’s Load Balance Local LAN=ON when using SE and LIBRSL (the 3Com Load Balancing suite). b Add or verify the LOAD commands for the LAN drivers for all slot-frame instances. c For each Load Balancing/RSL group, load the same protocols and frame types on the primary and all secondary NICs. d On the primary NIC only, bind a protocol to each slot-frame instance. e Remove any protocol BIND commands from each secondary NIC.
6 Installing NetWare Drivers load se load lbrsl ;Define primary NIC slot-frame instances load 3c99x slot=10001 frame=ethernet_802.2 name=p1_802.2 load 3c99x slot=10001 frame=ethernet_ii name=p1_ii ;Define secondary NIC slot-frame instances load 3c99x slot=10002 frame=ethernet_802.2 name=p2_802.2 load 3c99x slot=10002 frame=ethernet_ii name=p2_ii ;Bind protocols to primary NIC bind ipx to p1_802.2 net=FF02 bind ip to p1_ii address=192.1.1.1 mask=ff.ff.ff.
Changing NetWare Driver Configuration Parameters Changing NetWare Driver Configuration Parameters You can change server configuration parameters using the NetWare installation program Configuration screen. The following table lists the parameters shown on the Configuration screen. Default values are shown in uppercase text. Parameter Range of Values Description Slot Number All PCI slot numbers valid to the system Represents the PCI slot number of the physical NIC to be configured.
6 Installing NetWare Drivers The examples in this section illustrate typical actions you might take in the course of maintaining a 3Com Advanced Server server configuration under NetWare. They show how to add NICs and groups to a server where 3Com Advanced Server technology features are already installed and configured. Two drivers are associated with 3Com Advanced Server technology features in NetWare: SE and LBRSL.
Maintaining Groups load se load lbrsl ;Define primary NIC slot-frame instances load 3c99x slot=10001 frame=ethernet_802.2 name=p1_802.2 load 3c99x slot=10001 frame=ethernet_ii name=p1_ii ;Define secondary NIC load 3c99x slot=10002 load 3c99x slot=10002 load 3c99x slot=10003 load 3c99x slot=10003 slot-frame instances frame=ethernet_802.2 name=p2_802.2 frame=ethernet_ii name=p2_ii frame=ethernet_802.2 name=p3_802.2 frame=ethernet_ii name=p3_ii ;Bind protocols to primary NIC bind ipx to p1_802.
6 Installing NetWare Drivers 3 Reboot the server. The sample AUTOEXEC.NCF file in the following figure shows one group of three NICs and one group of two NICs. The primary NIC in slot 10001 is bound to two secondary NICs in slot 10002 and slot 10003. The primary NIC in slot 10004 is bound to the secondary NIC in slot 10005. load se load lbrsl ;Define Group 1 primary NIC slot-frame instances load 3c99x slot=10001 frame=ethernet_802.2 name=p1_802.
Maintaining Groups Server Feature Commands 3Com Advanced Server feature commands for NetWare can be used to create sophisticated configurations of groups and for troubleshooting. You can enter them at the NetWare command line or add them to the appropriate NCF file. The commands are summarized below. As shown in the examples, all commands are preceded by the keyword lbrsl. group This command creates groups from specified slot parameters for primary and secondary NICs.
6 Installing NetWare Drivers help This command displays the syntax for the 3Com Advanced Server server features commands. Syntax lbrsl help link timeout When a group is being created, the software waits the number of seconds specified by this command for the link/topology check to finish and then displays timeout information. Syntax lbrsl link timeout seconds where: seconds is the time in seconds. Example lbrsl link timeout 10 Default 5 probe interval This command sets the probe packet interval.
Maintaining Groups retry count This command sets the number of retries that the software attempts when a probe packet fails to appear at the receive end. After the retries, the software puts the board in Wait mode. If no argument is specified or the specified argument is invalid, the current value is displayed. Otherwise, the new value is displayed.
6 Installing NetWare Drivers wait timeout This command sets the timeout value, in seconds, that the software waits before marking a NIC that is in wait mode as failed (see retry count). If no argument is specified or if the specified argument is invalid, the current value is displayed. Otherwise, the new value is displayed. Syntax lbrsl wait timeout seconds where: seconds is any positive integer.
7 Configuring the NIC This chapter describes how to configure the NIC. NOTE: Before you change the NIC configuration settings, contact your system administrator. Default NIC Settings The table below lists the configuration settings for the NIC. The default setting is shown in uppercase in the Settings column. Option Description NetBoot ROM Provides the ability to boot a PC over the network. Enables or disables the Netboot ROM (if a boot ROM is installed on the NIC).
7 Configuring the NIC Option Description Media Type Determines the type of media your network is using. Settings ■ ■ Auto Select allows the NIC to automatically select the Media Type for you. AUTO SELECT ■ ■ If you set the NIC Duplex setting to Auto Select, the Media Type is automatically set to Auto Select.
Configuration Methods Configuration Methods The NIC can be configured using any of the methods listed in the table below. NOTE: This section describes how to configure the NIC using the 3Com NIC Diagnostics program for Windows. For instructions on using the other two methods, see the file or section mentioned in the table. Method Description Requirement(s) 3Com NIC Diagnostics program for Windows Configure the NIC locally using the 3Com NIC Diagnostics program for Windows: Windows 2000 Windows NT 4.
7 Configuring the NIC Changing General NIC Configuration Settings This section describes two NIC configuration methods. Depending on your PC operating system, you can use one of the following configuration programs: ■ 3Com NIC Diagnostics Program—for PCs running Windows 2000, Windows NT 4.0, Windows Me, Windows 98, or Windows 95. ■ 3Com Configuration and Diagnostics Program for DOS—for PCs running DOS and NetWare.
Configuring the Managed PC Boot Agent (MBA) Using the 3Com DOS Configuration Program This section describes NIC configuration for computers running DOS or NetWare. To run the DOS diagnostic program: 1 Copy 3c99xcfg.exe from the EtherCD to the root directory of a DOS-bootable diskette. NOTE: If you do not have a DOS-bootable diskette, see “Making a DOS-Bootable Diskette” on page 15 for instructions. 2 Boot to DOS using the DOS-bootable diskette. 3 Enter the following at the DOS prompt: a:\3c99xcfg.
7 Configuring the NIC 4 Click 3Com NIC Doctor. The 3Com NIC Diagnostics General screen appears. 5 Select the Configuration tab. The Configuration screen appears. 6 Under Network Parameter, select NetBoot ROM. 7 Open the Set Value list box and select Enabled to enable the boot ROM or Disabled to disable the boot ROM. 8 Click OK to save the setting and exit the program.
Disabling the 3Com Logo Non-BBS BIOS-Compatible PCs To enable a non-BBS BIOS-compatible PC to boot from the network using the MBA boot ROM: 1 Make sure that the NIC boot ROM setting is Enabled. See “Enabling or Disabling the Boot ROM Setting” on page 77 for instructions. 2 Change the MBA default boot setting from Local to Network. To change the default boot setting or any other MBA configurations, use the MBACFG utility or press Ctrl+Alt+B when the following message appears: Initializing MBA.
8 Troubleshooting the NIC This chapter describes procedures for locating problems you might have with the 3Com 10/100 PCI (3C990B) NIC. It explains how to: ■ Interpret the NIC LEDs. ■ Access 3Com support databases. ■ Troubleshoot NIC installation problems. ■ Troubleshoot NIC and network connection problems. ■ Troubleshoot Remote Wake-Up. ■ Remove the network driver.
8 Troubleshooting the NIC Viewing the NIC LEDs in the Diagnostics Program To view the LEDs in the 3Com NIC Diagnostics program: 1 Make sure that the NIC, the network driver, and the 3Com NIC Diagnostics program are installed. NOTE: For instructions on using the 3Com NIC Diagnostics program, see “Running NIC Diagnostics” on page 91. 2 Open the Windows Start menu. 3 Select Programs, and then 3Com NIC Utilities. 4 Click 3Com NIC Doctor.
Troubleshooting the NIC Installation Accessing Release Notes and Frequently Asked Questions To access release notes and frequently asked questions about the NIC: 1 Make sure that the NIC, its driver, and the 3Com NIC Diagnostics program are installed. See “Installing the 3Com NIC Diagnostics Program” on page 29 for instructions. 2 Open the Windows Start menu. 3 Select Programs, and then 3Com NIC Utilities. 4 Click 3Com NIC Doctor. The 3Com NIC Diagnostics General screen appears. 5 Click the Support tab.
8 Troubleshooting the NIC You can reinstall the 3Com NIC Diagnostics program after completing this procedure. See “Installing the 3Com NIC Diagnostics Program” on page 29 for instructions. 1 Insert the EtherCD in the CD-ROM drive. The EtherCD Welcome screen appears. 2 Click NIC Software. 3 Click Installation Utilities. 4 Click Undo Broken Installation and Uninstall. You are given the option to Proceed or go Back.
Troubleshooting Remote Wake-Up Tip Description (continued) Check the network connection ■ Inspect all cables and connections. Make sure that the cable complies with length and rating specifications described in “Installing and Connecting the NIC” on page 18. ■ Examine the cable for obvious signs of damage, wear, or crimping. Substitute a known working cable. Check the length and rating of the cable. Make sure that the cable complies with 10BASE-T or 100BASE-TX recommendations.
8 Troubleshooting the NIC 3 Check the computer BIOS. ■ Boot the computer and enter the BIOS. ■ For instructions on entering the BIOS, refer to the computer documentation or consult the computer vendor. ■ Locate the Wake-Up on LAN event setting. ■ Verify that the setting is enabled. 4 Check the Remote Wake-Up cable connection. If the computer complies with PCI 2.2, the Remote Wake-Up cable is not required. Remote Wake-Up is automatically enabled through the PCI bus.
Removing the Network Driver Troubleshooting Hubs A crossover cable can be used to identify the type of failure when hub performance or connectivity is in question. To use a crossover cable: 1 Connect a file server and a client PC back-to-back with a crossover cable to verify that the NIC and network operating system are properly configured. 2 To make a crossover cable, connect TD+ to RD+ and TD– to RD–. The cable performs the crossover that is usually performed by the hub.
8 Troubleshooting the NIC 4 Click Device Manager in the middle panel. The Device Manager screen appears. 5 Double-click Network Adapters. 6 Right-click the name of the NIC. 7 Select Uninstall on the pop-up menu. A warning message appears. 8 Click OK to confirm the driver removal. The network driver is removed. The Device Manager screen appears. NOTE: The Windows 2000 system does not allow you to uninstall the 3Com Advanced Server technology miniport using the Device Manager.
Removing 3Com DynamicAccess Advanced Server Features 6 Click OK to confirm the device removal. NOTE: Note that removing the network driver does not result in the removal of the diagnostics software. See “Removing the 3Com NIC Diagnostics Program” on page 95. You are prompted to restart the computer. If you are physically removing the NIC from the computer, click No. Do not restart the computer until you shut down the system, turn the power off, and remove the NIC from the computer.
8 Troubleshooting the NIC NetWare To remove 3Com DynamicAccess Advanced Server features: 1 Enter this command at the prompt: NetWare 4.11: load install NetWare 5.x: load nwconfig 2 In the Installation Options screen, select Product options. 3 In the Other Installation Actions screen, select View/Configure/Remove installed products. The Currently Installed Products screen appears, listing software products that are installed in the system.
9 Running NIC Diagnostics The 3Com 10/100 PCI (3C990B) NIC uses two types of NIC diagnostics programs: a Windows-based diagnostics program and a DOS-based diagnostics program. NOTE: Before starting any diagnostics program, close all running applications. Use the Windows-based 3Com NIC Diagnostics program if you are running any of the following operating systems: ■ Windows 2000 ■ Windows NT 4.
9 Running NIC Diagnostics 2 Boot to DOS using the DOS-bootable diskette. 3 Enter the following at the DOS prompt: a:\3c99xcfg.exe where a:\ is the drive containing the DOS-bootable diskette. For more information about the 3Com DOS Diagnostics program to configure the NIC, see “Using the 3Com DOS Configuration Program” on page 77.
Viewing the NIC LEDs in the 3Com Diagnostics Program Running the Network Test Run the Network Test to check the NIC connectivity to the network. To successfully pass the Network Connectivity test, at least one of the following conditions must be met: ■ A Windows client running on the same network. This client must have a successfully installed Windows diagnostics program that is currently not running. ■ A NetWare server running on the same network. ■ A DHCP server running on the same network.
9 Running NIC Diagnostics 4 Click 3Com NIC Doctor. The 3Com NIC Diagnostics General screen appears and displays following LEDs: Link—lights if there is a valid connection between the NIC and the network. Transmit—lights if the NIC is transmitting information. Receive—lights if the NIC is receiving information. NOTE: For instructions on interpreting the NIC LEDs, see “Interpreting the NIC LEDs” on page 81.
Removing the 3Com NIC Diagnostics Program Displaying Network Statistics When you drag the mouse pointer over the icon (but do not double-click the icon) a network statistics box appears, displaying the following information: Frames Sent and Received—A count of the number of frames (packets) sent and received through the NIC since the last time statistics were reset. Link Speed—The speed (10 Mbps or 100 Mbps) at which the NIC is connected to the network.
A Specifications and Cabling Requirements This appendix lists the specifications, standards conformance, cable requirements, and connector pin assignments for the 3Com 10/100 PCI NIC. 3C990B NIC Specifications The following table provides environmental, interface, and standards information for the 3Com 10/100 PCI NIC with 3XP processor (3C990B family). Hardware Memory 128 KB external RAM Bus interface PCI Local Bus Specification, Revision 2.
A Specifications and Cabling Requirements Standards Conformance Microsoft PC97 Microsoft PC98 Microsoft PC99 PCI 2.1 and 2.2 DMI 1.0 and 2.0 ACPI 1.0 SMBus 2.2 WBEM, CIM, WMI Cabling Requirements The cable, quality, distance, and connectors must comply with the Electronic Industries Association/Telecommunications Industries Association (EIA/TIA) 568 Commercial Building Wiring Standard and the Technical Services Bulletin TSB38 standards.
B Installing the 3Com DMI Agent This appendix explains how to install the 3Com Desktop Management Interface (DMI) Agent on your PC. The 3Com DMI Agent allows any DMI-compatible browser or network management application that supports DMI 2.0 to remotely manage and configure advanced features of a 3C990B NIC. NOTE: For detailed information about the 3Com DMI Agent, refer to the 3Com DMI Agent User Guide included with the 3Com DMI Agent software on the EtherCD.
B Installing the 3Com DMI Agent ■ Windows 2000, Windows NT 4.0, Windows Me, Windows 98, or Windows 95 using the appropriate Service Pack listed below: ■ Windows NT 4.0 Service Pack 4 ■ Windows 98 Retail Release ■ Windows 95 Retail Service Pack 1 or OEM Service Release (OSR2) Network Management Requirements The 3Com DMI Agent InstallShield Wizard checks for the presence of a DMI service provider on the computer you are configuring as a network management station.
Installing the 3Com DMI Agent 6 Follow the prompts on the screen. To verify successful installation, use a DMI-compatible browser or a network management application that supports DMI 2.0 or 2.0s to verify that the 3Com NIC is present. NOTE: If you have 3Com DynamicAccess Advanced Server features and a foreign (non-3Com) NIC installed, the foreign NIC is displayed as a 3Com NIC in the DMI browser. Refer to the 3Com DMI Agent User Guide or contact your system administrator for instructions.
C EtherCD Content and Navigation This appendix provides information about EtherCD content and navigation. If auto insert is enabled for your CD-ROM drive, the 3Com Welcome screen is displayed when you insert the EtherCD in your CD-ROM drive.
C EtherCD Content and Navigation Root Subdirectories List The following table lists and describes the root subdirectories included on the EtherCD that shipped with this product. Subdirectory Contains English In each language subdirectory files specific to that language. This subdirectory contains copies of Adobe Acrobat Reader (4.0 or 3.0), CMI Client installation files, the Disk Copy utility, and a PDF version of the user guide.
Text Files List Text Files List The following table lists the text files that are included in the Help directory on the 3Com EtherCD. File Name File Description client32.txt Contains NetWare 4.11 on Windows 95/98 client driver installation notes. license.txt Includes the 3C990B NIC software license agreement. netware.txt Explains how to install the ODI driver for the NetWare 4.1x and 5.x server.
D Installing a 3Com NIC While Installing the NOS Follow these instructions to install 3Com software while you are installing the network operating system. (This procedure is often called “performing a fresh installation.”) Windows Fresh Installation For installation requirements, see “Installation Requirements” on page 14. To display the Help system during the driver installation, click Help on any 3Com window. Windows NT For instructions, see the WINNT.TXT file in the HELP directory on the EtherCD.
D Installing a 3Com NIC While Installing the NOS 10 Enter the location of the driver on the 3Com EtherCD. For example: D:\nwserver 11 In the Driver Summary screen, select 3C99X.LAN and press Enter. Edit parameters as necessary. 12 From the Additional Driver Options menu, select Return to Driver Summary. 13 Remove the EtherCD from the CD-ROM drive. 14 Insert the NetWare CD in the CD-ROM drive. 15 From the Options menu, select Continue. The installation continues. In NetWare 5.
E Technical Support 3Com provides easy access to technical support information through a variety of services. This appendix describes these services. Information contained in this appendix is correct at time of publication. For the most recent information, 3Com recommends that you access the 3Com Corporation World Wide Web site.
E Technical Support Support from Your Network Supplier If you require additional assistance, contact your network supplier. Many suppliers are authorized 3Com service partners who are qualified to provide a variety of services, including network planning, installation, hardware maintenance, application training, and support services.
Support from 3Com Country Europe, Middle East and Africa From anywhere in these regions, call: Or access the following Internet site: Telephone Number 0870 24713901 http://www.3com.co.uk/support/emea.html #belgium Europe and South Africa From the following countries, you may use the toll-free numbers: Austria Belgium Denmark Finland France Germany Hungary Ireland Israel Italy Luxembourg Netherlands Norway Poland Portugal South Africa Spain Sweden Switzerland U.K.
E Technical Support Returning Products for Repair Before you send a product directly to 3Com for repair, you must first obtain an authorization number. Products sent to 3Com without authorization numbers will be returned to the sender unopened, at the sender’s expense.
Index Numerics 100BASE-TX cable requirements 17 Link LED 81 10BASE-T cable requirements 17 Link LED 81 168-bit encryption, see 3DES 3C99X.
Index removing a NIC from a group 50 removing the NIC from a group 50 window, defined 46 D data encryption, see encryption dedicated IP address 48 deleting or editing a VLAN, Windows 50 DES 34 Desktop Management Interface (DMI), overview 6 diagnostics program for DOS 75 Diagnostics program, starting 30 Diagnostics tab 92 diagnostics tests, running 92 diagnostics, offline 5 disabling encryption 41 disabling load balancing for a group, Windows 50 diskettes creating 15 making a DOS boot 15 obtaining 15 displ
Index NetWare NOS 107 NetWare, verifying 64 overview 13 Remote Wake-Up cable 19 requirements, hardware and software 14, 20 server features, NetWare 62 steps involved 13 Windows 2000 NOS 107 Windows NT NOS 107 installing drivers NetWare 55 Windows 2000 22 Windows 95 27 Windows 98 26 Windows Me 25 installing multiple NICs 31 integrated boot ROM 4 Intel LANDesk Client Manager 7 IP address changing 48 dedicated 48 IP and TCP checksum offload 5, 52 IPSec configuring in Windows 2000 38 defined 33 IPSec offload 5
Index IP and TCP checksum for Windows 2000 5, 52 IPSec for Windows 2000 5, 52 TCP segmentation for Windows 2000 5, 52 Windows 2000 networking and security tasks 5, 52 offloads configuring for a group of different NICs 54 disabling 53 enabling 53 enabling TCP/IP checksum for NetWare 65 support 45 online Help 82 online Knowledgebase 82 online technical services 109 OpenView Network Node Manager 7 P packet priority (802.
Index U W ungroup command 71 uninstalling DynamicAccess server features NetWare 90 Windows 2000 89, 90 Windows NT 89 network driver 87 unshielded twisted-pair (UTP) cable 17 updating network driver 31 NIC diagnostic program 31 upgrading Windows 95 to Windows 98 14 upgrading Windows 98 to Windows Me 15 URL 109 Utilities tab 92 wait tmo command 72 warning messages, sending to NetWare console 65 Windows adding NICs to a group 47 changing the primary NIC 50 creating a group 47 creating a VLAN 49 driver inst
Regulatory Compliance Information FCC Class B Statement This device complies with Part 15 of the FCC Rules. Operation is subject to the following two conditions: 1 This device may not cause harmful interference, and 2 This device must accept any interference received, including interference that may cause undesired operation.
Regulatory Compliance Information FCC Declaration of Conformity We declare under our sole responsibility that the Model: Description: 3C990B-TX-M 3Com 10/100 PCI Network Interface Card with 3XP Processor Client NIC for 3DES (168-bit) encryption and DES (56-bit) encryption 3C990BSVR 3Com Server 10/100 PCI Network Interface Card with 3XP Processor Server NIC for 3DES (168-bit) encryption and DES (56-bit) encryption to which this declaration relates, is in conformity with the following standards or othe