HomeConnectTM Cable Modem External with USB Getting Started Guide http://www.3com.com/ Part No.
3Com Corporation 3800 Golf Rd. Rolling Meadows, IL 60008 No part of this documentation may be reproduced in any form or by any means or used to make any derivative work (such as translation, transformation, or adaptation) without written permission from 3Com Corporation. 3Com Corporation reserves the right to revise this documentation and to make changes in content from time to time without obligation on the part of 3Com Corporation to provide notification of such revision or change.
CONTENTS 1 BEFORE YOU BEGIN Introduction 1 Cable Modem Features 1 Contacting Your Local Cable Service Provider Preparing Your Workspace 3 You Will Need These Items 4 Supplied 4 Also Needed 4 2 2 USB INSTALLATION Deciding Which Installation Process to Use 5 Using USB with the Windows 98 Operating System 5 Using the Cable Connections™ CD 12 Uninstalling the Cable Modem (Windows 98 Operating System Only) 12 Using USB with the Windows 2000 Operating System 13 Uninstalling the Cable Modem (Windows 2000 Operat
Connectors and Switches on the Back of the Cable Modem 41 5 VIEWING THE CABLE MODEM’S CONFIGURATION 6 SUPPORT RESOURCES Support Resources 47 World Wide Web 47 90-Day Free Installation Support 47 Technical Support Hotline 47 If You Are Still Having Problems 47 If You Need to Return the Modem to Us 48 7 REGULATORY INFORMATION AND LIMITED WARRANTY Manufacturers Declaration of Conformity 49 FCC Declaration of Conformity 49 FCC Class B Statement 49 FCC Notice: Radio and Television Interference 50 UL/c UL Lis
BEFORE YOU BEGIN 1 Introduction You have just purchased a modem featuring a pioneering new technology, making Internet access possible at speeds previously only imagined. This external cable modem is one part of a comprehensive communications system that utilizes the cable television network to deliver high-speed data to your computer. Data is requested and sent over the cable television network at burst rates of up to 38 megabits per second (Mbps)*.
2 CHAPTER 1: BEFORE YOU BEGIN hard disk space; (2) applications running simultaneously with the modem which use varying amounts of your computer’s resources; (3) the capacity of the Internet service you order from your provider; (4) the level of network traffic, which varies depending on when and where you go online. Contacting Your Local Cable Service Provider In order to use your cable modem, you need to set up an Internet access account with your local cable service provider.
Preparing Your Workspace 3 be able to communicate with your cable service provider’s Internet access service. You should immediately consult your cable service provider and place of purchase to determine the proper 3Com® cable modem to use. You can also visit the following URL for additional information: http://www.3com.com/cablemodem ■ ■ You have a cable line near your PC and it has been prepared for cable modem service.
4 CHAPTER 1: BEFORE YOU BEGIN CAUTION: Your cable service provider will provide a cable connection. Do not attempt any rewiring without first contacting your cable service provider.
2 USB INSTALLATION Deciding Which Installation Process to Use The 3Com® HomeConnect™ cable modem allows you to connect to the Internet using either the USB port or the Ethernet port. Be sure to follow the instructions provided for the port that you want to use. Using the USB port to connect to the Internet allows you to install the cable modem more quickly and easily than connecting to the Internet using the Ethernet port, because you do not need to install a network interface card (NIC).
6 CHAPTER 2: USB INSTALLATION center of the cable line when you connect it to the cable modem. After hand-tightening the CATV cable connector, use the adjustable wrench to firmly tighten it. Be careful not to over-tighten the connector or you may damage either the connector or the cable modem. If you plan to have the cable line connected to a television as well as the cable modem, you will need a cable line splitter (not included).
Using USB with the Windows 98 Operating System 4 Click Next. 5 Select Search for the best driver for your device. (Recommended) and click Next.
8 CHAPTER 2: USB INSTALLATION 6 Check the CD-ROM drive check box and click Next to search for the necessary driver files. 7 If Windows finds an updated driver, select The updated driver (Recommended) 3Com HomeConnect Cable Modem and click Next.
Using USB with the Windows 98 Operating System 9 8 Click Next. The computer automatically copies the necessary driver files from the CD. The computer finishes copying the driver files and prompts you to insert the Windows 98 CD into the CD-ROM drive. 9 Insert the Windows 98 CD and click OK. If the Copying Files dialog box appears, make sure that you have inserted the correct CD and that you have pointed it to the correct path.
10 CHAPTER 2: USB INSTALLATION The computer automatically copies the necessary system files. 10 Click Finish after the computer has copied the necessary files.
Using USB with the Windows 98 Operating System 11 The System Settings Change dialog box opens. 11 Click Yes to restart the computer. 12 Verify that the cable modem is operating properly. When the modem is operating properly, the cable modem Link Status and Power LEDs are lighted a solid green. If you are powering up the cable modem for the first time, allow 15 minutes for this process to finish.
12 CHAPTER 2: USB INSTALLATION Modem Operation” for a more in-depth description of the front panel LED indicators. Using the Cable Connections™ CD The included Cable Connections CD contains the software drivers necessary for installation using the USB port and valuable free software products. After you have completed the entire USB installation process for the cable modem, you can install the Cable Connections CD. Installing the Cable Connections CD gives you access to the free software products.
Using USB with the Windows 2000 Operating System 13 accidentally select the wrong software and click Add/Remove, the Windows deletes the software and you will have to re-install it. 6 Click Add/Remove. The system removes the 3Com HomeConnect Cable Modem software. 7 The system prompts you to restart the computer. Click Yes. 8 Click Windows Start, then click Shut Down. 9 Select Restart the Computer and click Yes to restart the computer.
14 CHAPTER 2: USB INSTALLATION 3 The Found New Hardware Wizard screen appears. Insert the included Cable Connections CD into the CD-ROM drive and Click Next. 4 Select Search for a suitable driver for my device (recommended) and click Next.
Using USB with the Windows 2000 Operating System 15 5 Check the CD-ROM drives check box and click Next to search for the necessary driver files. 6 The Found New Hardware Wizard displays the search results. Click Next to install the driver files for the cable modem.
16 CHAPTER 2: USB INSTALLATION 7 The Digital Signature Not Found screen appears. Click Yes to continue the driver installation. 8 The Found New Hardware Wizard completes the driver installation. Click Finish to close the Found New Hardware Wizard. 9 Verify that the cable modem is operating properly. When the modem is operating properly, the cable modem Link Status and Power LEDs are lighted solid green.
Using USB with the Windows 2000 Operating System 17 If you are powering up the cable modem for the first time, allow 15 minutes for this process to finish. See “Cable Modem Operation” for a more in-depth description of the front panel LED indicators. Uninstalling the Cable Modem (Windows 2000 Operating System Only) To uninstall the cable modem while using Windows 2000: 1 Close all open applications. 2 Click Windows Start. 3 Select Settings. 4 Click Control Panel. 5 Double-click Add/Remove Programs.
18 CHAPTER 2: USB INSTALLATION 11 Verify that you have selected 3Com HomeConnect Cable Modem then select Yes, I want to uninstall this device. 12 Click Next. 13 Click Finish when Windows informs you that it has successfully uninstalled the selected device. Troubleshooting the USB Installation I cannot access my e-mail or Internet service. ■ Check all connections. Make sure the cable line is securely connected to the cable jack on the back of the modem.
Troubleshooting the USB Installation ■ ■ ■ ■ ■ 19 Power off the computer. Power cycle the computer by unplugging the computer from its electrical outlet and then plugging it back into the outlet. Then try reconnecting to your cable service provider. Call your cable service provider to verify that their service is two-way. This modem is designed for use with two-way cable plants.
20 CHAPTER 2: USB INSTALLATION c In the Ethernet Adapter Information group area, click the drop down arrow and select 3Com HomeConnect Cable Modem. d Click Release. The IP address changes to 0.0.0.0. e Click Renew to refresh the IP address. The refreshed address may or may not be the same as the original IP address. To release and renew the IP address for the Windows 2000 operating system: a Click Windows Start and select Programs, then Accessories. b Click Command Prompt.
Troubleshooting the USB Installation 21 d After the system releases the IP address, at the command prompt type ipconfig /renew and press the Enter key (notice that there is a space between ipconfig and /renew). e Exit the Command Prompt screen to return to the Windows desktop. The Cable Status LED never stops blinking. The signal from your cable service provider’s equipment may be too weak or the cable line may not be properly attached to the modem.
22 CHAPTER 2: USB INSTALLATION All of the LEDs on the front of my modem look right, but I still cannot access the Internet. ■ If the Power, Link Status LEDs, and Data Rate LEDs are lighted, the cable modem is operating properly. Try shutting down the computer and then turning it back on. This will cause the computer to re-establish communications with your cable service provider’s computer.
Troubleshooting the USB Installation 23
24 CHAPTER 2: USB INSTALLATION
3 ETHERNET INSTALLATION Deciding Which Installation Process to Use The 3Com® HomeConnect™ cable modem allows you to connect to the Internet using either the USB port or the Ethernet port. Be sure to follow the instructions provided for the port that you want to use. Using the USB port to connect to the Internet allows you to install the cable modem more quickly and easily than connecting to the Internet using the Ethernet port, because you do not need to install a network interface card (NIC).
26 CHAPTER 3: ETHERNET INSTALLATION Configuring the TCP/IP Protocol on a Windows PC You need to have an Ethernet network interface card (NIC) and the TCP/IP communications protocol installed on your system before you install the cable modem. Follow these instructions to verify that TCP/IP is installed and configured correctly. For the Windows 95/98 Operating System 1 Right-click the Network Neighborhood icon on the Windows desktop and click Properties. 2 A list of installed network components appears.
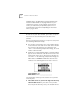
Setting Up the Computer to Use an Ethernet Connection 27 For the Windows 2000 Operating System 1 Right-click the My Network Places icon on the Windows desktop. 2 Right-click on Local Area Connection and click Properties. 3 A list of installed network components appears. Look for an entry named TCP/IP. Windows 2000 TCP/IP binding If a similar entry is present, you can now connect the cable modem. Go to “Connecting the Cable Modem” for the instructions.
28 CHAPTER 3: ETHERNET INSTALLATION 2 Click Edit on the Finder (gray bar) at the top of the screen. Scroll down to the bottom of the menu and click User Mode. 3 Click Advanced then click OK. 4 Click the Up/Down selector arrows (to the right of Configure) and select Using DHCP Server.
Setting Up the Computer to Use an Ethernet Connection 29 5 Click Options. Then click Active. In some cases, the Load only when needed check box does not appear. If it is visible, click the box. A check mark appears in the box. 6 Click OK. 7 Verify that the Use 802.3 box is unchecked (circled in the following image). If there is a check mark in the box, click it to remove the check mark. Then click Info in the lower left corner.
30 CHAPTER 3: ETHERNET INSTALLATION 8 Verify that there is a hardware address listed in the TCP/IP Info screen. If there is, click OK and close the TCP/IP Control Panel (click File and scroll down to click Close). If there is no hardware address listed in the TCP/IP Info screen, you must reset the computer’s Parameter RAM. To do this, power off the Macintosh. With the power off, simultaneously press and hold down the Command (Apple), Option, P, and R keys on the keyboard.
Setting Up the Computer to Use an Ethernet Connection 31 in the preceding instructions. If the computer still does not have a Hardware Address, please contact your local Apple authorized dealer or Apple support. Connecting the Cable Modem 1 Power off the computer. 2 Use the illustration on page 35 as a guide to make the following connections: ■ Connect the cable line to the cable modem’s CATV cable connector.
32 CHAPTER 3: ETHERNET INSTALLATION Modem Operation” for a more in-depth description of the front panel LED indicators. 4 Power on the computer. When installation is complete, your setup should resemble the diagram on page 35. Using the Cable Connections CD You do not need to install the included Cable Connections CD to use the Ethernet port on the cable modem. You will, however, want to discover the valuable free software products included on the CD.
Troubleshooting the Ethernet Installation ■ ■ ■ 33 cables so that the cable modem is connected directly to the cable wall jack. Then try reconnecting to your cable service provider. Check for a resource conflict. To do this, right-click the My Computer icon on the Windows desktop. Then click Properties. Click the Device Manager tab and look for a yellow exclamation point or red X over the NIC in the Network adapters field. If you see either, you have an IRQ conflict.
34 CHAPTER 3: ETHERNET INSTALLATION e Click Renew to refresh the IP address. The refreshed address may or may not be the same as the original IP address. To release and renew the IP address for the Windows 2000 operating system: a Click Windows Start and select Programs, then Accessories. b Click Command Prompt. c At the command prompt (C:\), type ipconfig /release and press the Enter key (notice that there is a space between ipconfig and /release).
Troubleshooting the Ethernet Installation 35 e Exit the Command Prompt screen to return to the Windows desktop. The Cable Status LED never stops blinking. The signal from your cable service provider’s equipment may be too weak or the cable line may not be properly attached to the modem. If the cable line is properly connected to the modem, call your cable service provider to verify whether or not a weak signal is the problem. All four of the LEDs on the front of my cable modem are lighted and blinking.
36 CHAPTER 3: ETHERNET INSTALLATION The power on my modem goes on and off sporadically. The Link Status light never stops blinking. You may be using the wrong power adapter. Check that the power adapter you are using is the one that came with the cable modem.
Troubleshooting the Ethernet Installation 37
38 CHAPTER 3: ETHERNET INSTALLATION
CABLE MODEM OPERATION 4 When the cable modem is properly installed and the power adapter is connected to AC power, the modem automatically scans for the active cable modem channel from your cable service provider’s server. When the front panel LEDs indicate the modem is connected to the server, all you have to do is launch your Internet browser or e-mail software, and you are ready to work online.
40 CHAPTER 4: CABLE MODEM OPERATION ■ Data Rate - Indicates data is being transmitted over the cable network. This LED should blink when data is being transmitted over the RF interface and at a rate dependent on data throughput. ■ Multifunction - Your cable service provider determines the function of this LED. Depending on how your cable service provider uses this LED, there may or may not be an audio notification associated with this LED.
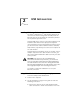
Connectors and Switches on the Back of the Cable Modem 41 Connectors and Switches on the Back of the Cable Modem 1 Power Jack: This is where you plug in the power adapter that came with the cable modem. Remember to use only the power adapter that came with the cable modem. Other power adapters might have voltages that are not correct for your particular cable modem. Using a power adapter with the wrong voltage can damage the cable modem.
42 CHAPTER 4: CABLE MODEM OPERATION
5 VIEWING THE CABLE MODEM’S CONFIGURATION You can use the 3Com Web-based configuration software to configure the cable modem. NOTE: If you do not currently have a Web browser installed on the computer, you can find the two most popular browsers, Netscape Navigator and Microsoft’s Internet Explorer, on the Cable Connections CD included with the modem. Open your Web browser and point it to the following URL: http://149.112.50.65 The Configuration Screens menu appears.
44 CHAPTER 5: VIEWING THE CABLE MODEM’S CONFIGURATION ■ Session Status: Click this option to launch the Cable Modem Status screen. This screen displays both the cable modem status and operational parameters. The status describes the downstream and upstream characteristics. The valid range of the Transmit Power Level is 8 dbmV to 58 dbmV. The value range of the Upstream Channel ID is from 1 to 255. ■ Operation Configuration: Click this option to launch the Cable Modem Operation Configuration screen.
45 ■ URL Change: Click this option to launch the Change Cable Modem URL screen. On this screen, you can change the URL that you use to access all of these configuration screens. After you change the URL setting, type it into your browser’s URL window to access these configuration screens. ■ Volume Control: Click this option to launch the Cable Modem Sound Control screen. This screen allows you to adjust the volume of the sounds emitted by the cable modem.
46 CHAPTER 5: VIEWING THE CABLE MODEM’S CONFIGURATION
6 SUPPORT RESOURCES Support Resources If you need help operating the cable modem, see “Troubleshooting the USB Installation” and “Troubleshooting the Ethernet Installation.” If you need further help, refer to the following resources. World Wide Web Visit our online support home page: http://consumer.3com.com/cable/ You can send a message to technical support by clicking Contact Us in the “Site Tools” section of this Web site.
48 CHAPTER 6: SUPPORT RESOURCES ■ If your dealer cannot help you, contact 3Com Technical Support. When you call, specify the modem's serial number (found on the modem and on the outside of the box) and the software being used. If You Need to Return the Modem to Us Contact 3Com Customer Support. If the support representative determines that you need to return the modem, you will receive a USO (User Service Order) number. You must have a USO number before returning the modem to us.
REGULATORY INFORMATION AND LIMITED WARRANTY 7 Manufacturers Declaration of Conformity FCC Declaration of Conformity We declare under our sole responsibility that the Description: 3Com HomeConnect Cable Modem External with USB To which this declaration relates, is in conformity with the following standards or other normative documents: ■ ■ ANSI C63.4-1992 Methods of Measurement Federal Communications Commission 47 CFR Part 15, subpart B 15.107 (e) Class B Conducted Limits 15.
50 CHAPTER 7: REGULATORY INFORMATION AND LIMITED WARRANTY FCC Notice: Radio and Television Interference Note: This equipment has been tested and found to comply with the limits for a Class B digital device, pursuant to Part 15 of the FCC Rules. These limits are designed to provide reasonable protection against harmful interference in a residential installation.
UL/c UL Listing: 51 UL/c UL Listing: This Information Technology Equipment is UL and C-UL listed for both the US and Canadian markets respectively. Canadian Notice: This digital apparatus does not exceed the Class B limits for radio noise emissions from digital apparatus set out in the interference-causing equipment standard entitled Digital Apparatus, ICES-003 of Industry Canada.
52 CHAPTER 7: REGULATORY INFORMATION AND LIMITED WARRANTY INTERNATIONAL DECLARATION OF CONFORMITY Electromagnetic Compatibility This equipment was tested and found to conform to the Council Directive 89/336/EEC for electromagnetic compatibility. Conformity with this Directive is based upon compliance with the following harmonized standards: CISPR 22:1997 Limits and Methods of Measurements of Radio Interference. This equipment conforms to the Class B limits.
Special Notes: 53 Special Notes: Japan Performance Specifications This equipment has a bit-error rate (BER) less than 10-8 when the signal-to-noise ratio (SNR) is 23.5 dB or greater when operating in 64 QAM mode, and when the SNR is 30.0 dB or greater when operating in 256 QAM mode. Export Notices ■ Unlawful to export from the US or Canada without an approved US Department of Commerce export license.
54 CHAPTER 7: REGULATORY INFORMATION AND LIMITED WARRANTY outside of the U.S. or Canada. You agree that you will not export/re-export, either physically or electronically, the encryption software or accompanying documentation (or copies thereof) or any products utilizing the encryption software or such documentation without obtaining written authorization from the U.S. Department of Commerce.
3Com Corporation Limited Warranty 55 published specifications. Customer assumes responsibility for the selection of the appropriate applications program and associated reference materials.
56 CHAPTER 7: REGULATORY INFORMATION AND LIMITED WARRANTY April 1, 2000, or ninety (90) days after purchase of the product from 3Com or its authorized reseller, 3Com shall, at its option and expense, provide a software update which would effect the proper performance of such product, repair such product, deliver to Customer an equivalent product to replace such product, or if none of the foregoing is feasible, refund to Customer the purchase price paid for such product.
3Com Corporation Limited Warranty 57 WARRANTIES EXCLUSIVE IF A 3COM PRODUCT DOES NOT OPERATE AS WARRANTED ABOVE, CUSTOMER'S SOLE REMEDY FOR BREACH OF THAT WARRANTY SHALL BE REPAIR, REPLACEMENT, OR REFUND OF THE PURCHASE PRICE PAID, AT 3COM'S OPTION.
58 CHAPTER 7: REGULATORY INFORMATION AND LIMITED WARRANTY PRODUCTS, EVEN IF 3COM OR ITS AUTHORIZED RESELLER HAS BEEN ADVISED OF THE POSSIBILITY OF SUCH DAMAGES, AND LIMITS ITS LIABILITY TO REPAIR, REPLACEMENT, OR REFUND OF THE PURCHASE PRICE PAID, AT 3COM'S OPTION. THIS DISCLAIMER OF LIABILITY FOR DAMAGES WILL NOT BE AFFECTED IF ANY REMEDY PROVIDED HEREIN SHALL FAIL OF ITS ESSENTIAL PURPOSE.