
User guide


2. Use the Magic CubeX Glue to coat the Print Pad with a layer
of glue. Turn the CubeX Glue upside down so the glue ows
to the tip. (Fig. 43)
3. Remove print pad from print plate and apply three layers of
Magic CubeX Glue using a slow circular motion. If the print is
large, ensure that the glue covers the Print Pad surface where
the creation will print. If it is a smaller print, cover the middle
of Print Pad with the glue. Install print pad on to print plate.
(Fig. 44)
16
CREATE A TEST PRINT
PLEASE ENSURE YOU HAVE FOLLOWED ALL CUBEX SETUP INSTRUCTIONS BEFORE STARTING A
PRINT. FAILURE TO DO SO MAY DAMAGE THE CUBEX.
Print a test print using one of the creation les that you downloaded from Cubify.com to ensure that your printer is
functioning properly.
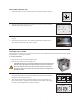
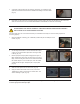
1. Insert the USB stick containing your .CUBEX le (creation les) into the USB port on the
CubeX. (Fig. 42)
Fig. 41
!
Fig. 42
Fig. 43
Fig. 44
Fig. 45 Fig. 46
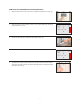
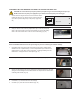
3. A message “Install Thumbscrew into Cartridge” will appear. If a cartridge is being
replaced, ensure that the thumbscrew is installed into cartridge if it is to be stored.
(Fig. 41)
4. Press “Next” on the touchscreen. A message “Would you like to load a new Print Jet” will appear on the touchscreen.
Select the check box and refer to “INSTALLING MATERIAL CARTRIDGE” to install the new cartridge.
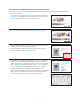
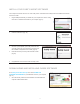
4. Select the ‘Print’ option from the main menu. (Fig. 45)
5. Using the arrows at the bottom of the screen, scroll to the
.CUBEX le you wish to print and tap on the le name. Your
creation will begin to print. (Fig. 46)
NOTE: After your creation is printed, please refer to “Finishing Your Creation” in the guide, for instructions on how
to remove your print from the print pad.