Exclusively Distributed by 3M ESPE Celara Denture System ™ Celara Denture System Training Manual
Table of Contents Introduction: The Celara Denture System......................................................................................3 Replacing a Patient’s Existing Denture.....................................................................................3–15 “Why Start from Scratch?”.....................................................................................................3 Making “Excellent” Final Impressions...........................................................................
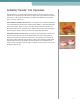
Introduction Congratulations, and welcome to the Celara™ Denture System! The Celara System was developed to help dental professionals to successfully treat the expanding population of denture patients. Traditional denture techniques are lengthy, cumbersome and often lead to unpredictable results. In addition, over the last several years, denture training is being de-emphasized in dental schools.
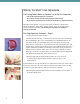
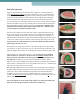
Making “Excellent” Final Impressions The Existing Denture Makes an Excellent Tray for the Final Impression • It has borders which the patient is accustomed to • The occlusion can help orient the tray back into the mouth correctly • The old denture usually fits loosely, creating an even thickness of impression material With today’s modern materials, it is not necessary to grind out undercuts or drill relief holes through the old denture.
When fabricating upper and lower dentures, it is best to make the impressions simultaneously with the teeth lightly in occlusion. Always insert the maxillary denture first, making sure it is completely seated, and do an open-mouth border molding technique for the posterior border— picking up the hannular notches and posterior tuberosity areas. Simply have the patient open very wide and move the jaw side to side to establish the thickness of the posterior tuberosity areas.
Suggestions When Using the Dentures as Trays for Final Impressions Single Stage Impression Technique When using a one-stage impression technique — using a single phase impression material — use a MEDIUM BODY VISCOSITY. Light body can result in too thin a layer of impression material and undercuts can be an issue. Heavy body impression material can compress the tissues resulting in excessive future adjustments.
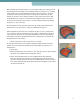
Evaluating “Records” from Impressions After the impressions are carefully removed from the mouth and all excess impression material removed from the facial surfaces of the dentures, the impressions are placed back into the mouth and all aspects of the records are observed such as midline, vertical dimension, tooth positions, planes of occlusion, esthetics, etc. WHEN SIGNIGICANT CHANGES ARE NECESSARY— a wax pattern can be made in the dental office or in the dental laboratory.
Troubleshooting — Using Existing Denture as Tray for Final Impression • Avoid using Rapid Repair Tabs over entire borders of denture. – This is usually not necessary, and you will likely throw off the occlusion. • Avoid using only light body or extra-light body impression material in a single stage technique without relieving denture off tissues with Rapid Repair Tabs — 3 small pea-sized pieces, softened, acting as a tripod similar to tissue stops in a custom tray.
Boxing the Impression Empty the entire package of the pre-measured Celara™ alginate into a clean mixing bowl and use the lower half of the container full of water for the measure of water. It is important that you use the amount of alginate in the package with a full lower container of water. This consistency produces a loose mix of alginate. Too thick a mix will result in the alginate rolling at the denture borders exposing too much of the denture flange. This can result in the denture locking on the cast.
Pouring the Cast Place the upper half of the container over the lower half — making sure the serrated top is punched out. The upper and lower halves will seat, but will not snap or lock. Make sure the upper and lower ledges are seated correctly. Empty a complete package of Celara™ stone in a clean mixing bowl and add a full measuring cup (provided) of water. The proper amount of water for stone powder is 43 mL.
Opening Container After the stone completely sets (5–7 minutes), carefully open the container, using a laboratory knife. Typically the denture will remain on the stone cast in the upper half of the container and an alginate impression of the external surface of the denture will be in the lower half of the container. Occasionally, the denture will come off the cast and be in the alginate — this is not a problem. Simply remove the denture from the alginate.
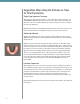
Fabricating the Wax Pattern in the Dental Office A wax injector enables the ability to fabricate the wax pattern in the dental office and modify this custom occlusal rim and take all the patient records on the same appointment as the impression. (Figure 14). Figure 14 The optimum injecting temperature is 170–190°F. This temperature is typically reached by setting the injector at the Medium/High position. It will take about 20 minutes to reach this temperature from a "solid" state.
Injecting the Wax Pattern At the proper temperature, the wax will flow easily and be clear. If it is cloudy, it is too cool. If you hear it cracking in the pot, it is too hot. When using the wax injector for the first time, melt 8–10 Celara™ Wax rods in the injector, and bleed the air out of the pump by pumping 4 or 5 times until wax begins to come out. Going forward, add 1–2 rods of wax per arch being fabricated. Lubricate the stone cast with an appropriate model release agent.
The wax pattern is ideal for obtaining records, as it was injected directly over the cast, and therefore will fit (Figure 19). If the dentist desires, a post dam can be cut into the cast prior to injecting. The wax pattern is also familiar and comfortable for the patient and provides a reference to communicate to the laboratory, from which any and all changes are made predictably. The Celara wax pattern is handled just like a wax rim.
Sending the Container to the Laboratory to Have the Laboratory Inject the Wax Pattern In the event that only minor changes are necessary, the Celara™ Denture System enables the dentist to send the container with the cast and the alginate to the laboratory for fabrication of the wax pattern. Make sure to seal the wax pattern to the cast when sending the Celara case to the laboratory. Also include the alginate container in a tightly sealed bag. This gives the laboratory the option to re-inject if they elect.
Customer Care Center: 1-800-634-2249 www.3MESPE.com Dental Products 3M Center Building 275-2SE-03 St. Paul, MN 55144-1000 U.S.A. 1-800-634-2249 Please recycle. Printed in U.S.A. © 3M 2011. All rights reserved. 44-0007-4983-6-A 3M and ESPE are trademarks of 3M or 3M ESPE AG. Celara is a trademark of Dentovations, Inc. 49836 Manufactured by Dentovations Inc. Boston, MA 02109 U.S.A.