
User Manual
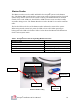
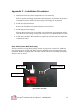
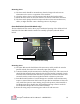
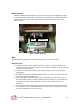
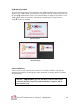
Table Of Contents

Octopus Installation & User Manual – APPENDIX D
D1
Appendix D – Managing iButton Keys
The Octopus system uses 3 distinct iButton keys: a blue iButton key, a black iButton
key, and a white iButton key. The system is shipped with 2 blue iButton keys configured
to work only with the supplied MCU. The blue iButton keys are used for turning the
system on and off.
The black and white iButton keys are used only by 3SI service personnel for key
management and replacement. Up to 3 blue keys can be stored / registered in the MCU.
Multiple MCUs can also have the same keys stored to them if required.
If no keys are stored to an MCU, any blue key will work.
Training Blue iButton Keys
To train up to 3 blue iButton keys to an MCU, follow these directions:
1. Place the black iButton key on the iButton reader of the MCU to open the session
and train new keys. The LED on the iButton reader should begin blinking green.
2. Place the black iButton key on the iButton reader. The LED on the iButton reader
should go to solid green.
3. Place at least 2 and up to 3 blue iButton keys on the reader, one at a time.
4. The LED should flash once for 1 key, twice for 2 keys and solid green for 3 keys.
5. To end the session, place the black iButton key on the iButton reader, after at least
2 blue keys have been trained.
6. If the storage is successful, the LED will alternate red/green for approximately 2
seconds, then go off.
7. If the storage is unsuccessful, the unit will timeout and blink the LED red for 2
seconds.
Erasing Blue iButton Keys
To erase stored blue iButton keys:
1. Place the black iButton key on the iButton reader to open the session and erase
keys. The LED on the iButton reader should begin blinking green.
2. Place the white iButton key on the iButton reader to which the blue keys are
trained.
3. If the erase is successful, the LED will alternate red/green for approximately 2
seconds before extinguishing.
4. If the storage is unsuccessful, the unit will timeout and blink the LED red for 2
seconds.