INSTALLATION GUIDE GUIDE D’INSTALLATION GUÍA PARA INSTALACIÓN FREE-STANDING BATHTUB BAIGNOIRE AUTOPORTANTE BAÑERA INDEPENDIENTE A&E Bath & Shower Bain et Douche
TO GET STARTED POUR COMMENCER PARA COMENZAR Before you begin, read all instructions carefully. Avant de débuter les travaux, lire attentivement les instructions d’installation. Leer todas las instrucciones cuidadosamente antes de empezar. Consult your local building codes to ensure that installation complies with the standards in your area. Inspect the unit carefully to ensure there is no damage or defects. If such is the case, contact your distributor.
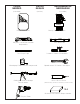
TOOLS NEEDED OUTILS REQUIS HERRAMIENTAS NECESARIAS (not included) (non inclus) (no incluidas) METRIC METRIQUE Drill bits | Forets | Brocas Utility knife | Couteau à lame rétractable Navaja multiusos Allen key | Clé allen | Llave allen Level | Niveau | Nivel Pencil | Crayon | Lápiz Screwdriver | Tournevis | Desatornillador Measuring tape | Ruban à mesurer | Cinta para medir Adjustable wrench | Clé à molette | Llave inglesa Caulking gun | Pistolet de calfeutrage Pistola de calafateo Silicone |
INSTALLATION INSTALLATION INSTALACIÓN 1 Determine the location of the bathtub. Take into account the position for the faucets, drain, and other components. Déterminer l’emplacement de la baignoire en tenant compte de l’emplacement de la robinetterie et des différents composants. Determinar la ubicación de la bañera tomando en consideración la posición del grifo, el desagüe y los otros componentes a tomar en consideración. 2 Remove the bathtub from the package (fig.1).
3 Turn the bathtub over and adjust the leveling pads so that they provide a gap of 5mm (1/4’’) from the floor (fig. 2). Retourner la baignoire et ajuster les patins de nivellement afin d’avoir un dégagement d’au moins 5mm (1/4’’) avec le plancher (fig.2). Leveling pad Patins de nivellement Almohadillas de nivelación Voltear la bañera y ajustar las almohadillas de nivelación para que proporcionen un espacio libre de 5 mm (1/4’’) desde el piso (fig.2). 5mm (1/4") 5mm (1/4") Fig.
Place the bathtub in position and proceed to make it level (fig. 4). Make sure there is a gap of at least 3mm (1/8’’) between the skirt and the floor. The skirt should not rest on the floor (fig. 5). 5 Placer la baignoire dans son emplacement et procéder à la mise-à-niveau (fig.4).S’assurer d’avoir un dégagement d’au moins 3mm (1/8’’) entre le plancher et la jupe de la baignoire. La jupe ne doit en aucun cas s’appuyer sur le plancher (fig.5).
Place the wood blocks along the outline of the inside skirt made in the previous step (fig. 8). Placer les blocs de bois en suivant le tracé du rebord de la jupe fait à l’étape précédente (fig. 8). Colocar los bloques de madera a lo largo del contorno de la falda interna que se hizo en el paso anterior (fig.8). Fasten wood blocks to the floor (fig. 9). They will immobilize the bathtub. Make sure the blocks do not put pressure on the skirt (fig. 10). Fixer des blocs de bois au plancher (fig.
Assure that the drainpipe is properly attached to the bathtub. S’assurer que le tuyau d’évacuation est bien fixer au drain de la baignoire. Asegurarse de que la tubería de desagüe se fijó adecuadamente a la bañera. Slowly drop the bathtub in place (fig. 11). Descendre lentement la baignoire en place. (fig. 11) Bajar lentamente la bañera en su lugar (fig.11). Vérifier de nouveau la mise-à-niveau de la baignoire. (fig.
After completing the installation, verify that there is no plastic film on the bathtub. Remove any remaining plastic film. Une fois la baignoire en place, retirer la pellicule de plastique protectrice s’il y en a. Apply a continuous bead of silicone at the junction of the bathtub skirt and the floor (fig. 14). Appliquer un filet de silicone à la jonction de la jupe et du plancher. (fig.14) Let the silicone dry for at least 24 hours before using your bathtub.
MAINTENANCE ENTRETIEN Daily care Entretien quotidien Cuidado diario Wipe with a soft towel after each use. Use mild dishwashing detergent to keep surfaces bright and clean. Rinse well and dry with a clean cloth. Après chaque utilisation, essuyer avec un chiffon doux. Limpiar con una toalla suave después de cada uso. Utilizar detergente suave para lavar trastes para mantener las superficies limpias y brillantes. Enjuagar bien y secar con un paño limpio.
WARRANTY A&E Shower and Baths Inc. (hereafter “A&E”) offers the following limited warranty on each of its products. This warranty extends only to the original owner/end-user for personal household use. A&E warrants their products to be free from defects in workmanship and materials under normal use and service for a period of one (1) year from the original date of purchase by the owner/end-user.
A&E Bath & Shower Bain et Douche 9181 Boivin LaSalle, Québec Canada H8R 2E8 Tel.: (514) 367-1741 1-800-667-9506 #373 (Toll Free/Sans frais) Fax: (514) 363-4753 @: service@aebath.com www.aebath.