
Installation manual


15
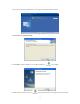
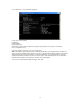
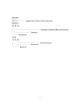
screen similar to the one below will be displayed.
5. Take note of the following:
i) IP Address
ii) Subnet Mask
iii) Default Gateway
iv) DNS Servers (Both numbers with the first being the primary DNS server and the second being
the secondary DNS server)
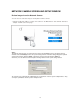
6. Enter the details noted in step 5 into the relevant fields.
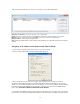
Note: The default IP address of the camera is 192.168.168.100This can be changed to any IP address on
your IP range. For example if the IP address of your PC is 192.198.1.52 then the IP address of your camera
should be unique and on the same subnet, i.e. 192.198.1.X where X is any number between 1 and 255
except 52. Ensure the IP address you chose is not the same as other network devices on your network as
this will result in conflict and may cause the device to not to work properly.
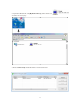
7. Once you’ve entered all the details click “Apply” then “Exit”.