SIP IP PHONE RELEASE # 1.
Aastra Telecom will not accept liability for any damages and/or long distance charges, which result from unauthorized and/or unlawful use. While every effort has been made to ensure accuracy, Aastra Telecom will not be liable for technical or editorial errors or omissions contained within this documentation. The information contained in this documentation is subject to change without notice. Copyright 2005 Aastra Telecom. www.aastra.com All Rights Reserved.
Table of Contents Table of Contents Overview .......................................1 General Requirements ................1 About this Guide..........................1 Methods of Installation................2 480i IP Phone Set up ...................2 The 480i’s Options List ..............3 Administrator Level Options ......3 Network: ....................................3 SIP Settings:..............................4 Phone Status: ............................4 The Aastra 480i Web Client ......
Overview Overview About this Guide This SIP 480i IP phone Administration Guide provides information on the basic network setup that is required for the SIP 480i IP phone. It also includes details on the functioning and conÞguration of the 480i phone. This guide targets network administrators, system administrators, developers and partners who need to understand how to install the 480i on a SIP network.
480i IP Phone Set up When the 480i is Þrst plugged in or reset it will automatically download any Þrmware updates for the phone. The binary and conÞguration Þles that are required for the 480i are: “Þrmware.st”, “aastra.cfg” and “.cfg”. The settings of the 480i phone, as well as the softkeys and the line keys, can be conÞgured through the conÞguration Þles. Please refer to Appendix A for details on the parameters that can be set for the 480i phone.
480i IP Phone Set up The 480i’s Options List Network: 1. Press the £button on the phone to enter the options list If DHCP is enabled, all the Network settings are automatically conÞgured. The 480i’s Þrmware allows the network settings to be manually entered, if for any reason the phone cannot populate any of the settings with DHCP enabled. If DHCP is disabled the following network settings can be conÞgured manually: 2. Use the r and s to scroll through the list of options 3.
Phone Status: If you have a proxy server or have a SIP registrar present at a different location than the PBX server, the following settings may need to be changed: The following options display the phone’s status or allow you to power cycle the phone or reset the phone to its factory default settings. 1. Proxy IP This is the IP address of the proxy server. 2. Proxy Port This is the SIP proxy server’s port number. By default this number is set to 5060. 3.
480i IP Phone Set up The Aastra 480i Web Client To access the Aastra 480i Web Client, open your web browser (supports Internet Explorer and Gecko engine based browsers like Firefox, Mozilla or Netscape) and enter the phone’s IP address into the address Þeld, starting with the web preÞx “http://”. In the side menu of the Aastra 480i Web Client, there are three main categories: Status, User and Admin.
The Network and SIP options within the 480i phone can be conÞgured from the phone or from the Aastra 480i Web Client web interface. Administrator level options are password protected in both the phone and the web interface. Network DHCP automatically sends the IP address, Subnet Mask and Gateway network (also DNS and FTP Server) information to the 480i phone during initialization when the phone is Þrst powered up or reset. By default, the DHCP setting is enabled.
480i IP Phone Configuration From the Web Client: SIP settings 1. Click on the Network sub-category under the ADMIN main category. The 480i uses the information in the SIP settings to register at the IP PBX. To conÞgure the SIP settings: 2. Enter the administrator’s user name and password (the default user name is “admin” and password is “22222”). 3. In the web page that has just opened enter the IP address of the phone, the Subnet Mask and the Gateway IP address in their corresponding Þelds.
Setting Parameters through Configuration Files The following are the parameters that can be used to conÞgure the 480i phone through the conÞguration Þles – aastra.cfg and .cfg. The "aastra.cfg" Þle conÞgures the settings server wide, while the conÞgures only the phones with the MAC address for which the Þle is named. The settings in the "aastra.cfg" Þle will be overriden by the settings which also appear in the cfg Þle.
Setting Parameters – Network Settings Setting Parameters – Network Settings The following section contains the parameters to conÞgure the network settings. Parameter – dhcp ConÞgurable through the 480i's Options List, the Aastra 480i web client or through the conÞguration Þles Description Enabling DHCP will populate most of the network information. The DHCP server should serve the network information that the 480i requires.
ConÞgurable through the 480i's Options List, the Aastra 480i web client or through the conÞguration Þles Description The IP address of the network's gateway or the router IP address Format IP address Default Value 1.0.0.1 Range Not Applicable Example default gateway: 192.168.0.1 Parameter – dns1 ConÞgurable through the 480i's Options List, the Aastra 480i web client or through the conÞguration Þles Description Primary domain name servers’ IP address.
Setting Parameters – Time Server Settings Parameter – tftp server ConÞgurable through the 480i's Options List, the Aastra 480i web client or through the conÞguration Þles Description The TFTP server’s IP address. If DHCP is enabled and the DHCP server provides the information, this Þeld is automatically populated. Use this parameter to change the IP address of the TFTP server. This will become effective after this conÞguration Þle has been downloaded into the phone.
ConÞgurable through the 480i's Options List or the conÞguration Þles. Description The primary time server's IP address. If the time server is enabled, the value for time server1 will be used to request the time from. Format IP address Default Value 0.0.0.0 Range Not Applicable Example time server1: 192.168.0.5 Parameter – time server2 ConÞgurable through the conÞguration Þles only Description The secondary time server's IP address.
Setting Parameters – Time Server Settings Parameter – time format ConÞgurable through the 480i's Options List or the conÞguration Þles Description This parameter changes the time to 12 hour or 24 hour format. Use “0” for the 12 hour format and “1” for the 24 hour format.
The following parameters are the settings speciÞc to SIP authentication. Parameter – sip proxy ip ConÞgurable through the 480i's Options List, the Aastra 480i web client or through the conÞguration Þles Description A SIP proxy is a server that makes and forwards requests generated by the 480i to the targeted user. This parameter’s IP address will be the address of the proxy server that the 480i will use to send all SIP requests to Format IP address or fully qualiÞed host name Default Value 0.0.0.
Setting Parameters – SIP Authentication Parameter – sip registrar port ConÞgurable through the 480i's Options List, the Aastra 480i web client or through the conÞguration Þles Description The registrar's port number Format Integer Default Value 5060 Range Not Applicable Example registrar port: 5060 Parameter – sip digit timeout ConÞgurable through the conÞguration Þles only Description Represents the time in seconds to conÞgure the timeout between consecutive key presses.
ConÞgurable only through the conÞguration Þles Description This session timer parameter is the time in seconds that the 480i uses to send periodic re-INVITE requests to keep a session alive. The proxy uses these re-INVITE requests to maintain the status' of the connected sessions. Format Integer Default Value 0 Range Not Applicable Example sip session timer: 30 Parameter – sip lineN auth name ConÞgurable through the conÞguration Þles.
Setting Parameters – SIP Authentication Parameter – sip lineN user name ConÞgurable through the conÞguration Þles. ConÞgurations done through the 480i's Options List or the Aastra 480i web client affect the Þrst line only. Description The value for this parameter is used in the name Þeld of the SIP URI for the 480i phone and for registering the 480i at the registrar.
This section contains the softkey parameters that can be conÞgured on the 480i phone. There are eighteen softkeys that can be conÞgured. These parameters can be conÞgured either from the Aastra.cfg or the .cfg Þle. Softkeys can be conÞgured as either speed dials or as additional call/line appearances. Parameter – softkeyN type ConÞgurable through the conÞguration Þles only Description The type of soft key that will be conÞgured to.
Setting Parameters – Softkey Settings Parameter – softkeyN value ConÞgurable through the conÞguration Þles only Description If the soft key is of type, line then value should be the line number that this soft key represents. If the softkey is of type, speeddial then value should be the number to speed dial. Format Text Default Value Not Applicable Range line or speeddial.
The 480i phone uses a TFTP server to download conÞguration Þles and Þrmware. The TFTP server should be ready and be able to accept connections anonymously (without a requirement for a user name and password). See Appendix B for information on setting up a TFTP server. You can download the Þrmware stored on the TFTP server in one of two ways, by either resetting the phone through the options list of the 480i or by activating a Þrmware download through the web client.
Firmware Upgrade Figure 1 Figure 2 21 Model 480i SIP Admin Guide
This section describes solutions to some most commonly occurring problems. Why does my phone display “Application missing”? If you have experienced networking issues while the phone was downloading the application from the TFTP server, it is possible that the phone can no longer retrieve the required Þrmware Þle.
Troubleshooting How to set the 480i phone to factory default? From the 480i phone: 1. Press the £ button to enter the Options List. 2. Select option 10. Phone Status to enter the Phone Status options list. 3. Select option 4. Factory Default. 4. Enter the administrator password and press the Enter softkey. 5. Press the Default softkey to restore the 480i to the factory’s default settings. 6. Press the Cancel softkey to cancel the operation.
The following conÞguration illustrates how to create a user with an extension to make and receive calls using the Asterisk as the PBX. This conÞguration is deÞned in the “sip.conf” Þle present along with the other conÞguration Þles that are created when Asterisk is installed. Usually, the conÞguration Þles can be found at the “/etc/asterisk” directory. ;This is used in the “extensions.conf” Þle to identify this ;physical phone when issuing Dial commands. [phone1] ;The type to use for the 480i is “friend”.
Appendix A: Configuring the 480i at the Asterisk After this is deÞned in the “sip.conf” Þle, some information has to be entered in the “extensions.conf” Þle present in the same directory as the “sip.conf” Þle. The following deÞnition in the Þle under the [sip]section/context completes deÞning the extension for the 480i phone. exten => 1234,1,Dial(SIP/phone1,20) This deÞnition completes conÞguring the 480i phone at the IP PBX system.
This section consists of the sample conÞguration Þles necessary to conÞgure the 480i phones. The general format is similar to conÞguration Þles used by several Unix-based programs. Any text following a number sign (#) on a line is considered to be a comment, unless the # is contained within double-quotes. Currently, Boolean Þelds use 0 for false and 1 for true. aastra.cfg # # Generic SIP Sample ConÞguration File ====================================== # Date: December 16th, 04 # File: Sample “aastra.
Appendix B: Sample Configuration Files # # DHCP Setting ============ dhcp: 1 # DHCP enabled. # DHCP: # 0 = false, means DHCP is disabled. # 1 = true, means DHCP is enabled. # Notes: If DHCP is disabled, the following network settings will # have to be conÞgured manually either through the conÞguration # Þles, the Options List in the phone, or the Web Client: IP # Address (of the phone), Subnet Mask, Gateway, DNS, and TFTP # Server.
SIP registrar and Proxy Server Settings ======================================= #sip proxy ip: # IP of proxy server. #sip proxy port: 5060 # 5060 is set by default. #sip registrar ip: # IP of registrar. #sip registrar port: 5060 # 5060 is set by default. sip digit time out: 4 # dialing behaviour #---------------------------------------------------------------------# # Time Server Settings ==================== #time server disabled: 1 #time server1: #time server2: #time server3: # Time server disabled.
Appendix B: Sample Configuration Files # # Softkey Settings ================ # # # Softkeys can be set either server wide or unique to each phone. Setting softkeys as line/call appearances should be done in the “.cfg” Þle, since these are unique to each phone. # # # # # # # # # Notes: There are a maximum of 18 softkeys that can be conÞgured on the 480i phone. These can be set up through either of the 2 conÞguration Þles, depending on whether this is to be server wide (“aastra.
softkey4 type: speeddial softkey4 label: “CallFwdOff” softkey4 value: *73 softkey5 type: speeddial softkey5 label: “DND On” softkey5 value: *78 softkey6 type: speeddial softkey6 label: “DND Off” softkey6 value: *79 softkey7 type: speeddial softkey7 label: “CLIDBlock” softkey7 value: *67 softkey8 type: speeddial softkey8 label: “Cancel CW” softkey8 value: *70 softkey9 type: speeddial softkey9 label: “Blacklist” softkey9 value: *60 # Example Softkey Line/Call Appearances # ====================================
Appendix B: Sample Configuration Files .cfg # # Generic SIP Sample ConÞguration File ===================================== # Date: December 16th, 04 # File: Sample “.cfg” Þle # Comments: # This Þle contains sample conÞgurations for the “.cfg” # Þle. Please rename this Þle with the MAC address (with the # dashes removed) of the speciÞc 480i device that you want to # conÞgure, for example “00085d03059f.cfg”. # # Settings that have already appeared in “aastra.
#ip: Network Settings ================ # This value is unique to each phone on a server # and should be set in the “.cfg” Þle if # setting this manually. #---------------------------------------------------------------------# # Line Settings ============= # # Lines should be set in the .cfg Þle since these settings are unique to each phone. # # # # Notes: Setting parameters for lines 1 - 4 conÞgures the 4 line/call appearance hard keys on the 480i.
Appendix B: Sample Configuration Files # Explanation of Settings with Line 1 as Example # ============================================== #sip line1 auth name: # SIP Registrar request authorization name. #sip line1 password: # SIP Registrar request passcode. #sip line1 user name: # This parameter value is used by the 480i # in the From header Þeld of the outgoing # SIP packet. It may be replaced by your # registrar. #sip line1 display name: # Name used for SIP messages.
#sip line8 auth name: authname #sip line8 password: password #sip line8 user name: 5551231234 #sip line8 display name: Joe Smith #sip line8 screen name: Joe Smith #sip line9 auth name: authname #sip line9 password: password #sip line9 user name: 5551231234 #sip line9 display name: Joe Smith #sip line9 screen name: Joe Smith #---------------------------------------------------------------------# # Softkey Settings ================ # # # Softkeys can be set either server wide or unique to each phone.
Appendix B: Sample Configuration Files # Softkey Speed Dials # =================== # # For the default softkey speed dials, please refer to the sample “aastra.cfg” Þle.
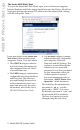
There are a number of TFTP servers available. PumpKIN is one of such TFTP servers. Use the keywords “pumpkin TFTP server” on Google and you should get the web site where you can download the software from. Installing PumpKIN is straightforward. To conÞgure the directory from where you would be serving the Þles, click on the Options button on PumpKIN’s main window as shown in the following Þgure. It is important to select the “Give all Þles” radio button under the “Read Request Behavior” category.
Limited Warranty Limited Warranty Aastra Telecom warrants this product against defects and malfunctions during a one (1) year period from the date of original purchase. If there is a defect or malfunction, Aastra Telecom shall, at its option, and as the exclusive remedy, either repair or replace the telephone set at no charge, if returned within the warranty period. If replacement parts are used in making repairs, these parts may be refurbished, or may contain refurbished materials.
If you’ve read this owner’s manual and consulted the Troubleshooting section and still have problems, please visit our website at www.aastra.com or call 1-800-574-1611 for technical assistance. © Aastra Telecom Inc.