480i SIP IP PHONE Release 1.
Aastra Telecom will not accept liability for any damages and/or long distance charges, which result from unauthorized and/or unlawful use. While every effort has been made to ensure accuracy, Aastra Telecom will not be liable for technical or editorial errors or omissions contained within this documentation. The information contained in this documentation is subject to change without notice. Copyright 2005 Aastra Telecom. www.aastra.com All Rights Reserved.
SOFTWARE LICENSE AGREEMENT Aastra Telecom Inc., hereinafter known as "Seller", grants to Customer a personal, worldwide, non-transferable, non-sublicenseable and non-exclusive, restricted use license to use Software in object form solely with the Equipment for which the Software was intended. This Product may integrate programs, licensed to Aastra by third party Suppliers, for distribution under the terms of this agreement.
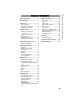
About this Guide ..........................1 Additional Features....................27 Documentation.............................1 Star Codes ................................27 Services ....................................27 Callers List ................................28 Missed Calls Indicator ...............29 Directory List .............................30 Voicemail...................................31 Suppressing DTMF Playback....33 Ring Tones and Tone Sets........34 Stuttered Dial Tone ..............
About this Guide About this Guide This guide explains how to use the basic features of your new 480i phone. Not all features listed are available by default. Contact your system or network administrator to find out which features and services are available to you on your system. Your system administrator has the ability to customize some features on this phone.
• Category 5/5e straight through cabling • Power over Ethernet (PoE) power supply (optional accessory – necessary only if no inline power is provided on the network). 2 480i IP Phone User Guide Installation and Setup If your system administrator has not already setup your 480i phone, please refer to the Aastra 480i Installation Guide for basic installation and physical setup of the 480i.
Getting Started Getting Started When You First Plug in Your Phone The 480i automatically begins the startup sequence as soon as it is connected. The phone goes through this process the first time you plug in your phone and every time you restart your phone. The first screen to display is the Aastra splash screen. Updating Your Phone Startup Screens After the phone displays the Aastra splash screen, or after downloading an update (if an update was available), the phone displays the Idle State screen.
The "Network Disconnected" prompt appears on the display and the telephone status light turns on when the phone is not properly connected to the network. The phone also displays the default time and date of 12:00am Jan 1st, 2005 or the equivalent. Check that the cables are tightly connected to the phone and to the wall jack. The phone should automatically detect when it is reconnected and will display the "Network Connected" prompt for a few seconds.
Customizing Your Phone Customizing Your Phone Setting Your Options Pressing the % key gives you a list of configuration options. You can also change these options in your phone through the Aastra Web UI. Refer to the Aastra 480i Installation Guide for information on less advanced configuration options. Note: Some options should only be set up or changed by a network or system administrator. Please contact your system or network administrator before adjusting any administrator level options.
Operation The Operation section provides the following options: Aastra Web UI - User Password - Allows you to change user password - Softkeys and XML - Allows you to set up to 20 softkeys for a specific function (none, line, do not disturb (DND), speeddial, busy lamp field (BLF), BLF list, XML, flash, park, pickup, or empty. - Directory - Allows you to copy the Callers List and Directory List from your IP phone to your PC. - Reset - Allows you to restart the IP phone when required.
Using the 480i Phone Using the 480i Phone Hard keys There are Hard keys on your phone, such as Hold z, Redial v, Xfer , Icom and Conf that are configured for the call handling features. These keys are static and cannot be reprogrammed or changed. They are located in two different areas on the phone. Note: Your system administrator can configure outgoing Intercom calls using the Icom button. The Redial and Conf keys can also be set as speeddial keys. Contact your system administrator for more information.
The Idle State menu appears when your phone is not in use. Your system administrator can set these softkeys using the configuration files or the administrative options in the Aastra Web UI. For more information on idle state softkey configuration, contact your system administrator.
Using the 480i Phone Softkeys Your 480i has 6 softkey access buttons, 3 on either side of the phone’s display. The softkey menus will change depending on the phone’s state, displaying relevant softkeys only.
You can customize the softkeys on your 480i phone to function as line/ call appearance softkeys. These line/call appearance softkeys function in a similar manner to the 4 line/call appearance hard keys and lights on your phone. For details on the line/call appearance hard keys and lights, please refer to the section "Multiple Line and Call Appearances" on page 7 of this manual. Lines/call appearance softkeys appear on the phone’s display as shown in the following image.
Using the 480i Phone appearances that can be set up is 8 or 9 (4 line/call appearance as hard keys and 4 or 5 as softkeys). If all line/call appearances have been set up for the same number, a total of 9 lines can be configured. If all line/call appearances have been set up between two different numbers, a total of 8 lines can be configured. This means that when all line/call appearances are in use, 1 call is connected while the rest are on hold.
On the 480i, the busy and idle indicators show on the IP phone screen display next to the softkey programmed for BLF functionality. When the monitored user is idle, an icon with the handset on-hook shows next to the BLF softkey. When the monitored user is on an active call, a small telephone icon is shown with the handset offhook. Note: You can also use the BLF configured softkey to dial out. Contact your system administrator for more information about this feature.
Using the 480i Phone services. The phone performs an HTTP GET on the URI created by your system administrator. You can set the following parameters for object requests: • xml application URI • xml application title The xml application URI is the application you are loading into the IP phone. You must get this URI from your system administrator. The xml application title is the name of the XML application that displays on the Services menu in the IP Phone UI (as option #4).
Connected State The connected state screen will appear when you are talking to someone on the phone. Connected state functions are available as softkeys on the connected state screen, as well as hard keys on the phone. These softkeys and hard keys allow you to handle calls, such as transferring, conferencing, and placing calls on hold.
Making Calls Making Calls Depending upon how you have set the Live DialPad option in your phone, your phone will either dial the digits as soon as they are pressed or collect the digits on the screen before dialing. See the section “Customizing your phone” in the Aastra 480i Installation Guide for more information on how to configure the Live DialPad option.
The 480i accepts headsets through the modular RJ22 jack on the back of the phone. Contact your telephone equipment retailer or distributor to purchase a compatible headset. Customers should read and observe all safety recommendations contained in headset operating guides when using any headset. Advanced Volume Controls for the Headset Mic On the 480i, there are 3 options for the headset microphone volume. To change this volume: 1. Press % to enter the Options List. 2.
Making Calls Using the Icom Key IP Phone UI To intercom another extension on the system: 1. Press the ]. 2.Enter the extension number of the person you wish to intercom or the BLF softkey for that extension. 3.After a beep tone, your phone will automatically connect with the remote extension and you can speak through its speaker. 4.To cancel intercom, press y or hang up. 5.
Press the v button to automatically dial the most recently dialed number you were connected to that was dialed from the phone. Note: Your system administrator can set your redial key to speedial a specific number. Contact your system administrator for more information. Mute Press the a button to mute handset, headset or handsfree. The speaker light will flash slowly and the text “Mute” will appear on the screen. You will still be able to hear the caller, but they will not hear you.
Handling Calls Handling Calls Automatic Hold When you are connected to a call, you can use the hard keys on the phone to transfer, conference or place a call on hold. When juggling multiple calls, you do not have to press the hold button to go from one call to the next. The phone will automatically put your current call on hold when you press a new line/call appearance button. Placing a Call on Hold When you place a call on hold, only your phone can retrieve the call. To place a call on hold: 1.
IP Phone UI To transfer a call to another extension: 1. Connect to the call you wish to transfer (if not already connected). 2. Press the . button. 3. Enter the extension number of the person you wish to transfer the call to. The 480i phone supports up to three parties (including yourself) in a conference call. This is also known as a 3 Way call. Note: Your system administrator can set your conference key to speeddial a specific number. Contact your system administrator for more information.
Handling Calls 5. If you do not wish to add the new party to the conference, press the Nbutton while connected to this new call. This disconnects the new party, leaving the original call on hold. To go back to the original call, press the line/call appearance button for this call. 6. If you wish to add the new party to the conference, press the = button again. Jan 01 10:10am 01:33 L1 Conference > 1202 Michelle LeBlanc Drop Next 7.
Setting Call Forwarding The call forwarding feature on the IP phone allows incoming calls to be forwarded to another destination. The phone sends the SIP message to the SIP proxy, which then forwards the call to the assigned destination. Use the following procedure to configure phone-wide call forwarding. Call forwarding is disabled by default. You can enable call forwarding on a global or per-line basis.
Handling Calls Note: To disable call forwarding in the Aastra Web UI, set the mode to OFF and remove the phone number in the "Number" field. 3. In the "Number" field, enter the call forward number for which you want your calls to be call forwarded. 4. In the "Number of Rings" field, enter the number of rings you want to set before the call is forwarded. Valid values are 1 to 9. 5. Click to save the Call Forward settings. The changes are dynamic and are immediately applied to the phone.
Park/Pickup Call Server Configuration Values Server Park Values* Pickup Values* Aasterisk 700 700 Sylantro *98 *99 BroadWorks *68 *88 callpark pickup ININ PBX *Leave "value" fields blank to disable the park and pickup feature. Note: For values to enter in this field, see the table "Park/Pickup Call Configuring Park /Pickup using Server Configuration Values" on Static Configuration page 24.
Handling Calls Park/Pickup Programmable Configuration The programmable method of configuration creates park and pickup softkeys or programmable keys that you can configure on the IP phones.
6. In the "Line" field, select a line for which to apply the Park configuration. 7. Pick a softkey to configure for Picking up a call. 8. In the "Label" field, enter a label for the Pickup softkey. 9. In the "Value" field, enter the approriate value based on the server in your network. Note: For values to enter in this field, see the table "Park/Pickup Call Server Configuration Values" on page 24. 10.Click changes. to save your 11.Click on Operation->Reset. 12.
Additional Features Additional Features Star Codes All of the main call handling and extension management features for your system can be set up as speed dials on softkeys on your phone. Contact your system administrator for more information. If these have not been set up, you can dial any star code commands on the 480i phone the same way you would on a regular telephone. Services The services key on the 480i accesses enhanced features and services provided by third parties.
The IP phone has a "Callers List" feature that store the name, phone number, and incremental calls, for each call received by the phone. You can view, scroll, and delete line items in the Callers List from the IP phone UI. You can also directly dial from a displayed line item in the Callers List. You can download the Callers List to your PC for viewing using the Aastra Web UI. When you download the Callers List, the phone stores the callerlist.csv file to your computer in comma-separated value (CSV) format.
Additional Features Downloading the Callers List Missed Calls Indicator Use the following procedure to download the Callers List using the Aastra Web UI. The IP phone has a "missed calls" indicator that increments the number of missed calls to the phone. This feature is accessible from the IP phone UI only. Aastra Web UI 1. Click on Operation->Directory. 2. In the Callers List field, click on . A File Download message displays. 3. Click OK. 4.
Directory List Limitations The IP phones have a "Directory List" feature that allows you to store frequently used numbers on the phone. You can also dial directly from a directory entry. The Directory feature also includes a quick-search feature that allows you to enter the first letter that corresponds to a name in the Directory to find specific line items. The phone displays the first name with this letter.
Additional Features Using the Directory List Use the following procedures to access the Directory List. IP Phone UI 1. Press x on the phone to display the Services menu. or Press the r key to enter the Directory List directly. (skip to step 3) 2. From the Services menu, select "Directory List". 3. Use the r and s to scroll through the line items in the Directory List. 4. To delete all entries in the Directory list, press the DeleteList softkey at the "Directory List" header.
IP Phone UI 1. Press x on the phone to display the Services menu. 2. Select "Voicemail". 3. Use the r and s to scroll through the line items in the Voicemail list. 4. When you have selected a line item, press the d/f handsfree key, 4 Scroll Right key, or press a line softkey to make an outgoing call using the voicemail access phone number associated with the line for which the voicemail account is registered.
Additional Features Suppressing DTMF Playback A feature on the IP phones allows you to enable or disable the suppression of DTMF playback when a number is dialed from the softkeys. When suppression of DTMF playback is disabled, and you press a softkey, the IP phone dials the stored number and displays each digit as dialed in the LCD window.
Ring Tone Sets You can configure ring tones and ring tone sets on the IP phones. In addition to ring tones, you can configure ring tone sets on a global-basis on the IP phone. Ring tone sets consist of tones customized for a specific country. The ring tone sets you can configure on the IP phones are: Ring Tones There are several distinct ring tones a user can select from to set on the IP phones. You can enable/ disable these ring tones on a global basis or on a per-line basis.
Additional Features Configuring Ring Tones and Tone Sets Use the following procedures to configure ring tones and tone sets on the IP phone. Aastra Web UI 1. Click on Basic Settings-> Preferences. IP Phone UI (global configuration only) 1. Press % on the phone to enter the Options List. 2. Select Tones. 3. Select Set Ring Tone. For global configuration: 4. Select the type of ring tone (Tone 1 through Tone 5, or Silent). 2. In the "Ring Tones" section, select a country from the "Tone Set" field. 3.
Call Waiting Tone You can enable or disable the playing of a stuttered dial tone when there is a message waiting on the IP phone. You can enable or disable the playing of a call waiting tone when a caller is on an active call and a new call comes into the phone. You can configure this feature using the Aastra Web UI. You can configure this feature using the Aastra Web UI.
Language Language Using the IP phone UI, you can set the phones to use a specific language to display. When you set the language to use on the phone, all of the display screens (menus, services, options, etc.) display in that language. Valid languages for the IP phones include English, French, Spanish, German, and Italian. Default is English. Setting Language You set the language on the IP phone using the Options key on the IP phone. Use the following procedures to configure the language for the IP phone.
Why doesn’t my phone ring? Why is my display blank? Check the ring volume on your phone. It may be turned down or turned off. To adjust the ringer volume setting, press the volume button when the phone is on-hook and idle. For more information, refer to the “Adjusting Volume section” in the Aastra 480i Installation Guide provided with your phone. Ensure that power is being provided to your phone.
Troubleshooting Solutions How do I change my User Password? You can change the user password from the IP phone UI or the Aastra Web UI. IP Phone UI 1. Press % on the phone to enter the Options List. 2. Select User Password. 3. Enter the current user password. 4. Enter the new user password. 5. Re-enter the new user password. 6. Press Enter to save the new password. A message, "Password Changed" displays on the screen.
Aastra Web UI 1. Click on Operation->Reset. 2. Click . 3. Click OK at the confirmation prompt.
Limited Warranty Limited Warranty Aastra Telecom warrants this product against defects and malfunctions during a one (1) year period from the date of original purchase. If there is a defect or malfunction, Aastra Telecom shall, at its option, and as the exclusive remedy, either repair or replace the telephone set at no charge, if returned within the warranty period. If replacement parts are used in making repairs, these parts may be refurbished, or may contain refurbished materials.
In North America, contact our service information number: 1-800574-1611. Outside North America, contact your sales representative. Note: Repairs to this product may be made only by the manufacturer and its authorized agents, or by others who are legally authorized. This restriction applies during and after the warranty period. Unauthorized repair will void the warranty. 42 480i IP Phone User Guide Limited Warranty shipping charges.
Index Index Numerics 480i additional features of 27 connected state 14 customizing 5 features of 1 finding IP address for 5 hard keys 7 idle state 8 line settings 7 making calls 15 requirements of 1 restarting 4, 39 softkeys 9 star codes for 27 using 7 A Aastra Web UI accessing 6 basic settings 6 operation description status 6 about this guide 1 6 B bad encryped file 39 C call forwarding 22 configuring 22 call waiting tone 36 callers list downloading to phone 29 overview 28 using on phone 28 calls ans
P Why does my phone display the "No Service" message? 39 Why doesn’t my phone ring? parked calls/pick up parked calls about parked calls 23 configuring 24 using on IP phone 26 38 Why is my display blank? 38 Why is my handset not working? 38 Why is my speakerphone not working? 38 Why is the light not coming on with a new Voice Mail Message? 38 R redial 18 redial key 18 requirements 1 restarting the IP phone 39 restarting the phone 4 restarting, IP phone 39 ring tone sets 34 ring tones 34 S services 27
If you’ve read this owner’s manual and consulted the Troubleshooting section and still have problems, please visit our website at www.aastra.com or call 1-800-574-1611 for technical assistance. © Aastra Telecom Inc.