22” DECK LAWN MOWER 2 1 C U T T I N G PAT H GASOLINE POWERED AAVIX LAWN MOWERS OWNER’S MANUAL AGT1321S Read this manual carefully. Learn how to operate and maintain your product properly to avoid injury and product damage. You are responsible for operating the product properly & safely. WARNING: FOR SAFE OPERATION, READ OWNER’S MANUAL PRIOR TO USE.
CONTENTS Introduction..............................................................................................................2 Safety warnings.......................................................................................................3 Product description................................................................................................11 Technical data.......................................................................................................13 Set up...............
SAFETY WARNINGS 1. This product is not intended for use by persons (including children) with reduced physical, sensory or mental capabilities. IMPORTANT READ THIS MANUAL CAREFULLY BEFORE USE. KEEP FOR FUTURE REFERENCE. Preparation 1. While mowing, always wear substantial footwear and long trousers. Do not operate the product when barefoot or wearing open sandals. 2. Thoroughly inspect the area where the product is to be used and remove all objects which can be thrown by the product. 3.
Operation 1. Do not operate the engine in a confined space where dangerous carbon monoxide fumes can collect. 2. Mow only in daylight or in good artificial light. 3. Avoid operating the product in wet grass, where feasible. 4. Always be sure of your footing on slopes. 5. Walk, never run. 6. Mow across the face of slopes, never up and down. 7. Exercise extreme caution when changing direction on slopes. 8. Do not mow excessively steep slopes. 9.
20. Never touch the exhaust, exhaust guard or cooling fins when the engine is hot. 21. Never carelessly touch the mower, you can burn yourself. While the product is in operation or shortly thereafter, its parts such as the exhaust pipe, engine, and other surfaces are extremely hot! Pay attention to the markings on the product. 22. Make sure that the air intake of the combustion engine is clear. Keep the air intake free of dust, dirt particles, gases and fumes.
Fuel Handling 1. Always turn the mower off and let it cool down before refuelling it. Gas is highly flammable. Never smoke when you are refuelling the mower. Do not refuel the mower, if there is an open fire in the vicinity! 2. Always use suitable aids such as funnels to refuel. Do not spill any fuel on the mower or its exhaust system. There is a risk of ignition. However, if fuel should be spilled, then you must remove it carefully from all parts of the product.
3. Use correct application tools for the product and ensure they are good condition. 4. Keep a tight grip on the handles when in use. 5. Maintain this product in accordance with these instructions and keep it well lubricated (where appropriate). No Your Mower Familiarise yourself with the use of this product by means of this instruction manual. Learn your mowers safety instructions and warning symbols to prevent risk of injuries and hazards. 1. Always be alert when using this mower.
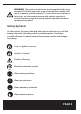
WARNING! This product produces an electromagnetic field during operation! This field may under some circumstances interfere with active or passive medical implants! To reduce the risk of serious or fatal injury, we recommend persons with medical implants to consult their doctor and the medical implant manufacturer before operating this product! Safety Symbols On the product, the rating label and within these instructions you will find among others the following symbols and abbreviations.
Always wear protective shoes. Wear tight-fitted protective clothing. Do not expose to rain or wet conditions. Open flames in the work area, around the product and in the vicinity of flammable materials are prohibited! Do not smoke around the mower and in the vicinity of flammable materials! Risk of fire or flammable materials. Hot surface, do not touch. High temperatures on the mowers surfaces and structural parts could cause burns, if they are touched.
Turn the mower OFF and disconnect the spark plug before assembly, cleaning, adjustments, maintenance, storage and transportation. Mow across the face of slopes, never up and down. Inspect the area where the mower is to be used and remove all objects which can be thrown by the mower. If objects are hidden while operating stop the engine and remove the object.
PRODUCT DESCRIPTION PAGE 11
Product Description 1. Handle 16. Muffler 2. Brake Bar 17. Oil Tank Cap 3. Brake Wire 18. Recoil StartHandle 4. Upper Handle Bar 19. Handle Support 5. Locking Knobs (Left/Right) 20. Height Adjustment Lever 6. Lower Handle Bar 21. Rear Deflector Guard 7. Brake Wire Clip 22. Nylon Grass Catcher 8. Mounting Set (X 2) A. Knob B. Bolt 23. Pull Start Rope Guide 9. Fuel Tank Cap 24. Oil Drain Screw 10. Air Vents 25. Blade 11. Air Filter 26. Locking Flange 12. Spark Plug Connector 27.
SPECIFICATIONS General Fuel Tank Capacity: 0.26 Gallons/1.0 L Gasoline Type: Unleaded Engine Oil Capacity: 0.55 L Engine Oil Type: 4-Stroke Engine Oil Cutting Width: 21inch Cutting Height: 8 Positions 1.25” to 3.75” Grass Catcher: 15 Gallon/60 L Engine Model No. AGT1321S Engine Type Air-Cooled, 4-Stroke Engine Displacement 159cc Max. Engine Speed 3800 min-1 Max. Torque 8.5 N·M/2500rpm Engine Net Power 3.
EXPLODED VIEW PAGE 14
Parts List Common Changeable Parts: Spark Plug Brake Cable 2 Blade Bolt 49 Blade 50 PAGE 15
Unpacking Mower 1. Unpack all parts and lay them on a flat, stable surface. 2. Remove all packing materials and shipping devices if applicable. 3. Make sure all contents is complete and free of any damage. If you find that parts are missing or the mower is damaged. Please call our Service Center Toll Free at: 1-866-591-8921 for assistance. Do not use this product if damaged or parts are missing. 4. Make sure you have all the accessories and tools needed for assembly.
NOTE: For handle height adjustment there are three holes in the support. Secure the lower handle to the middle hole on both sides. 6. Secure the lower handle (6) with the mounting sets (8) to the support (19) (Fig. 3). 7. Fix wires (3) with the wire clips (7a) to the lower handle (6) (Fig. 4). Nylon Grass Catcher NOTE: Before hooking the catcher onto position, check if the mulching insert (29) for mulching use is in the outlet. Take out the insert from the outlet before you attach the grass catcher.
Open the deflector guard (21), hold it in position and align the hooks on the grass catcher (22) with the support to hang it onto it (Fig. 5). Fig 5 Fuel And Engine Oil This product is equipped with a 4-stroke engine. Before operation you have to add the proper amount of fuel and engine oil. Fig 6 1. Place the product on a stable, level surface. We recommend laying a nonflammable sheet under the product. 2. Use proper funnels. Avoid spilling and overfilling the fuel tank.
Fuel WARNING! This product is not supplied with fuel! Before operating this product it is essential to fill it with fuel! 1. Always use clean, fresh unleaded gasoline. Purchase fuel in quantities that can be used within 30 days. 2. Never mix oil with gasoline. Avoid getting dirt, dust or water in the fuel tank. 3. Unscrew and remove the fuel tank cap (9). 4. Add correct fuel into the tank. Leave a minimum 5 mm/0.
Engine oil WARNING! This product is not supplied with oil. However, for manufacturing reasons it is possible that a small quantity may be in the engine! Before operating this product it is essential to fill it with the proper amount of oil (see “Technical Specifications”)! 1. Unscrew and remove the oil tank cap (17). 2. Gradually add good quality 10W-30 engine oil. Allow the oil to settle. 3. Check the oil level frequently while filling.
MOWER FUNCTIONS Grass Catcher Attach the grass catcher when using the mower for grass collection (SET UP 3, Fig 5). Emptying Empty the grass catcher (22) frequently during use. Do not wait until it is completely full. We recommend emptying it when it is half full. NOTE: A full grass catcher will reduce the performance of this product. 1. Lift the rear deflector guard (21) and pull the grass catcher (22) off the rods to remove it. 2. Empty the grass clippings onto a compost heap. 3.
Side Discharge Attachment Use the side discharge attachment when using the product for side discharging. 1. Open the side deflector guard (15), hold it in position, and hook the attachment (14) onto the two pegs of the deflector guard (Figs. 13, 14). 2. Lift the side deflector guard (15) and pull the deflector guard (15) off the pegs to remove it. Cutting Height Adjustment Adjust the cutting height according to the needs of your lawn. The cutting height depends on the kind of lawn and its actual height.
Recoil Starter The recoil starter handle (18) is positioned at the rear of the engine. 1. Slowly pull on the recoil starter handle (18) and fit it into the rope guide (23) on the right hand side of the upper handle (4) during operation (Fig. 22). 2. Pull on the recoil starter handle (18) to start the engine (Fig. 23). Do not remove the recoil starter from the rope guide. Fig.
OPERATION INSTRUCTIONS General 1. Check the mower as well as accessories for damage before each use. Do not use the product if it is damaged or shows wear. 2. Make sure that accessories and application tools are properly fixed. 3. Check the fuel and oil level, refill if necessary. 4. Always push the mower from its handle. Keep the handle dry and free from lubricant to ensure safe support. 5. Ensure that the air vents are always unobstructed and clear. Clean them if necessary with a soft brush.
Mowing 1. Prepare the product according to required application. Function Grass Catcher MulchingInsert Side Discharge attachment Grass collection Attached Removed Removed Mulching Removed Inserted Removed Side Discharging Removed Inserted Attached 2. Make sure that the lawn is clear of stones, sticks, wire or other objects that could damage the product or its engine. 3.
WARNING! If the product strikes a foreign object stop the engine! Disconnect the spark plug connector, let the product cool down and thoroughly inspect the product for damage! Have any damage repaired before restarting! Extensive vibration of the product during operation is an indication of damage! The product should be promptly inspected and repaired! Grass Collection 1. Remove the mulching insert (29) and attach the grass catcher (22).
4. Keep the housing free of built-up grass for best performance. From time to time switch the product off and wait for the cutting device to come to a complete stop. Then turn the product on its side. Using an object such as a wooden stick, remove any accumulation of grass in the cutting device area. Be careful of the sharp edges of the cutting device. Clean often after cutting new grass and after every use. 5.
MAINTENANCE AND CARE WARNING! Always switch the mower OFF, disconnect the spark plug and let the mower cool down before performing inspection, maintenance and cleaning! 1. Keep the mower clean. Remove debris from it after each use and before storage. 2. Regular and proper cleaning will help ensure safe use and prolong the life of the mower. 3. Inspect the mower before each use for worn and damaged parts. Do not operate if you find broken and worn parts.
Always use original spare parts for replacement. WARNING! The replacement of the blade should be done by a qualified specialist! Rework or sharpening blades is not recommended unless it is done by a qualified service center. Keep the under body and blade (25) clean and free of debris. Remove clippings from the discharge chute (28). Make sure all nuts and bolts are properly fastened before use.
Fig. 29 Grass Catcher 1. Inspect the grass catcher (22) before each use. Do not use if damaged. 2. Clean the grass catcher (22) after each use by using water and mild soap. 3. Let the grass catcher dry thoroughly before storing to avoid mildew.
Mower Wires Check the performance of the wires (3) before each use. Ask a qualified specialist to adjust it if necessary. WARNING! Do not use the product with defective or loose wires! Engine Refer to the Engine operator’s manual for maintaining points below. • Air Filter • Spark Plug • Fuel Engine • Oil • Carburetor • Muffler • Valve Repair This product does not contain any parts that can be repaired by the consumer.
Transportation 1. Turn the mower OFF and disconnect the spark plug before transporting it. 2. Attach transportation guards, if applicable. 3. Always transport the mower by its handle. 4. Protect the mower from any heavy impact or strong vibrations which may occur during transportation in vehicles. 5. Secure the mower to prevent it from slipping or falling over, loss of fuel, damage and injury. Environmental Protection 1.
Problem Possible cause Solution 1. Engine does not start 1.1. Not enough fuel in fuel tank 1.1. Add fuel 1.2. Spark plug is wet 1.2. Dry spark plug 1.3. Spark plug is damaged 1.3. Replace spark plug 1.4. Spark plug conn ector lose 1.4. Attach properly 2.1. Not enough fuel in fuel tank 2.1. Add fuel 2.2. Cutting device is blocked 2.2. Remove blockage 2. Engine stops 3. Unsatisfactory result 4. Excessive vibration/noise or exhaust 1.1 Cutting device dull 3.