aaxa TECHNOLOGIES P2jr Pico Projecteur Guide de l'utilisateur
Mise en garde ! AVERTISSEMENT : Veuillez utiliser ce produit en suivant les instructions. Une mauvaise utilisation peut causer des blessures ou la mort. NE pas utiliser pendant la conduite NE pas exposer à l'eau ou de sol mouillé.
Table des matières 2 Chapitre 1: P2jr en bref 2 Unité principale 3 Clavier 4 Accessoires 5 Chapitre 2: Mise en route Mise en marche / arrêt 5 Concentrer l'ajustement / Distance 6 de portée Sources/output entrées externes 7 Connexion à un ordinateur 8 Connexion vidéo Composite 12 Connexion au vidéo HDMI 14 Branchement d'une carte MicroSD 16 18 Connexion à un lecteur USB 20 Chapitre 3: Écrans de Menu Menu principal 20 Système de Menu fichier 21 Menu du lecteur vidéo 22 Menu de visionneuse de photo 24 Menu le
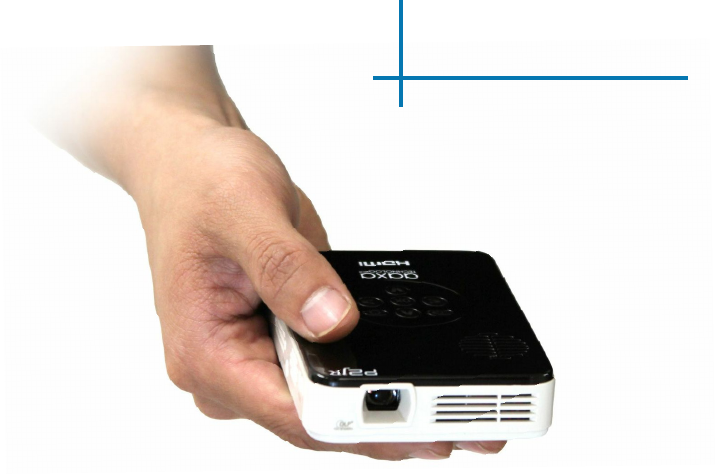
P2jr en bref Chapitre 1 Unité principale Bouton "retour" Confirmer la sélection Ventilateur de refroidissement Bouton marche / arrêt Haut-parleur Indicateur de charge Objectif projection Pavé directionnel Puissance d'entrée Mini HDMI Mini A / V / entrée VGA de Réglage de la mise Port USB Fente pour carte MicroSD 2
Clavier Sortie/retour Cette clé permet de revenir au menu précédent ou la sortie de l'option de lecteur média. Pavé directionnel Utilisez ces touches de mettre la sélection en surbrillance vous lequel choisir. Power ON / OFF Maintenez le bouton power pendant 3 secondes sera soit activer ou désactiver le P2Jr. Confirmer la sélection Cette touche permet d'activer l'option en surbrillance actuelle. * Plus détaillée de direction du clavier est discutée dans les paragraphes individuels.
Accessoires Accessoires standard Adaptateur d'alimentation Câble VGA Vendu séparément Mini-plein de HDMI Composite A / V câble * Dans des circonstances différentes, les accessoires réels peuvent différer de ceux montrés dans les images ci-dessus.
Getting Started Chapter 2 Powering ON the projector 1. 2. 3. Connect the power cord to the P2jr. Connect the wall plug into the wall power source. Press the POWER button and hold for 2-3 seconds to switch on or switch off the power • The LED turns red while charging. • The LED turns green when charging is finished. • 4 hours of charge time is required to reach a full charge. Powering OFF the projector 1. 2. Press and hold the power button for 3 seconds.
Focus Adjusment / Throw Distance Focus Adjustment 1. 2. Spin the focus wheel up or down until the image becomes clear. The recommended focus distance for this projector is 12” to infinity. Throw Distance Chart Distance inch (“) 10 15 20 30 40 50 60 70 Diagonal Inch (“) 8 12 16 24 31 39 47 55 DIA GO NA LS CR EE NS IZE 4:3 Aspect Ratio Throw Ratio 1.
External Inputs/Outputs Composite Cable Micro SD Card HDMI Cable Laptop Desktop USB Stick 7
Connecting to a Computer via VGA Step 1: Connect the large end of the to your computer’s VGA Cord Step 2: to your P2jr’s Connect the small end of the Step 3: VGA Adapter VGA Cord VGA Adapter In the Main Menu Select “VGA” icon 8
Connecting to a Computer Cont. Step 4: Enabling VGA or HDMI output on your Computer – To enable VGA or HDMI output on your computer most computers require “turning on” the video output feature. Each computer is different. Please consult your owner’s manual for instructions to enable VGA or HDMI output. Below are standard instructions for a Windows XP computer – not all systems are the same. Step 5: Press function & “F5” to instruct the computer to enable multiple displays.
Connecting to a Computer via HDMI Step 1: Connect the large end of the to your computer’s HDMI Cord Step 2: to your P2jr’s Connect the small end of the Step 3: HDMI Adapter HDMI Cord HDMI Adapter In the Main Menu Select “HDMI” icon The P2jr requries a mini to full HDMI cable 10
Connecting to a Computer Cont. Step 4: Enabling VGA or HDMI output on your Computer – To enable VGA or HDMI output on your computer most computers require “turning on” the video output feature. Each computer is different. Please consult your owner’s manual for instructions to enable VGA or HDMI output. Below are standard instructions for a Windows XP computer – not all systems are the same. Step 5: Press function & “F5” to instruct the computer to enable multiple displays.
Connecting to Composite Video Step 1: Connect one end of the to your P2jr’s Composite A/V Cord A/V Adapter Step 2: Connect opposite end of to your devices Composite A/V Cord Composite A/V Cord 12
Connecting to Composite Video Cont. Step 3: In the Main Menu Select “A/V” icon Step 4: Turn on your multimedia device. Connectivity with multimedia devices The P2jr can connect to many media devices including: iPod, iPhone, iPad, VHS players, DVD players, smart phones, cameras, video game consoles and other peripherals with ease. *Apps on smart phones require video out capabilities to be displayed with the P2jr.
Connecting to HDMI Video Step 1: to your P2jr’s Connect one end of the Step 2: Mini-HDMI HDMI Adapter to your devices Connect opposite end of HDMI HDMI Adapter 14
Connecting to HDMI Video Cont. Step 3: In the Main Menu Select “HDMI” icon Step 4: Turn on your multimedia device. Connectivity with multimedia devices The P2jr can connect to many media devices including: iPod, iPhone, iPad, VHS players, DVD players, smart phones, cameras, video game consoles and other peripherals with ease. *Apps on smart phones require video out capabilities to be displayed with the P2jr.
MicroSD Card How to insert your MicroSD Card • Slide in your SD card into the SD card slot on the side of the P2jr. (as shown in picture) • Gently slide the SD card until it *clicks* into place. How to access your MicroSD Card • Once your SD card has been inserted, you can view the files located in SD card icon in the main menu. • After selecting SD card mode, you should now be able to access the data on the SD device through the onboard media player.
MicroSD Card Cont. 1) 2) Select the “MicroSD” icon Media Player menu • In the Media Player selection you can choose from the options: Photo, Music, Video, Text • Select the appropriate menu for the type of file you wish to view. File Menu System • The P2jr will show all folders and files you have on your SD Card. • Use the directional buttons to navigate to different folders or files.
USB Reader How to insert your USB Drive • Slide your USB Drive into P2jr. (as shown in picture) • Gently slide the drive until it cannot go in any further How to access your USB Drive • Once your USB Drive has been inserted, you can navigate to the USB icon in the main menu. • After selecting USB Drive Mode, you should now be able to access the data on the USB drive through the onboard media player. *Review the Specification section of this manual to read about the supported file formats.
USB Reader Cont. 1) 2) Select the “USB” icon Media Player menu • In the Media Player selection you can choose from the options: Photo, Music, Video, Text • Select the appropriate menu for the type of file you wish to view. File Menu System • The P2jr will show all folders and files you have on your USB Drive. • Use the directional buttons to navigate to different folders or files.
Menu Screens Chapter 3 Main Menu To access the main menu simply turn on the projector by pressing and holding the Power button for 3 seconds. • Scroll Left/Right by pressing buttons on the keypad. • To select a submenu, highlight the desired submenu and press the located in the middle of the keypad. • To go back to the previous page while in a submenu, press the back button button.
File Menu System The P2jr will show all folders and files you have on your USB or MicroSD Drives. Use the directional buttons to navigate to different folders or files.
Video Player Menu Viewing Videos To adjust the volume simply press the or keys on the projector. For more options, press the to reveal more options. Move selection left • Move selection right • Confirm selection Play Video Rewind Video Fastforward Video To open the video player menu, press “OK” on projector. To close the video player menu, hit “back” on projector.
Video Playback FAQ How do I loop a video? 1. Choose either USB or SD Card for playback How do I preview a video? 1. 2. 3. 4. 2. Navigate the folders until you 5. reach the file you wish to play. 3. Highlight the file you want to play, then confirm the selection. 4. Move selection on video player menu to “repeat”, and confirm the selection. 5. The video will now loop after playback is finished. Choose the “video” option from the main menu Navigate using onboard buttons to the file you wish to preview.
Photo Menu Viewing Pictures To use the photo controls, use the directional keys to highlight the option you wish to choose. Move selection left • Move selection right • Confirm selection Start Slideshow Previous Photo Stop Slideshow Next Photo To open the photo player menu, press “OK” on projector. To close the photo player menu, hit “back” on projector.
Photo Slideshow FAQ How do I play a slideshow? 1. Choose either USB or SD Card for playback How do I manually control the slideshow? 1. 2. 2. Navigate to the folder that contains the pictures you wish to see in the slideshow 3. Confirm selection of the first picture. 4. Press “play” in the photo menu 5. Slideshow will not play. 6. NOTE: Selecting “repeat” will loop slideshow. 3.
Music Player Menu Listening to Audio To adjust the volume simply press the or keys on the projector. For more options, press the to reveal more options. Move selection left • Move selection right • Confirm selection Play / Pause Previous Track Rewind Fastforward To open the music menu, press “OK” on projector. To close the music menu, hit “back” on projector.
Music Playback FAQ How do I loop a song? 1. Choose either USB or SD Card for playback How do I create a song playlist? 1. 2. 3. 2. Navigate the folders until you reach the file you wish to play. 3. Highlight the file you want to play, then confirm the selection. 4. Move selection on music player menu to “repeat”, and confirm the selection. 5. The song will now loop after playback is finished. 4. 5. 6. 7. 8. Insert your media device (either MicroSD card or USB) into computer.
Text Viewer Menu Opening a file: • Choose “Open File” option • Select device file is stored on • Select file from list The P2jr will show all folders and files you have on your USB or SD Drives. Use the directional buttons to navigate through different folders or files. Previewing Files: • Press the directional keys to highlight the item of interest • Wait 2-3 seconds and a preview of the song will show on the screen Viewing text files The P2jr Pico Projector allows you to view text files.
Setup Menu The Settings Menu can be accessed by selecting “Settings”on the main Within the Setting Options, there are a few sets of submenus including: Picture • Picture mode Adjusts Contrast, Brightness, Color, Sharpness & Tint • Color Temperature Adjusts Color ratio of red, green, and blue • Aspect Ratio Choose between 16:9, 4:3, Zoom and more • PC setup Additional options are available when connected to PC via HDMI or VGA • Backlight Adjust low or high brightness modes.
Setup Menu Cont.
Setup Menu Cont. Option • OSD Language Change Language to English, French, Dutch, Spanish, Portuguese or Chinese • Restore Factory Default Reset P2jr back to default settings • Blending Adjust the blending option • OSD Duration Adjust automatic timer to return to main screen when idle.
Chapter 4 Technical Details Troubleshooting IMAGE IS BLURRED Possible Causes Solution The Projector is not in focus Adjust the focus with the focus adjustment dial until the image comes into focus The Projector is offset from plane / angle of operation Move the projector so that it is both 180 degrees and on an even plane with the screen. No Sync, No Signal 1. 2. Be sure to setup the computer to enable a video signal output. On some laptops this is done by pressing and holding Function F5 key.
Technical Details Troubleshooting THE PROJECTOR DOES NOT TURN ON Possible Causes Solution There is no power Check to ensure the power outlet or battery source is good. Check the power adapter to ensure a proper connection with the wall outlet as well as the projector. Confirm that the unit is charged and has enough power The power button was not held long enough To power on the projector, the power button needs to be depressed for a full 3 seconds.
Specifications Brightness Maximum Resolution Contrast Ratio Projection Lens: Battery life: Image Size: Lamp: Video in: Audio Output: MicroSD Card: USB: Dimensions: Weight: Supported File Formats: 55 Lumens WXGA(1920x1080) 1000:1 Manual Focus up to 120 minutes 10~60 inches 15,000 hour RGB Triple LEDs Composite A/V VGA(mini-VGA) HDMI(mini-HDMI) 1.0 W stereo speaker MicroSD Card Slot (16 GB maximum) USB (Memory Sticks) (16 GB maximum) 4.2 x 2 9 x 0.82 inch 0.
Please direct all customer service inquiries to: AAXA Technologies, Inc. 1541 Parkway Loop Suite F Tustin, CA 92780 (714) 957-1999 info@aaxatech.