802.
REGULATORY STATEMENTS FCC Certification The United States Federal Communication Commission (FCC) and the Canadian Department of Communications have established certain rules governing the use of electronic equipment. Part15, Class B This device complies with Part 15 of FCC rules. Operation is subject to the following two conditions:1) This device may not cause harmful interference, and 2) This device must accept any interfaerence received, including interference that may cause undesired operation.
Note: This module has two antenna connectors with receiver diversity function. Only 1 antenna will be attached in CON2 port for transmission/receiving mode in both 2.4GHz/5GHz frequency.
Table of Contents INTRODUCTION ...................................................................................................1 WIRELESS NETWORK OPTIONS ...............................................................................1 The Peer-to-Peer Network .........................................................................1 The Access Point Network ........................................................................2 INSTALLATION ..............................................................
INTRODUCTION The 802.11a/b/g Wireless LAN PCI Card is a device that allows you connect your computer to a wireless local area network (LAN). A wireless LAN allows your system to use wireless Radio Frequency (RF) technology to transmit and receive data without physically attaching to the network. The Wireless protocols that come with this product ensure data security and isolation from interference generated by other radio frequencies.
You can also use one computer as an Internet Server to connect to a wired global network and share files and information with other computers via a wireless LAN. The Access Point Network The network installation allows you to share files, printers, and Internet access much more conveniently. With Wireless LAN Cards, you can connect wireless LAN to a wired global network via an Access Point.
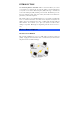
INSTALLATION Hardware Installation 1. Make sure the computer is turned off. Remove the expansion slot cover from the computer. 2. Carefully slide the Wireless mini PCI Card into the mini PCI slot. Push evenly and slowly and ensure it is properly seated. 3. After the device has been connected to your computer, turn on your computer. Windows will detect the new hardware and then automatically copy all of the files needed for networking.
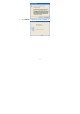
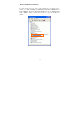
Software Installation 1. Exit all Windows programs. Insert the CD-ROM into the CD-ROM drive of your computer. If the CD-ROM is not launched automatically, go to your CD-ROM drive (e.g. drive D) and double-click on Setup.exe. 2. The main screen of the CD-ROM opens. Click Install Driver & Utility to start the installation. 3. When the License Agreement screen appears, view the contents and then click Yes to continue. 4. Click Continue Anyway to continue the software installation.
5. Click Finish to complete the software installation.
Device Installation Verification To verify that the device has been properly installed in your computer and is enabled, go to Start Settings Control Panel System ( Hardware) Device Manager. Expand the Network adapters item. If the Wireless LAN Card – A/B/G is listed, it means that your device is properly installed and enabled.
CONFIGURATION After successful installation of the Wireless LAN Card’s driver, the utility icon will display in the task bar. You will be able to access the Configuration Utility through the Network Status icon. If the icon doesn’t appear automatically, go to Start Programs Utility Wireless Utility, it will appear in the task bar.
Accessing the Configuration Utility All settings are categorized into Six Tabs: Profile Tab Link Status Tab Site Survey Tab Statistics Tab Advanced Tab About Tab Profile Tab Profiles can bookkeeping your favourite wireless settings among your home, office, and other public hotspots. You may save multiple profiles, and activate the correct one by your preference. Profile Profile Name Show the profile names that are saved in your profile page. The default profile name is PROF1, PROF2.
Encryption Shows the encryption type of the profile. Network Type Shows the Network type of the profile. Add Click the Add button to add up a new profile into the list and configure your profile settings. Configuration Tab- Profile Name: The default profile name is PROF1, you can modify it at will. SSID: The SSID is the unique name shared among all points in your wireless network. The name must be identical for all devices and points attempting to connect to the same network.
Tx Power: Select the Tx Power percentage from the pull-down menu, including 100%, 75% and 50% Preamble: A preamble is a signal used in wireless environment to synchronize the transmitting timing including Synchronization and Start frame delimiter. Select from the pull-down menu to change the Preamble type into Long or Short. RTS Threshold: The minimum packet length for sending an RTS frame, in bytes.
AES and then enter a WPA Shared Key of 8-63 characters in the WPA Preshared Key field. • WPA/WPA2Use 802.1x: Click to enable 802.1x function, to configure the RADIUS Server setting, click the 802.1x Setting button to enter the configuration screen. Certificate Tab- Authentication type: • PEAP: Protect Extensible Authentication Protocol. PEAP transport securely authentication data by using tunneling between PEAP clients and an authentication server.
requires only server-side certificates. Session Resumption: you can choose Disable, Reauthentication, Roaming, SameSsid or Always. Identity: Enter the given identity in this column. Password: Enter the given password in this column. Use Client Certificate: Check to enable this authentication function. Protocol: Select a protocol from the pull-down menu, including EAP-MSCHAP v2, EAP-MSCHAP v2, EAP-TLS/Smart card Generic Token Card. (Tunnel)Identity: Enter the identity for tunnel.
OK Click to exit this page. Link Status The Link Status page displays the current connection status. Link Status Status Shows the current connection status. Extra Info Shows the extra information of the current status. Channel Shows the channel in use. Link Speed Shows the current link speed. Throughput Shows the current throughput. Link Quality Shows the current link quality. Signal Strength2 Shows the current signal strength percentage. Noise level Shows the current noise level.
Site Survey SSID The SSID is the unique name shared among all points in your wireless network. The name must be identical for all devices and points attempting to connect to the same network. BSSID BSSID displays the ID of current BSS, which uniquely identifies each BSS. The displayed value is the MAC address of the Access Point or station. Signal Shows the current signal strength percentage. Channel Shows the channel in use. Encryption Shows the encryption type.
Statistics The Statistics screen displays the statistics on your current network settings. Advanced The Advanced tab lets you configure the advanced wireless settings including wireless security settings. Note: Country Code selection feature to be disabled for products marketed to the US/CANADA.
Advanced Wireless mode Select wireless mode. 802.11B only, 802.11 B/G mix, 802.11A only, 802.11 A/B/G mix and 802.11G only modes are supported. B/G Protection ERP protection mode of 802.11G definition. You can choose one from the pull-down list, including Auto, On and Off. Tx Rate Manually force the Transmit using selected rate. Dafault is auto. Tx BURST Check to enable the Tx BURST mode. Enable TCP Window Size Check to enable TCP Window Size function.
- 17 -
UNINSTALLATION In case you need to uninstall the Utility and driver, please refer to below steps. (As you uninstall the utility, the driver will be uninstalled as well.) 1. Go to Start Uninstall-Utility (All) Programs Wireless 2. Click OK to continue. 3. Click Finish to complete the uninstalled procedure.