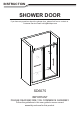
INSTRUCTION SHOWER DOOR If you have any questions about the shower door, please feel free to contact us. Customer Service Email: info3@buildepot.com SD6075 IMPORTANT PLEASE READ BEFORE YOU COMMENCE ASSEMBLY Follow the guidelines in this user guide to ensure correct assembly and care for this product.
SPECIFICATIONS ch 60 in 75.
CATALOG ! Catalog Specifica�ons........................................................................................................... 01 Catalog..................................................................................................................... 02 Exploded Views .......................................................................................................... 03 Part List And Extra ................................................................................................
EXPLODED VIEWS D M 5*40 A O B Glass Door R C E G F H Stationary Glass I K J 4*30 L K 4*30 N M6 M4 P S M2.
PART LIST Parts List A B C D E Guide Rail Bracket Glass Bracket Stopper Rollers Upper Guide Rail 2 PCS 2 PCS 2 PCS 2 PCS 1 PC F G H I J Long armrest Door Handle Stationary glass Anti-water strip 1 PC 1 PC 1 PC 2 PCS K L N M Side anti-water strip 1 PC O M4x30 Guide Block M5x40 Right aluminum cover with slot 35mm Wall Anchor 3 PCS 1 PC 2 PCS 1 PC 2 PCS P Q R S1 S2 25mm Wall Anchor Anti-Splash Threshold Glass Door M6 Allen key M4 Allen key 3 PCS 1 PC 1 PC
Installation steps How To Assemble Shower Door Step 1:Determine a suitable location and place the stainless steel Stopper (C) and Guide Rail Bracket (A) on the support rods as shown. Use the Allen key (S) to loosen the screws on the Guide rail bracket (A). First put (C) on the stainless steel support rod and fix it in the approximate position as shown in the figure, Then place (A) on both ends of the stainless steel support rod.
Installation steps Step 2:Place the Stationary Glass (H), align the hole above the glass with the Glass Bracket (B) that has been fixed with the stainless steel support rod. Cover the other half of the Glass Bracket (B) to lock the glass (two spacers are placed separately to protect the glass). NOTE:Never set your glass down directly onto a tile or concrete floor.
Installation steps Step 3:Put Stationary Glass (H) together with the Upper Guide Rail (E) on the Step installation position. Make sure all are leveled. Determine the distance between the bottom of the Guide Rail Brackets (A) and the ground at 184184.5cm, as shown in the figure. Mark the position of the bottom of the Guide Rail Brackets (A) on both sides. Drill holes in the determined position and apply silicone into the holes, insert the Wall anchors (O) for the Guide Rail Bracket.
Installation steps Step 5:Place the Stationary glass (H) back into the designated position. Slide the Guide Rail Bracket (A) to the two end sides of the Upper Guide Rail(E). Tighten the set screws on the Guide rail bracket (A) with Allen Key (S) to secure the guide rail to the wall. a. b. c. d. 08 M2.
Installation steps Step 6:Install Glass Door Loosen the Rollers (D) screws and the Install the rollers. The Upper roller part is used to connect to the Upper Guide Rail (E) and the lower two parts are used to connect to the Glass Door (R). a. D b.
Installation steps Step 7:Hang the Glass Door (R) installed with rollers, to the Upper Guide Rail (E). Slide the Guide Block (L) to the bottom of the glass door. Mark down the predrilled position of the guide block. Set the glass door aside. Now drill the hole with drill bit to the threshold. Put the silicone to the hole and then put the wall anchor (P) into the hole. Now secure the guide block to the threshold with Screw M4X30 (K). a. b. R H L c. d. R R L e. f.
Installation steps Step 8: Hang the Glass Door (R) back to the Upper Guide Rail (E) , slide the bottom of the glass door into the slot of the Guide Block (L) . Be careful that the glass door should not touch the metal part of the guide block. a. b. Step 9 : Slide the Side Anti-Water Strip (J) to the Glass Door (R), and slide the 2 Note pieces Anti-Water Strips (I) with an extended side to the middle glass, cut the extended side that interferes with the Upper Guide Rail (E).
Installation steps Step 10:Install the Anti-Splash Threshold (Q) in front of the Glass Door (R). Put the Antisplash threshold in front of the Glass Door (R), and then put the Aluminum Cover with slot(N) into the Stationary Glass (H), on top of the threshold. Mark down the predrilled holes on the threshold, drill the holes with drill bit, put the wall anchor (P). Put slicone sealant to the bottom of the Anti-splash threshold, secure it to the threshold with M4x30 Screw (K) and put the covers back on it. a.
Installation steps Step 11:Put the anti-jump buttons removed from step a on step 7 back into the Rollers (D) section. a. b. Fixed base Fixed base Fixed base Step 12:Tighten the fasteners on both Rollers (D), Guide Rail Brackets (A) Cover, Glass Brackets (B) and Glass door Stoppers (C). The Glass door Stoppers (C) can adjust the tightness to move the position, used to block the Rollers (D), control the edge of the glass will not touch the wall, determine the position before tightening. a. b. M2.
Installation steps Step 13:Install the handle as shown in the figure. NOTE:The connector of the big head on the handle is above. a. b. On top G F c. Step 14:Apply silicone sealant on the seams between the stationary glass and the shower base/bathtub,and between the wall and the stationary glass.