
Body Repair Manual


Refinishing Procedures
1. Base material reconditioning (sanding)
-1. Repaint and replacement part
Lightly sand the part with #400, #600 or #800.
-2. Slight scores or scratches
Use a flexible sanding block and wet sand the
damaged section with #400, #600.
NOTE: Sand level to remove damage.
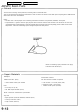
-3. Deep scratches, when filling.
Use a flexible sanding block and wet sand the
damaged section with #240, #400.
2. Degreasing and cleaning
Clean the repaired area with wax and grease remover,
then blow with air dry.
• Do not use high air pressure; use only an ap-
proved, 210 kPa (2.1 kgf/cm
2
, 30 psi) air nozzle.
• Wear goggles or safety glasses to prevent eye
injury.
NOTE: Wipe dust off surface with a tack cloth.
3. Filling, drying and sanding
Apply the filler in several thin coats.
NOTE: Mix and apply the filler according to the
manufacturer's instructions.
-1.Dry the filler with an infrared dryer for 5 or 6
minutes.
Be sure to keep the dryer 40-50 cm (16-20 in) away
from the surface.
-2. Scratch the filled surface with your nail. If the
surface is white when scratched, dry sand and wet
sand with the #240-#400 paper. Be sure to sand
level.
4. Cleaning with compressed air, and degreasing
Blow the entire area to be coated with compressed air,
then clean with wax and grease remover.
• Do not use high air pressure; use only an ap-
proved, 210 kPa (2.1 kgf/cm
2
, 30 psi) air nozzle.
• Wear goggles or safety glasses to prevent eye
injury.
NOTE: Clean the whole surface to the help the masking
tape adhere securely.
Main Menu
Table of Contents