
Body Repair Manual


1. Apply load to the damaged section and pull it out until
the section is almost restored to the original shape.
2. Check that the parts of the body they cover have been
more or less restored to their original shapes.
NOTE: Check the original position using the body
dimensional drawings (see section 6) and the position-
ing jigs (see page 1-7).
3. Remove the parts that require replacement.
4. Decide whether to replace all the affected parts or
whether to cut the weld joint parts and replace them.
5. Cut off and separate the damaged parts.
NOTE: When cutting the parts off, take special care
that you do not damage adjacent parts on the automo-
bile.
Setting Condition of Replacement Parts Joint Sec-
tions:
• Make sure that you can perform straightening work
after welding.
• Make sure that the locations are not susceptible to
distortion caused by other parts.
• Make sure that there are few removable parts and
that the location allows safe welding.
• Make sure that the joints are short, and that paint
repair can be performed easily.
• Make sure the locations are such that the joints can
be finished in a way that does not affect the outward
appearance.
• Make sure that the locations do not hinder the
removing and attaching of parts.
NOTE: Bear in mind all of these conditions, and after
determining the joint locations, cut the joints for an
overlap of 20~30 mm (0.8~1.2 in).
6. Mold the related parts.
7. Set and tack weld the replacement parts.
NOTE: Temporarily mount the related parts and check
the clearance and level differences.
8. Weld the replacement parts.
Welding methods (see section 2).
NOTE: Use of the positioning jig is recommended.
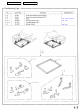
CAUTION: Protect body parts with the heat-resistant
protective cover to prevent damage, when welding.
The paint film, which is designed to prevent corrosion
caused by moisture, is destroyed around the edges of the
locations which have been repaired by welding.
Therefore, in such places and especially in those areas
which are not visible, apply another coat of the paint,
referring to the anti-corrosion painting manual. This
operation is designed to maintain durability and quality
(see section 7).
Main Menu
Table of Contents