
Installation Guide

Accentua
Vinyl Square Cupola Installation
Step 1: Use 2 pieces of wood each ~
24 in. long (2x4s are ideal). Fasten
together with one screw, just loose
enough that boards can still pivot
with pressure.
Step 2: Measure overall length of
roof; find center and mark.
Step 3: Lay your boards over the
peak of the roof, making sure each
board is fully against the surface.
Mark boards with pencil to confirm
angle position. Mark front & back of
roof (not all roofs are symmetrical.)
Step 4: Now working on the ground,
measure to identify center of cupola
base and mark lightly with a pencil.
Step 5: Place louvered midsection
upside down on a smooth flat
surface. Place the flared base section
upside down (widest portion up) on
top of the midsection.
Step 6: Ensure that the base section
is centered on the midsection, and
connect with 1-1/4 in. screws in
each pre-drilled hole.
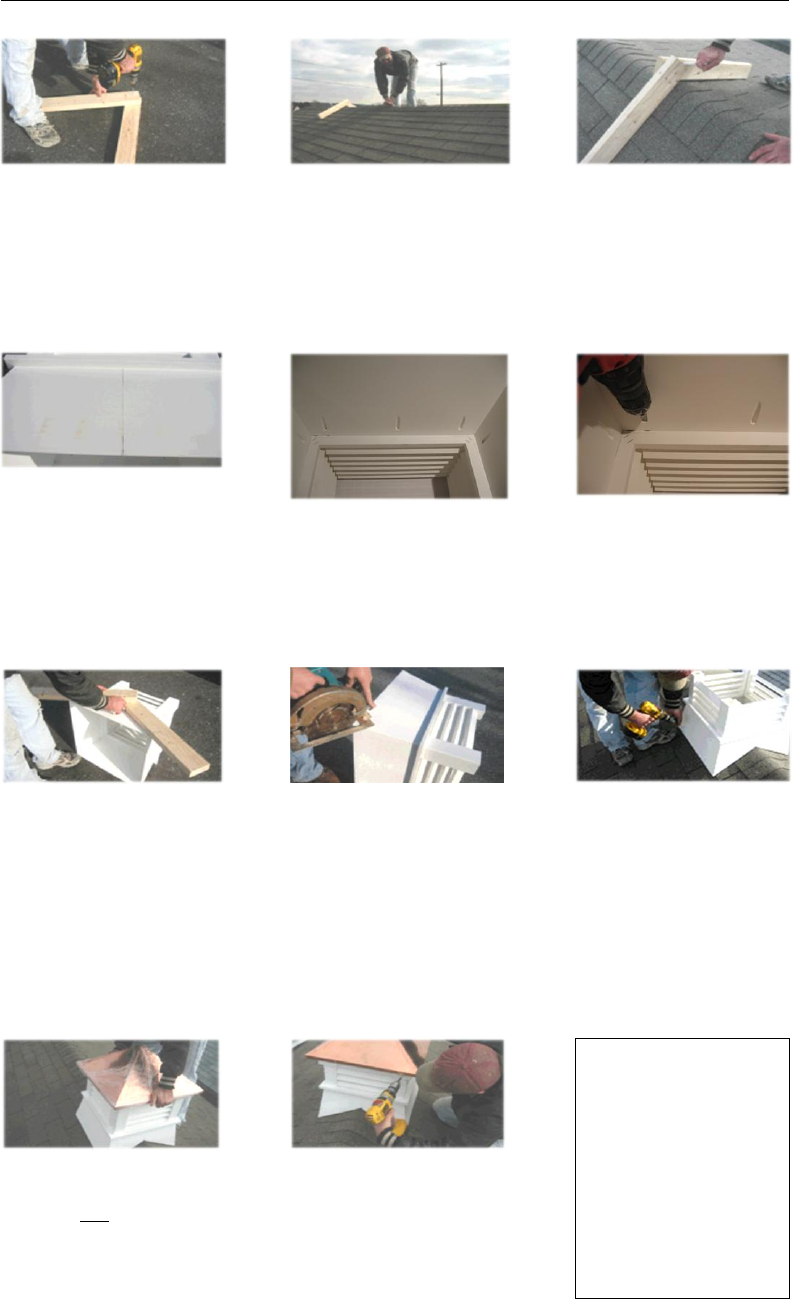
Step 7: Use pattern to mark cut lines
that match your roof profile. Cut lines
should extend from each lower
corner to your center line drawn in
step 4.
Step 8: Cut out roof profile by
starting at corners of cupola base
and cutting to the center. Repeat
steps 4 - 6 on the opposite side of
your cupola base. (If your roof is not
symmetrical, make sure that your
lines / cuts match the angles needed
for the front and back roofs.)
Step 9: Position cupola on center of
roof and fasten with 3" white
headed screws. Note: if you want
to utilize venting, cut a hole (app.
8" square) in the roof prior to
fastening cupola. Attach screen
mesh over hole to keep bugs out.)
Congratulations on completing
the installation!
Step 10: Place cupola roof on top of
base. Note: Remove shrink wrap
from copper after Step 9 is done, to
protect copper from oils on skin.
Step 11: Attach roof to base using 1-
3/4 in. white headed screws supplied
with unit.
Note: your cupola may vary in size
from the pictures or include a
different type of midsection (e.g.
have windows or a different
number of slats.) The same
installation practices apply.