
User's Manual


Microsoft Wireless Home Networking USB Adapter or PC Card Adapter 15
To connect the adapter
υ Plug in the USB cable that is attached to your adapter
to an available, powered USB port on your computer.
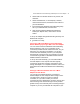
Insert diagram of USB Adapter plugged into PC
Card slot, & to router wirelessly
-or-
υ Insert the PC Card adapter into the PC Card slot on
your computer.
Insert diagram of PC Card Adapter plugged into PC
Card slot, & to router wirelessly
To configure the adapter
1. After you have connected the adapter, return to the
Home Networking Setup software and click Next.
Follow the software instructions.
c. When you are asked whether you want to set up
file and printer sharing, choose Yes or No.
d. If you choose Yes to set up file and printer sharing,
enter names for your computer, printers, and
workgroup on the appropriate screens. If you want
to share printers and files with other computers on
the network, you should set the same workgroup
name. The computer and printer names should be
unique.[T8]
2. After you click Finish to exit Setup, view the status of
your network in the Wireless Network Utility and test
your Internet connection by accessing a Web site
through your browser.
3. Remove the setup CD-ROM from the CD-ROM drive
and the floppy diskette (if used) from the floppy disk
drive. Keep the CD and the diskette to use for setting
up additional computers.
Adding Computers to Your Network
Now that you have installed a Microsoft Wireless Home
Networking USB or PC Card Adapter and connected to
your wireless network and Internet, you can add more
devices to your home or small office network. Refer to the
sections below for instructions on
Note:
Typically, the USB ports on
your computer are powered,
while many USB ports on
keyboards or monitors are not
powered.
Note
For more information about
network name, WEP Security,
computer and workgroup
names, file and printer
sharing, and other setup
options, click the Help button
on each setup screen, or refer
to the appropriate chapter in
this User's Guide.