
User Guide


ACDSee Pro 2.5 - User Guide
80
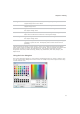
The color grids
In the top left corner there is a fixed grid of Basic colors to choose from, including gray, black,
and white in the last three boxes. Below it is a grid of Custom colors that you can fill in by
creating a custom color, and then clicking the Add to Custom Colors button.
The color palette and slider
Beside the Basic colors is a color palette. It contains all the colors of the spectrum from red
through yellow, green, turquoise, blue, purple, pink, to red again. The colors at the top of the
palette are pure primary colors with increasing amounts of gray added until along the bottom,
the colors are mostly gray. If you want a color to have a smoky look, select it from the bottom
end of this palette. Similarly, you will find colors like browns at the lower end of the red/orange
in this palette.
On the far right is a color slider. In the slider, the actual color selected is where the small black
arrow appears. You can then adjust the color to add white or black to it by moving the slider up
to add white (for pastels) until it is completely white or move the slider down to add black (for
a richer color) until it is completely black.
Selecting and adjusting colors
To select a color, click on a square in either grid, or on the color palette. You can also drag
over the color palette. When you click a color, or lift your finger off the mouse after dragging,
that color appears in the large Color/Solid square and all its numerical values; Hue,
Saturation, Luminosity, as well as Red, Green, Blue, appear in the boxes.
You can also adjust a color by changing the Hue Saturation, and Luminosity numbers. To select
a precise color, type in the values for that color. You can do the same using the Red, Green,
Blue values.
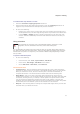
Selecting part of an image
You can use the Select tool in the Viewer to select a rectangular area of an image. You can
then zoom in on the selection, copy the selection, save the selection as a new image, print the
selection, and use the selection as the desktop wallpaper.
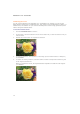
To select part of an image:
1. Drag the mouse pointer across the image to create a marquee.
2. Right-click inside the marquee and select one of the options described below.
3. To cancel the selection, click an area of the image outside of the marquee.
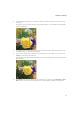
Selection options
Zoom To Zooms in on the selected area.
Copy Copies the selected area to the Clipboard.
Save Crop As Saves the selected area as a new image.
Print Prints the selected area.