
User guide

ACDSee Pro 6 User Guide
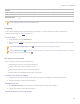
To correct a crooked photo:
1. In Develop mode, select the Geometry tab.
2. In the Rotate and Straighten group, adjust your image as described below.
You can right-click a slider to reset to the default value.
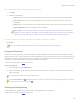
Click the Show Grid button to display a grid over your image. This tool is useful when fixing alignment in your images.
When the grid is not activated, it is gray .
Rotate options
90 degrees to the left
Rotates image 90 degrees to the left.
90 degrees to the right
Rotates image 90 degrees to the right.
Straighten options
Slider
Adjusts the horizontal angle of the image. Move the slider left or right until the image
appears straightened.
-5 Degrees left
Adjusts the image -5 degrees to the left.
+5 Degrees right
Adjusts the image +5 degrees to the right.
Straighten tool
Straightens the image. Use your cursor to draw a line along the crooked horizon. Release
the cursor to automatically straighten the horizon.
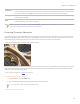
Correcting Perspective
Perspective issues, which can occur if the camera is not held horizontal or perpendicular to the object of the photo, can be common
in images taken with wide angle lenses. For example, if you take a photo of a tall building, looking up from street level, the building
can appear to bend in the photo. You can correct perspective issues using the tools in the Perspective group.
You can save your settings as a preset for future use.
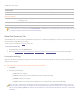
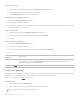
To correct perspective:
1. In Develop mode, select the Geometry tab.
2. In the Perspective group, set the options as described below.
Click the Show Grid button to display a grid over your image. This tool is useful when fixing alignment in your images.
When the grid is not activated, it is gray .
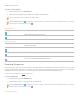
Perspective options