
User guide


Chapter 6: Edit Mode
You can use the Edit Brush to paint an effect onto specific areas of your image, and then set the blend mode
and opacity slider to change the way the effect is applied.
The blend mode and opacity controls apply to many of the editing tools and special effects filters. When it does not make sense to
have these controls, they are omitted. The blend mode and opacity controls are not on the following tools: Crop, Resize, Lens
Distortion Correction, Perspective Correction, Rotate, Flip, Watermark, Text, Red Eye Reduction, Repair Tool, Selections. It is also not
available in Develop.
Saving Images in Edit Mode
Saving Images
When you have finished editing an image, you can choose from one of the many options for saving your image, depending on what
you want to do next.
To save the image and return to the mode you were in previously:
1. Click Done.
2. Select one of the following:
Save
Save your changes.
Save as
Save a copy of your developed image with a new name or format.
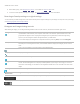
Depending on your file type, any of the following check boxes appear in the bottom left corner of the Save as
dialog box:
Preserve Metadata: Retains metadata with the new image.
Preserve database information: Maintains your catalog information, such as ratings.
Preserve develop settings for original image: Applies changes to the original image, as well as the copy
being saved.
Embed Color Profile in Image: Retains color profile selected in Color Management with your new image.
Discard
Discard your changes.
Cancel
Remain on the same image in with your changes intact, without saving the image.
To save the image and continue processing other images:
1. Click Save.
2. Select one of the following:
Save: Save your changes.
Save As: Save a version of your edited image with a new name or format and switch to the updated image.
212