
User guide


Chapter 6: Edit Mode
3. Under Brush settings select from the following preference settings:
Drag the Nib Width slider to select a brush size.
Drag the Feathering slider to soften the edges of your strokes
Drag the Strength slider to adjust the intensity of your strokes
4. Draw over the areas of the image you want to lighten or darken.
5. Click Done.
You can right-click a slider to reset to the default value.
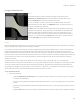
Adjusting White Balance
You can use the White Balance tool to remove unwanted hue from an image. For example, if you take a photo at sunset and the
resulting image has a reddish hue, you can use the White Balance tool to remove it.
You can save your settings as a preset for future use.
To remove a color cast from an image:
1. In Edit mode, in the Color group, click White Balance.
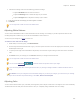
2. Click an image area that should be white or gray. The color square shows the color of the original pixel on the left, and the
modified pixel on the right.
3. To specify the strength of the white balance adjustment, move the slider. Higher settings remove more of the unwanted
color.
4. Click Done to save your changes, or click Cancel to discard your changes and leave the tool.
You can right-click a slider to reset to the default value.
You can use the Edit Brush to paint this effect onto specific areas of your image.
If you are having difficulties achieving the desired effect, try clicking an image area that is a different shade of white or
gray.
Click Reset to clear your changes and reset to default settings. If you saved your changes, you cannot reset your settings.
If you want to discard only the Edit settings, select File | Restore to Developed.
Adjusting Color
You can use the Advanced Color (hue, saturation, and brightness) tool to adjust overall colors in an image or each color individually.
The advanced tools can subtly fine-tune and enhance colors, or completely change individual colors in an image.
282