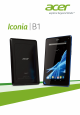
© 2012. Alle rechten voorbehouden. Acer Iconia Gebruikershandleiding Model: B1-A71 Deze uitgave: 12/2012 Acer Iconia Modelnummer: ................................................................................................................ Serienummer*:................................................................................................................. Aankoopdatum: ...............................................................................................................
Inhoudsopgave De tablet leren kennen 4 Een e-mailtoepassing instellen ........................ 28 Eigenschappen en functies ............................... 4 Online toepassingen ........................................ 28 Productregistratie .............................................. 4 Muziek en video afspelen 33 Instellen 5 Multimedia afspelen ......................................... 33 De tablet uitpakken............................................
Eigenschappen en functies De tablet leren kennen Eigenschappen en functies De nieuwe tablet biedt vooruitstrevende en gebruiksvriendelijke functies voor multimedia en entertainment. U kunt: • Verbinding maken met internet. • Onderweg e-mail opvragen. • In contact blijven met vrienden via Personen en sociale netwerken. Productregistratie Als u het product voor het eerst gebruikt, wordt aanbevolen dat u het onmiddellijk registreert.
Instellen De tablet uitpakken Uw nieuwe tablet is ingepakt in een veilige verpakking. Pak de doos voorzichtig uit en haal alles eruit.
De tablet leren kennen De tablet leren kennen Vooraanzicht 1 2 3 Nr. Item Beschrijving 1 Aanraakscherm 7-inch, capacitief touchscreen met 1024 x 600 pixels. 2 Naar voren gerichte camera Een 0,3-megapixel camera voor videogesprekken en zelfportretten. 3 Microfoon Ontvangt geluid van videogesprekken en internetgesprekken.
Linker- en rechter aanzichten 1 2 Nr. Item Beschrijving 1 Aan/uit-toets Druk lang op deze toets om de tablet in te schakelen, druk kort om het scherm in/uit te schakelen of in de slaapstand te zetten; druk in en houdt vast om de tablet uit te schakelen. 2 Volumetoets Verhoogt en verlaagt het volume van de tablet. Bovenaanzicht 1 Nr. Item Beschrijving 1 3,5 mm koptelefoonaansluiting Aansluiting voor een stereokoptelefoon.
De tablet leren kennen Onderaanzicht 1 2 Nr. Item Beschrijving 1 microSD-kaartsleuf Plaats een microSD-kaart in de sleuf. Zie "Een microSD-kaart plaatsen (optioneel)" op pagina 24. Micro-usb-poort (Slave) Voor aansluiting op een computer via een usbkabel. Kan ook gebruikt worden om op te laden door de wisselstroomadapter erop aan te sluiten. Voor meer informatie, zie "De tablet opladen" op pagina 9. 2 Achteraanzicht 1 Nr. Item Beschrijving 1 Luidspreker Voor geluidsweergave.
De tablet gebruiken De tablet opladen U dient uw tablet voor het eerste gebruik ten minste vier uur op te laden. Daarna kunt u de batterij opladen zodra dit nodig is. Opmerking: De afbeelding van de oplader dient alleen als referentie. Daadwerkelijke configuratie kan afwijken. De stroomadapter opbouwen Schuif de passende stekkerplug in de adapter zodat deze op z’n plek klikt. Aansluiten op stroomnet Verbind de stroomconnector met uw tablet en steek de stroomadapter in een stopcontact.
Voor het eerst inschakelen Waarschuwing: Gebruik voor het opladen van uw apparaat enkel de meegeleverde stroomadapter. Voor het eerst inschakelen Om uw tablet in te schakelen, houdt u de aan/uit-knop ingedrukt totdat het Acer-logo verschijnt. Wacht een ogenblik totdat de tablet opstart. Dan zullen u enkele vragen worden gesteld voordat u uw tablet kunt gebruiken. Om te beginnen, tikt u op de taal die u wilt selecteren, daarna tikt u op Start.
Wanneer u bestaande instellingen wilt terugzetten van een ander apparaat dat Android 2.0 (of recenter) geïnstalleerd heeft, moet u zich tijdens de installatie aanmelden bij uw Google-account. Wanneer u wacht totdat de installatie voltooid is, zullen uw instellingen niet worden teruggezet. Opmerking: Wanneer u meerdere Google-accounts hebt, zoals gescheiden accounts voor persoonlijke en zakelijke contacten, kunt u die openen en synchroniseren vanuit het onderdeel Accountinstellingen.
Het Beginscherm Het Beginscherm bevat al een aantal zaken, zoals handige besturingselementen en informatie. Tijd en status Zoeken Toepassingmenu Navigatie Zoeken Om te zoeken naar toepassingen, bestanden of naar informatie op het Internet, tikt u op het pictogram Google in de linkerbovenhoek. Voer eenvoudig de tekst in die u wilt vinden. Tik op de pijl of op de toets Enter om op het Internet te zoeken of tik op één van de suggesties, toepassingen of bestanden die in de lijst worden weergegeven.
Start Tik op dit pictogram om direct naar het Beginscherm te gaan. Recent Tik op dit pictogram om recent geopende toepassingen te bekijken. Tik op een toepassing om die te openen of tik op een willekeurige plaats op het scherm om terug te keren naar het Beginscherm. Het uitgebreide Beginscherm Het Beginscherm kan naar beide kanten van het oorspronkelijke Beginscherm worden uitgeklapt, zodat u meer ruimte heeft om widgets toe te voegen of snelkoppelingen te rangschikken.
Het Beginscherm De toepassingen worden weergegeven in alfabetische volgorde. Wanneer er meer toepassingen beschikbaar zijn, zal er aan de zijkant van de scherm een contour van de tweede pagina worden weergegeven. Veeg de contour naar het midden van het scherm om te schakelen tussen pagina’s. Veeg anders naar links om meer toepassingen weer te geven. Wanneer u zich op de laatste toepassingenpagina bevindt, veegt u naar links om de widgets weer te geven die beschikbaar zijn op uw tablet.
Veeg vanuit het meldingsgebied naar beneden om het statuslint weer te geven. Het statuslint bevat meldingen zoals recente downloads en mediabesturing zoals "afspelen/pauseren" en "volgende nummer", wanneer er muziek wordt afgespeeld. Pictogram Beschrijving Pictogram Beschrijving Vergrendelt/ontgrendelt de schermrotatie.
Het Beginscherm Statuspictogrammen voor de batterij Pictogram Beschrijving Pictogram Beschrijving Batterijniveau is zeer laag Batterij is vol Batterijniveau is laag Batterij wordt opgeladen Batterij is gedeeltelijk leeg Opmerking: Wanneer de batterij van uw apparaat te warm wordt, wordt dat gemeld en wordt u aangeraden het apparaat uit te schakelen. Als het niet lukt die uit te schakelen, dan wordt deze automatisch uitgeschakeld.
Het Beginscherm aanpassen U kunt het Beginscherm aanpassen door snelkoppelingen van toepassingen of widgets toe te voegen of te verwijderen, of door de achtergrond te veranderen. Snelkoppelingen of widgets toevoegen of verwijderen Om snelkoppelingen of widgets toe te voegen, tikt u op het pictogram APPS onderaan in het midden van het Beginscherm. Het APPS-menu bevat een lijst met snelkoppelingen naar toepassingen, die u naar het Beginscherm kunt slepen.
Het Beginscherm Om een App of Widget naar het Beginscherm te verplaatsen, tikt u op een item en houdt dat vast totdat het geselecteerd is. Het Beginscherm zal open gaan. Sleept het item naar een willekeurige vrije zone op het scherm. Om informatie te zien over de app of widget sleept u die naar het pictogram boven in het scherm. Om het item naar een ander Beginscherm te verplaatsen, versleept u het naar de zijkant van het scherm; het Beginscherm zal overschakelen naar het scherm in die richting.
De afbeelding van het beginscherm wijzigen Tik en houd vast op een open plek in het Beginscherm. U kunt kiezen uit een aantal vooraf geformatteerde achtergronden, afbeeldingen die opgeslagen staan in de Galerie, geselecteerde Achtergronden of Live achtergronden met bewegende of interactieve achtergronden. Het schermtoetsenbord Als u op een tekstvak tikt of tekst invoert, verschijnt automatisch het schermtoetsenbord. Tik gewoon op de toetsen om tekst in te voeren.
Tekst bewerken Tekstvoorspelling en automatische correctie Het Android-toetsenbord kan zorgen voor voorspellende tekstinvoer. Terwijl u op de letters van het woord tikt, verschijnt een reeks met woorden die de ingedrukte letters aanvullen of een nabije treffer zijn met ruimte voor foute toetsaanslagen. De woordenlijst verandert met elke ingedrukte toets. Als het gewenste woord verschijnt, tikt u erop om het in de tekst te voegen.
3. Versleep de tabs om de hoeveelheid geselecteerde tekst te vergroten of te verkleinen of tik op Alles selecteren. 4. Om de tekst te knippen of te kopiëren, tikt u op de knop KNIPPEN of op KOPIËREN. Tekst invoeren Nieuwe tekst invoeren of tekst toevoegen die u heeft gekopieerd: 1. Tik op de tekst die u wilt selecteren. Wanneer u deze tekst kunt selecteren, wordt er een cursor geplaatst onder de tekst. Opmerking: De cursor geeft aan waar de text die u typt of plakt, zal worden geplaatst. 2.
Tekst bewerken De tablet activeren Als het scherm is uitgeschakeld en de tablet niet reageert als u op het scherm tikt, is de tablet wellicht geblokkeerd en in de slaapstand geschakeld. Haal de tablet uit de slaapstand door op de aan/uit-knop te drukken. De tablet opent het vergrendelingsscherm. Om het scherm te ontgrendelen, drukt u op de vergrendelknop en volgt u het slot-symbool aan de rechterzijde van de cirkel.
Uw tablet uitschakelen Wanneer u uw tablet gedurende langere tijd niet gaat gebruiken, schakel die dan uit om de batterij te sparen. Om uw tablet in te schakelen (zelfs wanneer die vergrendeld is), drukt u op de aan/uit-knop en houdt die een seconde ingedrukt. Tik op Uitschakelen en bevestig de uitschakeling. Om uitschakelen te forceren, drukt u vier seconden op de aan/uit-knop.
Op netstroom aansluiten Apparatuur aansluiten op uw tablet Op netstroom aansluiten Zie "De tablet opladen" op pagina 9. Een microSD-kaart plaatsen (optioneel) U kunt een microSD-kaart plaatsen om de opslagruimte van het apparaat te vergroten. Zorg dat de microSD-kaart volledig in de kaartsleuf is geplaatst. Opmerking: Uw tablet ondersteunt alleen microSD-kaarten die de bestandssystemen FAT of FAT32 gebruiken.
Maak gebruik van een micro-usb- of usb-kabel en steek het micro-uiteinde in uw tablet en het andere uiteinde in uw computer. Na een ogenblik wachten zal het interne geheugen van de tablet zichtbaar worden als Draagbaar apparaat in de verkenner van de PC. Selecteer het pictogram Acer Iconia Tab om het interne geheugen van uw tablet te bekijken en al het extra geheugen (microSD-kaart) waarover uw tablet de beschikking heeft.
Wi-Fi-verbindingen beheren Online gaan Wi-Fi-verbindingen beheren Wanneer u zich niet bij de eerste opstart van uw tablet heeft verbonden met een Wi-Fi-netwerk of u zich wilt verbinden met een nieuw netwerk, klikt u op APPS > Instellingen > Wi-Fi om uw verbindingsinstellingen te beheren. U kunt ook tikken op het Wi-Fi-statuspictogram in de rechterbenedenhoek van het scherm. Wanneer Wi-Fi niet ingeschakeld is, tikt u op wi-fischakelaar AAN en wacht u tot uw tablet netwerken in de buurt detecteert.
Bekijk de browsergeschiedenis, bladwijzers of regelmatig bezochte websites door de browser te openen en op het menupictogram in de rechterbovenhoek te tikken. U kunt meerdere tabbladen openen. Wanneer er een pagina geopend is, tikt u op de kleine knop Nieuw tabblad. Tik eenvoudig op een van de geopende tabbladen boven in het scherm om tussen pagina's te schakelen. Nieuw tabblad Knijp op het scherm om in of uit te zoomen op pagina's. Houd ingedrukt op een item op een pagina om een contextmenu te openen.
Een e-mail schrijven Als nog geen adres en wachtwoord van het Gmail-account is ingevoerd toen de tablet voor het eerst werd gestart, volgt u de instructies. Opmerking: U moet een Google-account activeren om Gmail te kunnen gebruiken. Een e-mail schrijven 1. 2. 3. 4. Controleer of uw tablet aangesloten is op het internet. Open het toepassingmenu en tik op Gmail. Tik op het pictogram Opstellen (rechts weergegeven). Voer het e-mailadres van de ontvanger in, het onderwerp en het bericht zelf. 5.
Item Beschrijving Lengtegraad Bekijk op Google Maps waar uw vrienden zijn. Lokaal Bekijk interessante plekken en winkels in de buurt op Google Maps. Kaarten Eenvoudig te volgen routebeschrijving van Google Maps. Messenger Stuur een sms naar een persoon of een groep mensen vanaf uw Google+ account met deze Messengerservice. Navigatie Stap-voor-stap navigatie met actuele verkeersinfo, diverse zichtbare lagen en tekst-naar-spraak, dit alles brengt u naar uw plek van bestemming.
Online toepassingen Google Play Opmerking: Google Play is wellicht niet beschikbaar in alle landen en regio’s. Opmerking: U moet een Google-account activeren om Google Play te kunnen gebruiken. De eerste keer dat u Google Play opent, dient u de Gebruiksvoorwaarden te lezen en accepteren. Tik op Play Store in het beginscherm of in het menu toepassingen om Google Play te openen. Hier kunt u diverse extra programma’s en toepassingen verkrijgen om de functionaliteit van de tablet te verbeteren.
U kunt de voortgang van de download bijhouden via de apps-pagina en het statusgebied van de tablet. Belangrijk: Voor enkele toepassingen moet eventueel worden betaald voordat u ze kunt downloaden. U hebt een Google Checkoutaccount nodig om voor deze toepassingen te kunnen betalen. Gedownloade toepassingen gebruiken Nadat u een toepassing gedownload en geïnstalleerd hebt, kunt u die terugvinden in de secties APPS of WIDGETS in het Toepassingenmenu.
Online toepassingen Google Talk Opmerking: Google Talk is wellicht niet beschikbaar in alle landen en regio’s. Opmerking: U moet een Google-account activeren om Google Talk te kunnen gebruiken. Tik op Talk in het toepassingmenu om Google Talk te openen. Hier kunt u een lijst zien met uw contacten die verbonden zijn met de diensten van Google Talk. Tik op een contact om een chatsessie te openen. Nadat u verbonden bent, kunt u een videogesprek openen.
Muziek en video afspelen Multimedia afspelen De tablet wordt geleverd met diverse programma's waardoor u van diverse multimedia kunt genieten. Muziek afspelen Gebruik Muziek afspelen om te luisteren naar muziek of andere audiobestanden die u vanaf uw computer, usb-station, apparaat voor massaopslag, etc. downloadt of kopieert. Tik op APPS > Muziek afspelen om de toepassing te openen. Opmerking: De bedieningselementen in Muziek afspelen kunnen enigszins afwijken, afhankelijk van de schermoriëntatie (d.
Multimedia afspelen Afhankelijk van de selectie, wordt uw muziekbibliotheek gegeven als een vlak met albumhoezen of een lijst met nummers. Opmerking: U kunt terugkeren naar de beginpagina terwijl u muziek afspeelt. Het actuele nummer met basisfuncties voor de afstelling van de muziek verschijnen in het statuslint. Zie "Status- en meldingsgebied" op pagina 14.
Personen en contacten beheren De tablet bevat een telefoonboek waarvan u contacten in het interne geheugen of in uw Google-account kunt opslaan. Tik op Personen in Beginscherm of het menu toepassingen om uw contacten te bekijken. Wanneer u geen contacten opgeslagen hebt op uw tablet, kunt u synchroniseren met de contacten van uw Google-account, contacten importeren van een contactgegevensbestand (vCard of csv) of een nieuw contact toevoegen.
Een nieuw contact toevoegen Tik op Nieuw om een nieuw contact toe te voegen. Wanneer u meerdere accounts hebt, zal u gevraagd worden welke account u wilt gebruiken om het contact in op te slaan. Het contact zal met die account worden gesynchroniseerd. U kunt nu het nieuw ingevoerde contact bewerken. Een contact bewerken Wanneer u een nieuw of bestaand contact geopend hebt, kunt u informatie over dat contact invoeren: Tik eenvoudig op een tekstvak en voer de gewenste informatie in.
Tip: Stel elk telefoonnummer in op het correcte netwerktype, omdat hierdoor bepaalde functies kunnen worden bepaald. Bepaalde toepassingen herkennen bijvoorbeeld alleen ‘mobiele’ nummers omdat die een functie nodig hebben, die alleen beschikbaar is op een mobiel netwerk. Een contact openen Tik op de naam van een contact in de lijst aan de linkerzijde om de gegevens van het contact te bekijken. Tik op een gegeven (zoals een e-mailadres) om de toepassing te openen die gekoppeld is aan dat soort invoer.
Indicatoren en pictogrammen van de camera De camera en camcorder gebruiken De tablet bevat een 2-megapixel digitale, naar voren gerichte camera. In dit hoofdstuk vindt u alle informatie over het maken van foto's en video's met de tablet. Opmerking: Wij raden u aan om voor het gebruik van de camera een microSD-kaart te plaatsen. Wij willen u erop wijzen dat u alleen foto's en video's op het interne geheugen of de microSD-kaart kunt opslaan en niet op een extern usbopslagapparaat.
Pictogram Beschrijving Uitzoomen U kunt alleen uitzoomen nadat u heeft ingezoomd. Een foto maken Nadat u een foto genomen hebt, tikt u op de miniatuur in de rechterbovenhoek om de foto te bekijken en te delen. Opties Tik om de cameraopties te bekijken. Camcorder-modus Overschakelen naar de camcorder (videorecorder). Cameramodus Overschakelen naar de camera. Panorama Gaat in de panoramamodus waardoor u een foto kunt maken van een groot gebied.
Een foto maken Een foto maken 1. Controleer of de bovenstaand beschreven opties ingesteld zijn in overeenstemming met uw voorkeuren. 2. Zoek het beeld in de zoeker en houd de tablet stil. 3. Indien nodig zoomt u in of uit. Opmerking: Wanneer u zoom gebruikt, is de kwaliteit van het beeld op het scherm niet gelijk aan die van de uiteindelijke afbeelding. 4. Tik op het camerapictogram om de foto te maken. Nadat u een foto genomen hebt, tikt u op de miniatuur in de rechterbovenhoek om de foto te bekijken.
Pictogram Beschrijving Opnemen starten/stoppen Opties Tik om de camcorderopties te bekijken. Camcorder-modus Overschakelen naar de camcorder (videorecorder). Cameramodus Overschakelen naar de camera. Panorama Gaat in de panoramamodus waardoor u een foto kunt maken van een groot gebied. Camcorder-opties Camcorder-opties aanpassen voor het beste beeld: Pictogram Beschrijving Witbalans Wijzig de kleurbalans om die af te stemmen op de belichting: Automatisch, Gloeilamp, Daglicht, TL of Bewolkt.
Een video opnemen Een video opnemen 1. Controleer of de bovenstaand beschreven opties ingesteld zijn in overeenstemming met uw voorkeuren. 2. Richt op het subject en houd de tablet stil. Zoom naar wens in of uit. 3. Tik op het opneempictogram om de opname te starten. 4. Tik nogmaals op het opnamepictogram om de opname te stoppen. Ondersteunde formaten Type Formaten Foto JPEG Video H.264 BP, MPEG-4 SP, H.
Geavanceerde instellingen Toegang tot de Instellingen vanuit het Toepassingmenu. Tik op APPS, en daarna op Instellingen. Draadloos en netwerken Verbindingen activeren of deactiveren Tik op APPS > Instellingen en daarna heeft onder DRAADLOOS EN NETWERKEN iedere verbinding een AAN/UIT-schakelaar waarmee de verbinding kan worden beheerd. Tik op een item om uw verbindingsinstellingen te beheren. U kunt ook de rechterzijde van de statusbalk gebruiken om verbindingsinstellingen te beheren.
Draadloos en netwerken Maak verbinding met een apparaat door op het apparaat in de lijst met beschikbare apparaten te tikken. Eventueel wordt u gevraagd een pincode in te voeren op beide apparaten om de verbinding tot stand te brengen. Opmerking: Alleen A2DP-stereoheadsets (alleen afspelen, geen microfoon) worden ondersteund. Controleer op updates voor de software van uw tablet om ondersteuning toe te voegen voor extra Bluetoothapparaten.
Apparaat Geluid Pas het volume van de tablet aan met de volumetoetsen aan de zijkant van de tablet. U kunt de instellingen van het tabletgeluid ook aanpassen via APPS > Instellingen > Geluid. Item Beschrijving Volumes Stelt het volume in voor Media, Alarm en Meldingen. Standaardmelding Stelt een beltoon in voor meldingen. Aanraakgeluiden Speelt een geluid af als een keuze op het scherm wordt gemaakt. Schermblokkeergeluid Speelt een geluid af als het scherm wordt geblokkeerd en gedeblokkeerd.
Persoonlijk Een toepassing verwijderen U kunt programma's verwijderen die op de tablet zijn geïnstalleerd om extra geheugenruimte vrij te maken. Houd in het toepassingmenu ingedrukt op een programmapictogram en versleep het naar de zone Verwijderen in de linkerbovenhoek. Opmerking: U kunt geen toepassingen verwijderen die vooraf op de tablet zijn geïnstalleerd. Of gaan naar APPS > Instellingen en selecteer Apps.
Taal- en tekstopties veranderen Stel uw locatie en voorkeuren voor taalinvoer in door te tikken op APPS > Instellingen > Taal en invoer. Systeem De datum en tijd instellen Om de tijd en de datum in te stellen tikt u op APPS > Instellingen > Datum en tijd. Tip: Als u regelmatig reist of op een plek woont waar zomer- en wintertijd gebruikt worden en u toegang heeft tot een mobiel netwerk, activeer dan Automatische datum en tijd in dit menu.
De tablet opnieuw instellen De tablet opnieuw instellen U moet de tablet eventueel herstellen als die niet meer reageert op indrukken van toetsen of tikken op het scherm. Om de tablet opnieuw in te stellen, gebruikt u een klein dun voorwerp (zoals een paperclip) om de verzonken resettoets boven de aan/uit-knop in te drukken. Opmerking: Wanneer u de reset-opening gebruikt om uw apparaat opnieuw in te stellen, is het nodig de aan/uit-knop in te drukken om de tablet opnieuw in te schakelen.
FAQ en problemen oplossen Dit hoofdstuk bevat een lijst met veelgestelde vragen die bij u kunnen opkomen als u de tablet gebruikt, en biedt eenvoudige antwoorden en oplossingen voor deze vragen. Onderdeel Vraag Antwoord Geluid Waarom komt er geen geluid uit het toestel? Als de headset op het toestel is aangesloten, wordt de luidspreker automatisch uitgeschakeld. Maak de headset los. Controleer of het volume van het toestel niet gedempt is.
Onderdeel Opslag Andere hulpbronnen Vraag Antwoord Hoe kan ik de status van het geheugen controleren? Om de geheugenstatus te controleren, gaat u naar Instellingen > Opslag. Wat moet ik doen als de beschikbare interne opslagruimte van mijn apparaat vol of bijna vol is. U moet wellicht geïnstalleerde apps verwijderen of mediabestanden verplaatsen naar de microSD- kaart. Na vijf onjuiste pogingen, kunt u het ontgrendelingspatroon opnieuw instellen.
Specificaties Prestaties • MediaTek 1,2 GHz dual-core processor • Systeemgeheugen: • 512 MB RAM • 8 of 16 GB flashgeheugen Google Android™ besturingssysteem Beeldscherm • 7” wsvga tft-lcd capacitief multi-touchscreen • 1024 x 600 resolutie Multimedia • Mono luidspreker • Ingebouwde microfoon Ondersteunde formaten: Type Formaten Audio opnemen AAC-LC, AMR-WB Afspelen van geluid AAC-LC, AAC, AAC+ (geen “raw AAC”), AMR-NB, AMR-WB, MP3, OGG Vorbis, WAV Opnemen van video H.264 BP, MPEG-4 SP, H.
Camera • 0,3-megapixel camera aan de voorzijde Uitbreiding • microSD™-kaartsleuf Batterij • Oplaadbare lithium-ion-accu, 10 W Opmerking: De duur van het batterijgebruik is afhankelijk van het stroomverbruik, wat afhankelijk is van het gebruik van de systeembronnen. Als bijvoorbeeld altijd de verlichting is ingeschakeld, of als toepassingen worden gebruikt die veel stroom eisen, moet de batterij vaker worden opgeladen.
Eindgebruikerslicentieovereenkomst BELANGRIJK - LEES ZORGVULDIG DOOR: DEZE EINDGEBRUIKERSLICENTIEOVEREENKOMST ("OVEREENKOMST") IS EEN JURIDISCHE OVEREENKOMST TUSSEN U (ALS INDIVIDU OF RECHTSPERSOON) EN ACER INC.
ONDERSTEUNING Acer is niet verplicht technische of andere ondersteuning voor de Software te bieden. ACER LIVE UPDATE Bepaalde software bevat elementen die gebruik maken van de dienst Acer Live Update, waarmee automatisch updates voor deze software op het toestel worden gedownload en geïnstalleerd.
BEPERKING VAN AANSPRAKELIJKHEID EN RECHTSMIDDELEN ONGEACHT ENIGE SCHADE DIE OM WELKE REDEN DAN OOK IS OPGETREDEN (WAARONDER, MAAR NIET BEPERKT TOT ALLE SCHADE DIE HIERBOVEN IS GENOEMD EN ALLE DIRECTE OF INDIRECTE SCHADE) ZAL DE TOTALE AANSPRAKELIJKHEID VAN ACER, ZIJN LEVERANCIERS EN LICENTIEHOUDERS, ONDER GEEN ENKELE VOORWAARDE VAN DEZE LICENTIE, EN ALS COMPENSATIE VOOR HET VOORAFGAANDE, BEPERKT ZIJN TOT HET TOTAALBEDRAG DAT U VOOR DE SOFTWARE HEBT BETAALD.