BDK-2000 Blu-ray Disc Karaoke Player User’s Manual V.2 CAUTION: To assure this player will work at its best, please read this user ’s manual carefully before operation and keep for future reference. www.Acesonic.
Warnings, Cautions and Others Mises en garde, precautions et indications diverses For Canada/Pour le Canada CAUTION: TO PREVENT ELECTRIC SHOCK, MATCH WIDE BLADE OF PLUG TO WIDE SLOT,AND FULLY INSERT. ATTENTION: POUR EVITER LES CHOCS ELECTRIQUES, INTRODUIRE LA LAME LA PLUS LARGE DE LA FICHE DANS LA BORNE CORRESPONDANTE DE LA PRISE ET POUSSER JUSQUAU FOND. Caution Risk of Electric Shock Do Not Open CAUTION: TO REDUCE THE RISK OF ELECTRIC SHOCK. DO NOT REMOVE COVER (OR BACK).
1. Important Safety Instructions Read These Instructions. 2. Keep These Instructions. 3. Heed All Warnings. 4. Follow All Instructions. 5. Do not use this product near water. 6. Clean only with dry cloth. 7. Do not block any ventilation openings. 8. Do not install near any heat sources such as radiators, heat register, stoves, or other apparatus (including amplifiers) that produce heat. 9. Do not defeat the safety purpose of the polarized or grounding-type plug.
Acesonic BDK-2000 Included Accessories *Never block the vents on the unit. Vents are used to circulate air Please check that you have all of the following accessories and keep the temperature of the player down. supplied to you. If anything is missing, please contact your Blocking the vents may result in damage of the unit. dealer immediately.
Before Operation Playable Media This unit supports the following formats: *MP3, WAV, WMA, MPEG-1, MPEG-2 (MPG/VOB), MPEG-4 (AVI), MKV, ISO, JPEG, and MP3G (mp3/cdg) files. Above media is playable on the following discs: *Blu-ray™ Discs, BD-ROM, BD-R, BD-RE, DVD, DVD±R, DVD+RW, VCD, CD-DA,CD-R, CD-RW, MPSG, VCDs, CD+Gs, CDs, and Data Discs. Note: Any disc that is not listed above will cause the player to display “NO DISC” in the DISPLAY WINDOW.
Player Connections Audio Connections Line Out Connections Connect the RCA cable from the Audio L and R outputs of the BDK-2000 to the Line Ins (NOT Phono Ins) on the stereo amplifier or TV. If using a TV that has only 1 input, only connect either the Left or Right Channel. Under some circumstances (such as playing an MP3+G File) you can use the Audio MPX button to change the audio to be a mix of left and right channels (mono).
z Front Panel Operation: 1) DISPLAY WINDOW - Displays player status such as time, disc format, and song number. If no disc is in the tray, the display window will display NO DISC. Detailed information will also be shown on the TV screen. 2) REMOTE SENSOR window Receives signals from remote control. (Underneath display bezel and so not visible here. This is where the remote should be aimed for best operation.) 17) POWER - Press the button to turn the unit on or off. 18) level.
Rear Panel Operation: AC Cord Input - Connection to the auto-detect AC power supply (100-240V,50-60 Hz). Rear Panel Connections 1) Component Video Output (Pb) Blue Difference channel output. 7) OPTICAL OUTPUT – SPDIF Optical output for connection with a digital amplifier or receiver for Dolby Digital or DTS sound. 2) Component Video Output – (CVBS) Luma (Luminance) output. 8) HDMI Video Output – Used to connect the unit to a High Def. TV through the HDMI input.
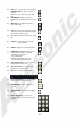
Remote Control Operations 1) POWER BUTTON - Turns the player on or off. Note: This merely puts the unit into standby mode. To fully power the unit down, manually press the power button on the unit’s front panel.
20) KEY buttons – Used to raise or lower the pitch SHARP BUTTON (♯) - Raises the key by a half step 21) Flat button (♭) – Lowers the key by a half step INFO BUTTON - Displays the elapsed or remaining time for single track, file, or the total disc 22) MUSIC VOL (+/-) – Adjusts the volume of music audio output. 23) CUE - Inserts a pause/break between end and start points of track or file. Turning this function off will result in continuous play 24) PIP – Switches Picture-in-Picture mode on and off.
Basic Operations Basic Playback Turn on the BDK-2000. After a few moments the initial menu screen will appear. To Stop Playback Completely Press the STOP button twice. Now when you press the PLAY button, it will begin from the beginning of the disc. Also, if you eject the disc, the playback completely stops and ejects the disc. To Pause Playback Press the PAUSE button to pause playback. To resume, press either the PLAY or PAUSE button. Note: *Do NOT insert a damaged disc.
Disc Navigate to the Disc Icon using the directional buttons [◄/►] Press the ENTER button to confirm your selection Disc will play automatically, if loaded. USB Navigate to the USB Icon using the directional buttons [◄/►] Press the ENTER button to confirm your selection Screen will show the root directory of the USB memory device, if one is inserted.
Ripping, Recording and Speech Dictation Ripping Tracks from CDG into MP3+G 1. Insert a CD+G 2. Press the SETUP button on the remote control to launch the Ripping menu 3. Use the directional buttons to highlight the desired track(s) and press ENTER to select 4. Select each of the desired tracks to be recorded To Select All Tracks, simply press the Red function button labeled A on the remote control 5.
Setup menu System Setup Note: Pressing the RETURN button will revert back to previous menu-level/screen. 1) 2) Navigate to the Setup Icon by using the directional buttons [◄/►] Press the ENTER button to confirm your selection General Screen Saver This setting allows you to turn the floating ACESONIC logo to after a period of inactivity. Select On to enable Select Off to disable Note: Screen Saver is set to begin after 3 Minutes of inactivity.
Version Displays the version of your player’s operating system that is currently installed. Keeping this version current will ensure your player has the latest features and bug fixes. Firmware updates can be found at http://www.acesonic.com/bdk2kfirmware.html Software Update 1) You will need to have the software loaded on a USB memory device and select when prompted to Choose device (USB1, USB2, or Disc) 2) Use directional buttons [▲/▼] to select "Disc" or "USB" depending on where you loaded the firmware.
Language 1) 2) Press the directional buttons [▲/▼] to select “Language” Press the ENTER button or right-directional button [►] to confirm it. OSD (On Screen Display) Language 1) Press the directional buttons [▲/▼] to select “OSD Language” 2) Press the ENTER button or right-directional buttons [►] to select the Sub-Menu. 3) Press the directional buttons [▲/▼] to select “English”, ”Francais”, or “Español” 4) Press the ENTER button to confirm it.
Network 1) 2) Press the directional buttons [▲/▼] to select “Network” Press the ENTER button or right-directional button [►] to confirm it. Wired 1) Press the directional buttons [▲/▼] to select “Wired” 2) Press the ENTER button or right-directional button [►] to select the Sub-Menu. Auto Configuration 1) Press the directional buttons [▲/▼] to select “Auto Configuration” 2) Press the ENTER button or right-directional button [►] to select the Sub-Menu. 3) The Auto configuration will run automatically.
Slide 1) 2) Press the directional buttons [▲/▼] to select “Slide” Press the ENTER button or direction button [►] to confirm it. Transition Mode 1) Press the directional buttons [▲/▼] to select “Transition Mode” 2) Press the ENTER button or right-directional button [►] to select the Sub-Menu. 3) Press the directional buttons [▲/▼] to select “None”, “Slide”, “Stripes”, “Fade”, “Wipe”, or “Random” 4) Press the ENTER button to confirm it.
1) 2) 3) Press the directional buttons [▲/▼] to select “Font Colour”. Press the ENTER button or right-directional [►] to select the Sub-Menu Press the directional buttons [▲/▼] to adjust –99 to +99 seconds. TV Display 1) 2) 3) 4) Press the directional buttons [▲/▼] to select “TV Display”. Press the ENTER button or right-directional [►] to select the Sub-Menu. Press the directional buttons [▲/▼] to select “4:3 Letterbox”, ”4:3 Pan Scan”, or ”16:9”. Press the ENTER button to confirm it.
and electrical appliances in use. If the trouble cannot be rectified even after exercising the steps listed below, call our Acesonic service center +1-626-820-0670 to inquire about repairs. Reset to Factory Settings Operation Symptom Resetting the unit to factory defaults will likely solve more than 90% of problems encountered. The Disc automatically ejects back out when the DVD tray is closed. Cannot execute playback. Video playback stops and the operation buttons cannot be used.
NOTES 17
ACESONIC USA CORP. City of Industry CA, U.S.A Customer service: +1626 820 0670 www.acesonic.