e
Declaration of Conformity Manufacturer: Klaus Süßmuth Elektronik Manufacturer´s Karlsbaderstr.
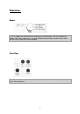
Sequencer Modes In all six modes the playing of the sequencer is guaranteed. You can change the modes, while the sequencer is running. Switching into another mode, takes place after the last step of the current pattern. Start/Stop Start/Stop works in each mode, and puts the pattern back to the starting point step 1 of the current pattern.
Pattern-Group 12 pattern groups are available. One pattern Group contains 8 patterns. Pattern The current pattern is indicated with the LEDS 1-8. A pattern consists of maximally 16 steps. Altogether 96 patterns are available (12 pattern groups with 8 patterns each).
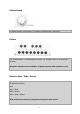
Pattern Play The memory of a new Autobot is empty, and new patterns must be programmed, as described in Pattern Write mode. In the Pattern Play mode, patterns are played. The active step lights up in the the upper LED row. The light shows the length of the Pattern (1-16), too. The pattern is selected from one of the 12 pattern groups. You can change the pattern group at all times with the rotary switch, and the switching into the new pattern group takes place after the last step of the current pattern.
Pattern Chaining In the Pattern Play mode, it is possible to chain patterns from a pattern group: If pattern 1 is active, and repeats, pattern button 1 is kept pressed again, and the pattern button 2 is pressed additionally. Both LEDs from Pattern 1 and from Pattern 2 light. Both are played repetitive. The LED of the active pattern flashes and the other one lights continuously. This chaining of two neighbouring patterns is possible with the patterns 1-2, 2-3, 3-4, 5-6 and 7-8.
Pattern Copy + Paste (Pattern Play Mode) In Pattern Play Mode, it is possible to copy patterns. Copy Function To copy a pattern, press one of the pattern buttons (1-8) while holding down the Select- button. The pattern is now saved to the buffer memory and will remain there until another pattern is selected.
Paste Function To paste a pattern, press one of the pattern buttons (1-8) while holding down the Write/Next button. This pattern will be overwritten with the pattern from the buffer memory. Patterns can also be copied to another Pattern Group. To do so, select the new group with the rotary switch and then use the Paste Function. Manual Slide and Accent (Pattern Play Mode) In Pattern Play Mode, it is possble to add Slide and Accent manually, with the pressing of the Slide or Accent buttom.
Pattern Write The memory of a new Autobot is empty, and new patterns must be programmed! There are two Pattern Write modes: Pattern Write Step and Pattern Write Tap Switching from the Pattern Play mode in the Pattern Write Tap or Pattern Write Step mode, is possible during operation. Selected chains from the pattern Play mode, are transferred in the Pattern Write Tap mode, and are played repetitive. The whole pattern chain can be edited in the Pattern Write Tap mode.
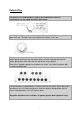
Pattern Write Tap In the Pattern Write Tap mode, it is possible it to change the programming of pitch, note, Slide and Accent "live". The selection of the pattern or the pattern chain that should be edited, takes place in the Pattern Play mode. The upper LED row indicates the active step, as in the Pattern Play mode. The lower 8 buttons of the keyboard indicates the active pattern with a flashing LED, as in the Pattern Play mode.
Zustand LED Octave-Offset buttom Octave + Octave + --Octave Octave - - Octave + Octave off off off constant on flashes flashes constant on off off off + 2 Octaves + 1 Octave ---- 1 Octave - 2 Octaves As described in the table, it is possible to shift the pitch of each note with the buttoms Octave Up/Down between the 5 octaves. Without the Octave Up/Down buttons it is always programmed in the middle octave (no LED lights).
Programming Scale (Pattern Write Tap Mode) Press the Roll/Scale buttom while holding down the Select button. Now you can select the step 1-4, and the pattern scale of your active pattern. The Scale of the active pattern will be saved to the buffer memory. Shuffle can just be changed when the LED of Step 1 lights (4/4-Scale).
Programming Shuffle (Pattern Write Tap Mode) The Autobot has two kinds of Shuffle: - The first kind of shuffle delays the even numbered steps (2, 4, 6, ...). This is similar to the common shuffle found on the 909. - The second kind of shuffle delays steps 3, 7, 11 and 15. This second kind of shuffle is similar to the one on the CR-8000. Both shuffles can be applied simultaneously. Each of the two shuffles can be adjusted over a range of 4 degrees.
Pattern Write Step With the mode rotary switch you switch into the Pattern Write Step mode, without stopping the equipment. In contrast to the Pattern Write Tap mode, only a single pattern can be played and edited. The pattern is taken with the time of switching. As in the Pattern Play mode, a flashing LED of the lower 8 buttons of the keyboard indicates the active pattern. As in the Pattern Write Tap mode, pitch, Octave Up/Down, Accent and Slide, can be edited, but only for a selected step individually.
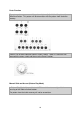
A second possibility to select the step (direct step-selection) Press the buttom Select continuously, and the first LEDs of the row light. With pressing one of the buttoms 1-8 of the keyboard, the step is directly selected e.g. the step 7. Now this step can be changed. With pressing the buttom Select twice and holding, the upper eight LEDs 9-16 lights, and with the buttoms 1-8 of the keyboard, the steps 9-16 can be selected directly. The LED in the upper LED row, shows the active step.
The LEDs over the keys indicate the programming of Octave Up/Down, Slide, Accent, of the note. Oktave UP/DOWN, Accents and Slides can be only programmed, if a note is programmed! If a note is unwanted, it can be deleted with Clear. Accent, Slide and Octave Up/Down are deleted too. When pressing the buttoms Slide and Accent the programming changes the previous programming (toggles). The buttom Octave Up/Down adds or subtracts a octave.
Programming Pattern Length ( Pattern Write Step Mode) When you press the buttom Lenght, the LEDs 1-8 of the row light. Now you can select the last step 1-8, and the pattern length of your active pattern. You press one buttom 1-8 of the keyboard, and this step is selected as the last step of the pattern. E.g. step 3. Now the Pattern repeats after the third step, and is 3 steps long. Press the buttom Length twice, and the LEDs 9-16 lights. Now you can select the pattern length between 9-16.
Programming Shuffle (Pattern Write Step Mode) The Autobot has two kinds of Shuffle: - The first kind of shuffle delays the even numbered steps (2, 4, 6, ...). This is similar to the common shuffle found on the 909. - The second kind of shuffle delays steps 3, 7, 11 and 15. This second kind of shuffle is similar to the one on the CR-8000. Both shuffles can be applied simultaneously. Each of the two shuffles can be adjusted over a range of 4 degrees.
Programming Roll With the roll function the starting point of a Pattern is shifted. The Pattern length remains unaffected. The selected step and its cursor is shifted to the left when you press the buttom Roll. Roll and a pattern with 16 steps: the starting step sequence: 1,2,3,...15,16 (1 is the original starting point) press Roll once: 2,3,4,5.......16,1 (2 is the new starting point) press Roll again: 3,4,5,6......
Track Play Mode The memory of a new Autobot is empty, and new patterns and tracks must be programmed: A track is a chaining of different and transposed patterns from a pattern group. In the Track Write mode the chained patterns are chained to one track 1-12, that can be selected with the rotatory switch. For each pattern group, one track is available. A change to another new track finishes the current pattern and starts the new track with its first pattern.
The active pattern is indicated with the LED over the buttom and is played repetitive. Press Write/Next and the current pattern becomes the first pattern of the track. Then a new Pattern can be selected. Press the Write/Next buttom, and the second Pattern is fixed in the TRACK. The selected Pattern is sequentially repeated as in the Pattern Play mode. As in the Pattern Play mode you can chain several Pattern and be written with a Write/Next completely in the track.
Transposition (Track Write Mode) The selected and repeating pattern can be transposed. A pitch offset (within a oktave) can be added. While the Pattern 1 repeats, press the Select buttom continuously, and press at the same time one of the 12 possible pitch offsets of the keyboard. Now the entire pattern is transposed by the pitch offset that has been added. This transposed pattern repeats and can be changed with the repeated pressing of the Select buttom and a new pitch offset again.
Synchronisation The sequencer can be synchronized with Midi in or Sync in (Roland)! Midi-Clock to Sync out: If the synchronisation switch is in the position Midi in, a Midi Clock of a Midi-master synchronises the bassline. At the Sync socket there is a Sync Out signal that can be used to synchronise other gear with Sync In. Sync-Slave: If the synchronisation switch is in the position Sync In, an external Sync Master synchronises the bassline.
With Tempo, the speed of the internal clock generator is controlled. Start and stop with the Start/Stop buttom. The Sync cable must have all pins connected.
Midi Mode The Autobot can also be controlled using MIDI Note Data. The Bassline must be connected with a Midi-cable on its Midi In, to the Midi Out of the Midi-master (Midi-sequencer, laptop, …). To use the Bassline3 in Midi Mode, switch off the Bassline using the On-Off slide switch on the right side of the rear panel. Now hold the the Write/Next [Midi] button and switch the Bassline back on with the On-Off slide switch. You can see that you are in MIDI Mode when the LEDs of Step 1-4 are illuminated.
Slide With the Slide you change the Slide-time. In the middle position you get the slide-time of a 303. In the left position, the slide time is as short as possible and is the same to not programmed slides. In the right position the slide-time is 8 times longer than of a 303. CV-, Gate- und Accent-Outputs: Over the sockets CV Out and Gate Out (3.5 mm, mono) compatible synthesizers can be played.
Trigger-Outputs: 1st Trigger Out: The 1st Trigger Out gives out a 12V impuls (10ms) at the first step of a pattern. This Trigger can be used to reset counters or LFOs(Reset In). 16`` Trigger Out: The 16`` Trigger Out gives out a 12V impuls (10ms) on every 1/16 and can be used to trigger and synchronise counters. The timing is independent from the shuffel-settings. You can invert this trigger by changing the jumpersetting on the backside of the PCBboard.
ST/ST Trigger Out: The ST/ST Trigger Out gives out a singel 12V impuls (10ms) at the starting of the sequencer. This Trigger can be used to reset counters or LFOs(Reset In).
Voltage Supply The Autobot has to be connected with the delivered 2x8 ribbon-cable to the +/-12Vpowerbus (e.g. Doepfer). The secound 2x8 multi-pin-connector on the PCB-board can be used for a flying-buswiring. The lowerpin is connected to the –12V. It is not necessary to supply the Autobot with a +5V. The Autobot generates a +5V out of the connected +12V.
CV-, Gate-Bus If there is no CV-Gate-source connected to the CV-/Gate-Bus, then the CV-/Gate-Out of the Autobot should be connected. Jumper J1 and J2 must be set. Now it is possible to control modules (e.g. VCOs or ADSRs) with the CV-/Gate-Bus. Please do not set the jumper J1 and J2, if there is no modul in the need of the CV-/Gate-Bus. Warranty The manufacturer grants a warranty of two years starting from the purchase date on the product, in accordance with the condition described here.