42 inch Plasma TV Operating Instructions Model No.: AR4200 For assistance, please call: 1-800-619-3848 Before connecting, operating or adjusting this product, please read these instructions completely.
Table of Contents Important Information...................................................................................................................1 Important Safety Precautions ......................................................................................................2 Preparations...................................................................................................................................5 Using the Remote Control .....................................................
Table of Contents Setting Sound ...............................................................................................................................28 Using the Preset Audio Mode .............................................................................................28 Customizing the Sound........................................................................................................28 Adjusting the Headphone Volume ...................................................................
Important Information WARNING: TO REDUCE THE RISK OF FIRE OR ELECTRIC SHOCK, DO NOT EXPOSE THIS APPARATUS TO RAIN OR MOISTURE.
Important Safety Precautions Electrical energy can perform many useful functions, but it can also cause personal injuries and property damage if improperly handled. This product has been engineered and manufactured with the highest priority on safety. But IMPROPER USE CAN RESULT IN POTENTIAL ELECTRICAL SHOCK OR FIRE HAZARD. In order to prevent potential danger, please observe the following instructions when installing, operating and cleaning the product.
Important Safety Precautions (continued) 12. Stand---Use only with the cart, stand, tripod, bracket, or table specified by the manufacturer, or sold with the apparatus. Do not place the product on an unstable trolley, stand, tripod or table. Placing the product on an unstable base can cause the product to fall, resulting inserious personal injuries as well as damage to the product. When mounting the product on a wall, be sure to follow the manufacturer’s instructions.
Important Safety Precautions (continued) 22. Power source---This product is intended to be supplied by a listed power supply indicated on the marking label. If you are not sure of the type of power supply to your home, consult your product dealer or local power company. For added protection for this product during a lightning storm, or when it is left unattended and unused for long periods of time, unplug it from the wall outlet and disconnect the cable system.
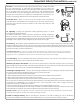
Preparations Using the Remote Control
Preparations (continued) Power connection Household power Plug into AC outlet. AC cord SPEAKER R CONTROL L DVI AUDIO COMPONENT INPUT 1 D-SUB PIC AUDIO PIC Y Cb /Pb Cr /Pr AUDIO COMPONENT INPUT 2 Y Cb /Pb Cr /Pr AUDIO HEADPHONE AV OUTPUT VIDEO L AUDIO R AV INPUT VIDEO RF SVHS AC- INPUT L AUDIO R 1. Connecting the female plug to the AC socket on the unit. 2. Connecting the male plug to the wall outlet as illustrated.
Preparations (continued) Antenna Connection CABLE TV (CATV) CONNECTION A 75-ohm coaxial cable connector is built into the set for easy hookup. When connecting the 75- ohm coaxial cable to the set, screw the 75-ohm cable to the ANT. Terminal. Some cable TV companies offer “premium pay channels”. Since the signals of these premium pay channels are scrambled, a cable TV converter/descrambler is generally provided to the subscriber by the cable TV company.
Identification of Controls Main unit (front view) MENU SOURCE MENU VOL VOL CH CH REMOTE SENSOR POWER INDICATOR A blue indicator lights when the power is on and a red indicator lights when in the standby mode. BOTTOM VIEW MENU POWER SWITCH VOL CH POWER ON/STANDBY CHANNEL MENU DOWN/UP VOLUME DOWN/UP 1. POWER Press this button to turn the unit ON from STANDBY mode. Press it again to turn the set back to STANDBY. 2. MENU Press this button to access the MENU main page. 3.
Identification of Controls (continued) Main unit (rear view) AC power input socket Speaker output jacks SPEAKER L R AC - INPUT CONTROL SPEAKER R CONTROL D-SUB D-SUB DVI AUDIO PIC AUDIO DVI AUDIO L COMPONENT INPUT 1 D-SUB PIC AUDIO PIC Y COMPONENT INPUT 1 PIC Y Cb /Pb Cr /Pr AUDIO Cb /Pb Cr /Pr COMPONENT INPUT 2 AUDIO Y Cb /Pb Cr /Pr AUDIO HEADPHONE AV INPUT AV OUTPUT VIDEO L AUDIO R VIDEO RF SVHS AC- INPUT L AUDIO R COMPONENT INPUT 2 Y Cb /Pb Cr /Pr HEADPHONE AUD
Identification of Controls (continued) Remote Control 10 1 2 - + 11 3 STILL ZOOM CLK SLP 4 5 12 13 6 7 14 15 8 9 16 1. POWER Turn the unit on or standby 2. CH5/6,VOL+/CH5/6---Use to switch channels; VOL+/----Use to adjust volume; In MENU operation, use CH5/6 to select menu item and VOL+/- to adjust selected item 3. MENU To access the MENU main page 4. STILL To freeze current picture 5. ZOOM To go into ZOOM or PAN mode 6. S.M To access sound mode select menu 7. P.
Identification of Controls (continued) Remote Control - STILL 17 18 + ZOOM CLK MENU MODE 24 POS 19 20 21 22 23 SLP 25 SIZE SWAP PIP SPEAKER AUTO 26 17. MODE To access screen layout select menu 18. PIP display To activate picture in picture 19. POS To access PIP frame position select menu 20. SIZE To access PIP frame size adjusting menu 21. SPEAKER In multi-picture mode, press this button to output the sound of the selected picture frame from speaker 22.
Connections Cautions before connecting Carefully check the terminals for position and type before making any connections. The illustration of the external equipment may be different depending on your model. Loose connectors can result in image or color problems. Make sure that all connectors are securely inserted into their terminals. Refer to the user manual of the external device as well. When connecting an external device, turn the power off on the panel to avoid any issues.
Connections (continued) Connect a Camcorder CONTROL D-SUB D-SUB DVI AUDIO PIC AUDIO COMPONENT INPUT 1 PIC Y Cb /Pb Cr /Pr COMPONENT INPUT 2 AUDIO Y Cb /Pb Cr /Pr HEADPHONE AUDIO AV INPUT AV OUTPUT VIDEO L AUDIO R VIDEO RF SVHS L AUDIO R BOTTOM VIEW Y Y W R W R Yellow (VIDEO) White (AUDIO L) Red (AUDIO R ) Video cable Y VIDEO Audio cable W OUT IN R L AUDIO R How to connect: Connect the Audio/Video cables between the Audio (L/R)/Video jacks on the unit and camcorder.
Connections (continued) Connect a DVD player CONTROL D-SUB D-SUB DVI AUDIO PIC AUDIO COMPONENT INPUT 1 PIC Y Cr /Pr Cb /Pb COMPONENT INPUT 2 AUDIO Y Cr /Pr Cb /Pb AUDIO HEADPHONE AV OUTPUT VIDEO L AUDIO R AV INPUT VIDEO RF SVHS L AUDIO R BOTTOM VIEW G W B R white (audio L) R red (audio R, Pr /C r ) Video cable G Green (Y) Audio cable B Blue (P b /Cb ) R B G R W DVD player COMPONENT AUDIO Pb L AUDIO R Pr Y AV OUT R AUDIO L VIDEO S - VIDEO Rear of the DVD player
Connections (continued) Connect a DTV receiver CONTROL D-SUB D-SUB DVI AUDIO PIC AUDIO COMPONENT INPUT 1 PIC Y Cr /Pr Cb /Pb COMPONENT INPUT 2 AUDIO Y Cr /Pr Cb /Pb HEADPHONE AUDIO AV OUTPUT VIDEO L AUDIO R AV INPUT VIDEO RF SVHS L AUDIO R BOTTOM VIEW G W B R white (audio L) R red (audio R, Pr /C r ) Video cable G Green (Y) Audio cable B Blue (P b /Cb ) R B G R W COMPONENT AUDIO Pb L AUDIO R Pr Y AV OUT R AUDIO L VIDEO S - VIDEO ANT DVI Rear of the DTV recei
Connections (continued) Connect a PC CONTROL D-SUB D-SUB DVI AUDIO AUDIO PIC COMPONENT INPUT 1 PIC Y Cb /Pb Cr /Pr AUDIO COMPONENT INPUT 2 Y Cb /Pb Cr /Pr AUDIO HEADPHONE AV OUTPUT VIDEO L AUDIO R AV INPUT VIDEO RF SVHS L AUDIO R BOTTOM VIEW VGA cable Audio cable How to connect: Connect a VGA cable between the VGA jack on the PC and the VGA input jack on the unit. Connect an Audio cable between the AUDIO output on the PC and AUDIO input jack on the unit. To Watch the PC screen 1.
Connections (continued) Connect a VCR (for recording) or external amplifier CONTROL D-SUB D-SUB DVI AUDIO PIC AUDIO COMPONENT INPUT 1 PIC Y Cb /Pb Cr /Pr COMPONENT INPUT 2 Y AUDIO Cb /Pb Cr /Pr HEADPHONE AUDIO AV INPUT AV OUTPUT VIDEO L AUDIO R VIDEO RF SVHS L AUDIO R BOTTOM VIEW Y Y W R Audio cable R W R Yellow (VIDEO) White (AUDIO L) Red (AUDIO R ) Audio cable R W W Video cable Y VCR for recording To Audio inputs ANT OUT AV OUT R AUDIO L VIDEO S - VIDEO ANT IN AV IN
Turning the Unit On and Off Turning the Unit On and Off Turning On Insert the power cord into the wall outlet. Press the Power Switch on the unit. Press the Power button on the remote control. - Turning Off + With the power on, Press the Power button on the remote control to turn off the unit temporarily. If you want to cut off Note: Viewing the Menus and Displays Your PDP TV has a simple, easy-to-use menu system that appears on the screen.
Memorizing TV Channels Your PDP TV can memorize and store all of the available channels for both antenna and cable channels.
Memorizing TV Channels (continued) Setting Auto Fine Tune (AFT) 1 Repeat steps 1~4 in [Selecting the Signal Source] to display search menu page. 2 Press CH6 repeatedly to select auto fine tune item. 3 Press VOL+/- to select on or off. When the AFT is set to On, the unit will automatically tune the program frequency to provide the best possible picture and sound.
Basic Operations Changing Channels Using the Channel Buttons (CH5 or CH6) Press the CH5 or CH6 to change channels. When you press the CH5 or CH6, the unit changes channels in sequence. You will see all the channels that the unit has memorized. You will not see channels that were erased, not memorized or unavailable. Direct Accessing Channels Press the number buttons to go directly to a channel.
Basic Operations (continued) Select input source signal Using the SOURCE button 1 Press the SOURCE button to access source menu. 2 Press VOL+ or VOL- to select a desired input channel. 3 Press ENTER to confirm and the unit display signal from the selected input channel. A D C1 C2 AV TV source VGA A--------VGA, select signal from VGA (15-pin D-sub) terminals. D--------DVI, select signal from DVI terminals. C1------YPbPr1/YCbCr1, select signal from YPbPr1/YCbCr1 terminals.
Setting Channel Options Editing Channel Label 1 Press MENU to display the menu main 2 Press VOL+/- repeatedly to display options menu page options tv tuner content blocking 3 Press CH6 to select tv tuner item. 4 Press VOL+ to enter. 5 Press VOL+again to display channel menu page. select to activate tuner menu channel edit labels 6 Press CH6to select edit labels item. 7 Press VOL+ to enter into channel label editing mode.
Setting Picture Customizing the Picture 1 2 Press MENU to display the menu main If the picture menu does not display, press VOL+/repeatedly to display picture menu page. Press CH5/6to select the item you wish to change. 3 Press VOL+/- to adjust the value of the item. 4 Press MENU to exit. picture brightness contrast sharpness color tint 50 50 50 50 12 down for picture settings for current window Using the Preset Picture Mode 1 Press P.M on the remote to display picture mode select menu.
Setting System Setting the Menu Background 1 Press MENU to display the menu main 2 Press VOL+/- to display settings menu page. 3 Press CH6to select menu background item. 4 Press VOL+/- to select opaque or translucent. settings translucent menu background english language close caption mode cc1 close caption off on on mute opaque close capt. background source select right/left to change menu background Setting Sleep Timer 1 Press the SLP button to display sleep time menu. 2 Press VOL+/- to adjust.
Changing Screen Options Changing the Scaling mode of Image 1 Press MENU to display the menu main page. 2 Press VOL+/- to display window menu page. window 3 Press CH6to select image size item. 4 Press VOL+/- to select a proper image size. The image size can be selected between: fill all, normal, wide and zoom .
Changing Screen Options (continued) Changing the Position of the Image The unit allows you to adjust the position of the image if it is not well-aligned. 1 2 Press MENU to display the menu main page. Press VOL+/- to display window menu page. 3 Press CH6repeatedly to select h position or v position 4 Press VOL+/- to adjust until the picture is well-aligned.
Setting Sound Using the Preset Audio Mode 1 2 3 Press MENU to display the menu main page. audio Press VOL+/- to display audio menu page. Press CH6to select Audio mode item. 4Note:Press VOL+/- to select a desired Audio mode. Audio mode treble bass balance headphone MTS auto volume Cinema ーメトハ 50 50 50 50 STEREO off on right/left to set audio mode You can not access the treble and bass item unless the Audio mode is set to User.
Setting Sound (continued) Choosing a Multi-Channel Sound (MTS) Soundtrack 1 Press MENU to display the menu main page. audio 2 Press VOL+/- to display audio menu page. 3 Press CH6repeatedly to select MTS item. 4 Press VOL+/- to select STEREO, SAP or MONO. Audio mode treble bass balance headphone MTS auto volume Cinema 50 50 50 50 STEREO off on right/left to set stereo Choose STEREO for channels that are broadcasting in stereo.
Changing Screen Layout Selecting Screen Layout Using the Layout Menu 1 Press MENU to display the menu main page. 2 Press VOL+/- to display layout menu page. 3 Press CH5/6 to select item. 4 Press VOL+or ENTER to confirm. layout full screen pip split screen pop3 grid down for current screen layout options Using the MODE button 1 2 3 4 Press the MODE button to display the screen layout select Press VOL+/- to select item. Press ENTER to confirm. Press MENU to exit.
Changing Screen Layout (continued) PIP When this item is selected, one main frame and one PIP frame display on the screen at the same time. Main Frame PIP Frame Split Screen When this item is selected, the screen will be split into two frames. Main Frame Split Frame POP3 2 When this item is selected, one main frame and three scanning frames display on the screen. Scanning Frame Main Frame 3 4 Grid 1 2 4 5 6 7 8 9 When this item is selected, the screen displays 9 scanning frames.
PIP Operations Viewing the Picture-in-Picture 1 Press MENU to display the menu main page. layout 2 Press VOL+/- to display layout menu page. 3 Press CH6twice to select pip item. 4 Press VOL+or ENTER to display pip frame. The screen displays one main frame and one PIP frame. 5 Press 5or6to select main frame or PIP frame. full screen pip split screen pop3 grid select activates pip window layout Main Frame The selected frame displays with a green border.
PIP Operations (continued) Changing the Position of the PIP Frame 1 With the PIP frame displaying, press MENU to display the menu main page. 2 Press VOL+/- to display window menu page. 3 Press CH6repeatedly to select pip position item. 4 Press VOL+/- to select a desired position for the PIP frame.
Adjustment in PC (VGA) Mode With working in VGA mode, this unit allows you to perform several adjustments. Adjusting Picture picture 1 Press MENU to display the menu main page. If the picture menu does not display, press VOL+/repeatedly to display picture menu page. brightness contrast phase frequency 50 50 50 50 2 Press CH5/6to select brightness or contrast item. 3 Press VOL+/- to adjust the value of the item.
Adjustment in PC (VGA) Mode (continued) Changing the Scaling mode of Image 1 Press MENU to display the menu main 2 Press VOL+/- to display window menu page. 3 Press CH6to select image size item. 4 Press VOL+/- to select fill all or Normal. 5 Press MENU to exit. window image size h position v position freeze window off digital pan and zoom fill all 50 50 on right/left to change image size Fill All---this mode stretches the input vertically and horizontally to fill the full screen.
Adjustment in YPbPr Mode Changing the Scaling mode of Image 1 Press MENU to display the m e n u m a i n page. 2 Press VOL+/- to display window menu page. 3 Press CH6to select image size item. 4 Press VOL+/- to select fill all or Normal. 5 Press MENU to exit.
Viewing Closed Captions The unit decodes and displays the closed captions that are broadcast with certain TV shows. These captions are usually subtitles for the hearing impaired or foreign language translations. All VCRs record the closed caption signal from television programs, so home-recorded video tapes can also provide closed captions. Most prerecorded commercial video tapes provide closed captions as well.
Adjusting V-CHIP Settings V-CHIP This function allows TV programs to be restricted and TV usage to be controlled based on FCC data. It prevents children from watching violent or sexual scenes that may be harmful. Restriction of TV programs includes two ratings that contain information about the program: the MPAA rating and the TV Parental Guidelines. The MPAA rating is restricted by age. TV Parental Guidelines are restricted by age and content.
Adjusting V-CHIP Settings (continued) [2] TV Parental Guidelines Rating content based D L V S FV TV-Y (All children) TV-Y7 (Direct to Older Children) age TV-G (General Audience) based TV-PG (Parental Guidance Suggested) TV-14 (Parents Strongly Content Rating can be set but this Rating is not normally broadcast by TV Station. Content Rating can be set.
Adjusting V-CHIP Settings (continued) Accessing the V-CHIP Menu 1 Press MENU to display the menu main page. 3 Press CH6to select content blocking item. 4 Press VOL+ or ENTER to display password menu page. 5 6 Press CH6to select enter item. 2 Press VOL+/- to display options menu page. Input the password and highlight OK. Use VOL+/- to move password digit leftward or rightward. Use CH5/6to select character for password.
Adjusting V-CHIP Settings (continued) Adjusting the Movie Rating 1 Repeat steps 1~7 in [Accessing the V-CHIP Menu]. 2 Press the MENU button. 3 Press VOL+/- to display movie blocking menu page. 4 Press CH5/6to select a rating to be blocked. 5 Press ENTER to confirm and MENU to return. Movie blocking select to adjust movie blocking level, menu to return “PG-13” in the age-based rating is blocked, this will automatically block the higher ratings “R”, “NC-17”, “X” also.
Troubleshooting Before calling for repair service, check the following items for possible remedies to an encountered symptom. Symptoms Check item !This No power may be caused by obstruction to the antenna due to high rise buildings or hills. Using a highly directional antenna may improve the picture. !Check that the AC power cord is plugged into the mains socket. !Unplug the power cord, wait for 60 seconds. Then re-insert plug into the mains socket and turn on the unit again.
Specifications Specifications: Model Number: AR4200 UPC number: 0-44476-01943-2 Display Specs Plasma Display type 42" (diagonal) Screen Size Aspect Ratio 16:9 aspect 852 (H) x 480 (V) Resolution (native) 36.73 inches (H) x 20.98 inches (V) Active Area Brightness * 640Cd/m² (Avg) Contrast ratio * 1000:1 aspect (Avg) 160/160 Viewing Angle Dot Pitch 1.095 x 1.
Specification (continued) Display Format Supported by This Unit For VGA: 640X480 @ 60Hz,72Hz,75Hz,85Hz; 1024X768 @ 60Hz,75Hz,85Hz; For YPbPr: 480P @ 50Hz, 59Hz, 60Hz; 720P @ 50Hz, 59Hz, 60Hz; 1080i @ 50Hz, 59Hz, 60Hz.
Dimensional Drawings 79 733 645 1050 110 287 1247 (Unit: mm) 777 Design and specifications are subject to change without notice.