Acoustica Registration Overview Quick Start Version History Using MP3 Audio Mixer Working with Sounds Working with Sound Groups Main Window Exporting to MP3, WMA, WAV, or Realaudio™ Preferences Troubleshooting Menu Reference File Edit Sound Group Sound Menu Toolbar Copyright and Ownership Notices MP3 Audio Mixer © Copyright 1998-2002 Acoustica. All Rights Reserved. Includes Xaudio software Copyright © 1996-2002 Xaudio Corporation. All Rights Reserved.
Quick Start So you want to get started in a hurry? Follow "SoundWarrior" through the steps to MP3 Audio Mixer mastery! 1. Start MP3 Audio Mixer SoundWarrior double clicks the MP3 Audio Mixer icon on his desktop. Okay, we could have left this step out. 2. Drag in some sounds. SoundWarrior has a good sound of a cave-woman scream called arghhh1.wav. The sound is located in "c:\cavescreams\", which he finds, and then drags the sound’s icon onto the MP3 Audio Mixer window. See working with sounds. 3.
some paintings or even sharpen a stick.
Overview MP3 Audio Mixer is an intuitive multi-track sound recording and mixing utility. Let your creativity take off…….! It lets you record, overdub and mix multiple tracks of .wav and .mp3 files. The simple, fast and intuitive interface makes it a no-brainer when it comes to sound mixing. With support for the standard copy, cut, paste, undo and redo you can even make a few mistakes! Drag sounds in , record a few from the CD or microphone. Change things in real-time while its playing.
Registration Why Register? How do I Register? Enter your Registration Code(s) Why Register? Registering will entitle you to the following benefits. Unlimited technical support MP3 Audio Mixer is fully functional Priority feature requests. If there is something that you want MP3 Audio Mixer to do, just request it and it will most likely end up in a future release.
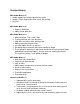
Your Name: Email Address: (Please print clearly) Product: MP3 To Wave Converter PLUS (We have more than one software product!) Mailing Address: Phone Number: (In case there is a problem with your email.) Please don’ t forget to include your email and mailing address so that we can send you a registration code. For other purchasing alternatives, visit http://www.acoustica.com/snailmail.htm Upon payment, a registration code will be emailed or mailed to you.
Company Information Acoustica was founded in 1998 and is located in the foothills of the Yosemite Valley. Acoustica's mission is to create high quality, intuitive and powerful software. We value diligence, creativity and innovation. We are embracing Internet technology and the new world that it is creating. We also have this curious idea that SOFTWARE SHOULD BE EASY TO USE! MP3 Audio Mixer was the first in a series of highly innovational and user-friendly software we are making.
Version History MP3 Audio Mixer 2.47 Added support for Esellerate purchasing system Added a "Enter Registration Code" menu item to Help. Bug fixes MP3 Audio Mixer 2.42 Export as WMA files Ability to load WMA files MP3 Audio Mixer 2.13 New trial period. Trial is now 7 days. Track marker bad char save bug fixed Multi-MP3 save with marker drift bug fixed. Adding sound crash/freeze fixed. Can now import .cbs files as playlists.
Save as multiple WAV file especially for creating a multi-track continuous audio cd. Many little odds and ends Many bug fixes. Internet Audio Mix 1.32 Better zoom in/out Bug fixes Internet Audio Mix 1.3 Support for RealNetwork’ s G2 protocol, including Surestream. Integrated MP3 support. Bug fixes Internet Audio Mix 1.25 Improved recording level display Better support for MP3. Lock/Unlock positions for sounds and Sound Groups. Undo/Redo support for locking, muting, and changing of names.
Supports multiple sound cards.
You can add as many extra pivot points as needed by clicking on the bar when the cursor changes to a pencil . Fig08a. Before adding a volume pivot point. Fig08b. After adding a volume pivot point. To change the current parameter (volume, pan, or rate), select from the drop down box on the right side of the toolbar. Fig09. Drop down box to select current effect. In addition to moving individual points, you may also move the line that connects the 2 adjacent points.
Limits of the pivot points. • Volumes from 0% to 100% • Pans from 100% Left Speaker to 100% Right Speaker • Rates from 10% to 400% original speed. Sound Information Dialog Click the right mouse on a sound and select Sound Info from the pop-up menu. A dialog will come up displaying the sound’ s name, file location, sound format, length and size. You may change the sound’ s name by editing the name text box. Fig09a. Sound Information Dialog.
Working with Sound Groups Sound Groups are useful collections of sounds. By combining sounds into a Sound Group, the user has more master control over the way the sounds are mixed together. You can think of a Sound Group as a composite sound. Sound Groups are hierarchical and may be many layers deep, much like the file directory system on this computer.
Fig10a. Creating a Sound Group from a selection of sounds. Moving a Sound Group A Sound Group may be moved in the same way that a sound is moved. Simply position the mouse on the Sound Group’ s title bar, click the left mouse button and move the mouse. Note that a Sound Group may not be resized by stretching the right side of the Sound Group. However, a Sound Group may be resized by Expanding a Sound Group and moving the sounds within.
Adding sounds to a Sound Group To add sounds into a Sound Group, simply select the sound or sounds and drag them over and into the destination Sound Group. The sounds that you are changing will look more transparent when they are able to go into a Sound Group. Fig11. Moving a Sound into a Sound Group. In addition, you can also drag Sound Groups into other Sound Groups. The Sound Group hierarchical system can be very useful for organization and Sound Group re-use.
Fig12. Initial look of a Sound Group. If you select the Sound Group, you may Expand it. Expanding the Sound Group causes the main display to be replaced by the contents of the new Sound Group. You can expand a group by selecting Expand from the Sound Group menu. Expanded groups have a red diagonal striped background, which helps you know the extent of the Sound Group.
Fig13. Expanded Sound Group Once you have Expanded a Sound Group, you may also Collapse it, which simply replaces the screen contents with the parent Sound Group. Collapse can be found on the Sound Group menu as well, as long as the user is viewing an expanded Sound Group. The Main Sound Group The Main or first Sound Group is special. Although it doesn’ t appear as a bar, it is the main container for all sounds and sub Sound Groups. When MP3 Audio Mixer loads, you start in the main Sound Group.
The Main Sound Group may be played by selecting Play from the Sound Group menu or by pressing the Play button on the toolbar. You may play a selection of the current group by first making a selection and then pressing the Play button. Adjusting a Sound Groups volume and pan Sound Groups may be adjusted in the same way that sounds are adjusted. Note that the Sound Groups parameters affect all sub Sound Groups and sounds contained within. (Note that playback rate is not an option for Sound Groups.
searches for the sound. If you know where the sound is you may select the Browse button to explicitly tell MP3 Audio Mixer to use a certain sound. If you don’ t care about the sound, you may simply hit the Skip button. Fig13a. MP3 Audio Mixer is searching for a missing sound.
Export Options You can export your mix to other formats. WAV WAV files are the most widely supported file types. Unfortunately, these are also the largest file type. This would be the best option if you are burning audio cds. More on exporting to WAV … MP3 MP3 files are the most popular way of encoding sound at this time. This would be the best option if you are sending your MP3 files to the Internet, are creating an MP3 data cd, or are sending them to a portable MP3 device.
Exporting To WAV Destination File Size Render All/Selection Sampling Rate 8 or 16 bits Stereo Title, Author, Copyright Create separate WAV file for each CD Marker? From the "File" menu, select "Save As a" and then select "Wave File" from the submenu. Pick a name for your new WAV file. ( If you are going to be saving multiple WAV files for each CD Track Marker, this name will be the base name. ) After a name or base name is chosen, you need to set up extra parameters for the WAV file.
Check this if you want to create a stereo WAV file. If this is unchecked, the resultant WAV file will be mono (one channel of audio.) Title This should be the title of the recording. Note that this is not the same as the filename. The title information is not read by that many programs, though. Author This should be the name of the person or organization that made the recording. (This will be automatically filled in if you filled this info in the Preferences.
Exporting To MP3 Encoder Engine Destination File Size Render All/Selection Preset Quality Specify Exact Settings Entering File Information Create Separate MP3 File For Each CD Marker? From the "File" menu, select "Save As a" and then select "MP3 File… " from the submenu. Pick a name for your new MP3 file. ( If you are going to be saving multiple MP3 files for each CD Track Marker, this name will be the base name. ) After a name or base name is chosen, you need to set up extra parameters for the MP3 file.
variable bit rate MP3, you’ ll need to use this option. More on setting the specific encoding settings … Entering File Information MP3 Audio Mixer adds authoring information to the MP3 file. It creates an ID3V1 and ID3V2 tag by default. You can fill in the Title, Author, Copyright, Genre, Year and Comment. Create Separate MP3 File For Each CD Marker? This option will be enabled if you have more than 1 CD Track Marker.
Exporting to RealAudio™ What is RealAudio™ ? Exporting to RealAudio™ Creating the RealAudio File (.ra) Optimizing your sound for RealAudio™. Uploading it to the Internet. *Important to version 1.5+ : If you can not create Realaudio files, then you must download and install the optional Realaudio plugin from Acoustica @ http://www.acoustica.com/download.htm What is RealAudio™ ? RealAudio is an audio format, which is highly compressed and small, allowing for real time streaming of audio over the Internet.
Fig17a. Exporting to the Internet. SureStream vs. Single Rate SureStream is RealNetwork’ s multi-format file. It’ s the most important feature of G2.
connecting through a LAN, in addition to people with bit-pushin’ 28.8 modems! The people with the higher speed connection will be served higher quality audio, while the people with the lower speed connection will be served the "less than perfect" audio. You can have up to six target audiences. What’ s the catch? You need a RealServer G2 for playback! (Your ISP may have a RealServerG2 already setup.) • Pressing ‘Preview’ will automatically render the first 5 seconds of the session with the selected codec .
audiences (56K Modem and Corporate LAN). You can select up to 6 different target audiences if you are creating a SureStream. If you are creating a single rate file, you can only select one target audience at a time. Content Type This one is pretty self-explanatory. Is your masterpiece music or voice? Or is it voice with background music? If the stereo separation is an important part of the piece, you might select "Stereo Music".
default to the name of the main Sound Group. The copyright and author information will default from the Miscellaneous information tab in the Preference dialog. Fig17b. RealAudio Fine Tune Dialog If you choose to fine-tune a codec, it will bring up this dialog (fig17b). You may choose a different codec and preview it. The bit-rate, frequency response, compatibility information and a detailed description are displayed as you switch between different codecs.
Note: It may take awhile for the RealAudio file to be completely rendered, depending on the power of your computer and the length of the session. You may hit the cancel button to escape a lengthy encoding. Creating the RealAudio File (.ra) After you are happy with the settings, you should press the Save button on the main RealAudio dialog. Pick a filename and press "Save".
Check the "Links" page on Acoustica for some links to sites that have useful information on uploading RealAudio files!
Export As WMA If you do not see a WMA tab, you may not have WMA support properly installed. Destination File Size Render All/Selection Preset Quality Entering File Information Create Separate WMA File For Each CD Marker? WMA is a second-generation compressed audio format. From the "File" menu, select "Save As a" and then select "WMA File… " from the submenu. Pick a name for your new WMA file. ( If you are going to be saving multiple MP3 files for each CD Track Marker, this name will be the base name.
4 5 6 7 64 kbps 96 kbps 128 kbps 192 kbps Stereo Stereo Stereo Stereo 44,100 Hz 44,100 Hz 44,100 Hz (default) 44,100 Hz Entering File Information MP3 Audio Mixer adds authoring information to the WMA file. You can fill in the Title, Author, Copyright, Genre, Year and Comment. Create Separate WMA File For Each CD Marker? This option will be enabled if you have more than 1 CD Track Marker. If you select this option, MP3 Audio Mixer will create a WMA file for each section of audio.
Preference Dialog Playback Tab Recording Tab Miscellaneous Tab Information Tab Playback Tab The Playback tab allows you to choose the quality at which your session plays. If you have more than one soundcard, you can choose the soundcard you want for playback in the Playback device drop down at the top of window. If you select Use Best Quality, MP3 Audio Mixer will always use the best sound format in the session as the default sound format.
Choose a Recording Device from the dropdown box if you have more than one soundcard! This tab also has a full duplex test. It lets you know if your soundcard supports full duplex, which is the ability to play sound and record at the same time. Press the "Test" button to see how your soundcard fares. The advanced tab is similar to the advanced tab for playback. Here, you get to select the number of buffers and the buffer size set-aside for recording.
Editing sounds in an external editor. If you want to edit sounds in an external editor, you need to select an external editor executable that MP3 Audio Mixer launches. You can either type in the full path to the sound editor or press the Browse button to find it through Windows file system. Information Tab The name, and copyright fields will automatically appear when rendering the session to a RealAudio™ MP3, WMA or Wave file.
Toolbar The toolbar allows quick access to common functions. Create a new Main Sound Group. Open/Load a Main Sound Group. Save the Main Sound Group. Add a sound to the Main Sound Group. Play/Stop the Main Sound Group. Rewind to the beginning of the Main Sound Group. Fast Forward to the end of the Main Sound Group. Record a new sound from the CD, line-in or microphone. Zoom In. Zoom Out. Collapse the current Sound Group. Expand the selected Sound Group. Previews the sound as RealAudio®.
File Menu New Open Add Sound Import Playlist… Save Save As.. Save As A..WAV, MP3, WMA or Realaudio file Preferences Exit New This menu item clears the Main Sound Group. If the current Main Sound Group is dirty, it will first ask if you want to save, before clearing. Open This menu item brings up a standard file dialog, which allows you to find a Sound Group file (.sgp) to load as the Main Sound Group. If the current Main Sound Group is dirty, it will first ask if you want to save, before loading.
Fig 18. Shows Import Playlist Wizard. Save This menu item saves the Main Sound Group as a Sound Group file (.sgp ). If the Main Sound Group has not been saved yet, it will bring up a standard file dialog allowing the user to pick a filename and folder. Save As… This menu item allows the user to save the Main Sound Group with a different name. Currently, you may save it as one the following… Sound Group Wave File MP3 File RealAudio™ File.
be saved.
Edit Menu Undo Redo Copy Cut Paste Select All Zoom In Zoom Out Undo Undo allows you to go back to previous states. Undo is supported for the following actions. Adding a sound or sounds to MP3 Audio Mixer. Cutting a sound or sounds. Moving a sound or sounds. Resizing a sound. Adding a volume, pan or rate pivot point. Changing a volume, pan or rate pivot point. Deleting a volume, pan or rate pivot point. Once you save, the Undo memory is cleared.
Paste Paste will add all Copied sounds and Sound Groups to MP3 Audio Mixer at the Caret position. Select All All sounds and Sound Groups in the current Sound Group will be selected. Zoom In MP3 Audio Mixer allows you to zoom in up to a resolution of 1 pixel = 4 millisecond. Zoom Out MP3 Audio Mixer allows you to zoom in up to a resolution of 1 pixel = 2 minutes.
Sound Group Menu In addition to the menu bar, you can right click in the main session to get this menu. Add Sound… Record Sound… New Group/Group From Selection Send To Parent Group Group Info Collapse Expand Play/Stop Rewind Fast Forward Add Sound… This option brings up a standard file dialog allowing you to select a new Wave file (.wav) to include in the current Sound Group. It will appear at the current position of the Caret.
Rewind This causes playback to rewind to the beginning of the Main Sound Group. This can happen during playback. Fast Forward This causes playback to fast forward to the end of the Main Sound Group. You may use this option to get to the end of the Main Sound Group quickly.
Sound Menu You can also use the Sound menu by right clicking on a sound bar. Make sure that the sound is selected first. Cut Copy Invert Map Reset Map Sound Info Send to Parent Group Muted Play/Stop Locked Edit In External Sound Editor Cut This will remove the sound from the main window. (You can always redo to get it back.) Copy This will copy the sound and it’ s associated pivot points for volume, pan and rate into memory.
mucking around with the rate. For volume, you will return to a sound or Sound Group with 2 pivot points, one at the start and, one at the end. Both will be at 100% volume. For pan , you will return to a sound or Sound Group with 2 pivot points, one at the start and, one at the end. Both will be at 0% Pan (Centered between the speakers). Sound Info This brings up a dialog with information about the sound. Send to Parent Group This sends the selected sound to the parent group.
Troubleshooting It’ s not making any sound Playback is stopping too soon! I can't load or save WMA files! Sound is breaking up How do I record from the CD? I can’ t preview RealAudio™ files MP3 Audio Mixer won't load the sound. It says that the format is unsupported I edited a sound in an editor and it messed up other sounds! How do I set MP3 Audio Mixer up to record from memory (RAM)? I’ m not hearing real-time changes of effects during playback! I can’ t render to RealAudio.
I can’t load or save WMA files! In order to load and save to WMA files, you must have support for Microsoft Windows Media Format 7.1. If you are trying to load a WMA file or export to WMA file and the option is grayed out, you probably do not have this installed. To download and install it, please visit http://www.acoustica.com/plugins/wma-install.htm .
1) Click on the speaker icon on the lower right hand corner of the window's desktop. If you do not have this, then you may need to add/remove programs and make sure you select all "multimedia" components. This should have brought up a window that is titled "Volume Control". 2) Select "Properties" from the "Option" menu. This brings up another window 3) Select the "Recording" option from the "Adjust Volume For" grouping. Look at the list box called "Show the volume controls.
RealSlideshow™. After installing one of these programs, your computer will be setup to render to RealAudio. New tracks are picking up sound from old tracks. Your new audio tracks are picking up remnants of other tracks. Your microphone or input device is picking up the output from your speakers. Try using headphones. If that doesn’ t work, your soundcard may have some touchy circuitry. Go to your mixer ’ s recording settings and make sure that only the devices you are interested in recording are set.
cd burning software and drag in the new files! How do I cut and paste portions of sounds? You know how to copy a whole sound or sound Group. But how do you copy part of a sound or Sound Group? Left click on the session (not on a sound) . Keep the left mouse button down and then move the mouse over the area you want to copy or cut. A selection rectangle will highlight over the area of the sound or Sound Group. Then let the mouse button up and select "Cut" or "Copy" from the "Edit" menu.