Spin It Again Page 1 of 39 Welcome to Spin It Again 2.0's help file. Spin It Again is the easiest way to convert your LPs & tapes to CDs or audio files.
Spin It Again Page 2 of 39 Spin It Again helps you: z Hookup your record player or cassette player to your computer z Set the optimal recording level so you don't record too low or with distortion z Make a recording z Automatically split up the recording into multiple tracks z Reduce tape noise or LP clicks and pops z Tag or name each track, including artist and album information z Create audio files for use on your computer or portable MP3 player z Burn audio CDs How To Record An LP or Tape To CD Record
Spin It Again Page 3 of 39 Thank you for your support! -The Acoustica Team Record An LP/Tape To CD Step 1: Hookup Your Record Or Cassette Player Yo Your Computer Run the software and click "Hookup Wizard". It will guide you through a series of questions and show you photos and images to help you hook up your record or cassette player to your computer. Step 2: Get A Good Recording Level The first time you run the software, it will ask you if you want to run the "Recording Level Wizard".
Spin It Again Page 4 of 39 Enter in the artist, album, genre and track names if your CD burner supports burning CD-Text. (This screen is more important when creating MP3s or other audio files.) Click "Next" when you are done. Step 6: Click "Burn CD" Click the "Burn CD" button, click "Next" to accept the default settings and click "Next" again.
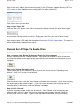
Spin It Again Page 5 of 39 Step 4: Preview And Edit Your Recording The software automatically splits your recording up into tracks. If there were any erroneous tracks created or if there was extra silence, you can edit it by clicking "Split" and/or by dragging the track markers. If the recording has lots of clicks and pops, select a built in cleaning preset. Once you are satisfied, click "Next" Step 5: Tag / Name Your Recording Enter in the artist, album, genre and track names.
Spin It Again Page 6 of 39 Type in the track names and track lengths that correspond to the recording. To add a new track, click the "Add" button. Move tracks around by selecting them and clicking the "Up" or "Down" buttons. If you don't feel like typing, click the "Look Up Album Information" button. Type in an album and/or artist and click "Search". You may need to adjust your search query if you are not finding the results you would expect.
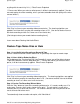
Spin It Again Page 7 of 39 Select your audio file and click "Open". Step 2: Preview And Edit Your Multi-Track Audio File The software automatically splits the audio file into multiple tracks. If there were any erroneous tracks created or if there was extra silence, you can edit it by clicking "Split" and/or by dragging the track markers. See more on manually creating tracks here. Once you are satisfied, click "Next". Step 3: Tag / Name Your Tracks Enter in the artist, album, genre and track names.
Spin It Again Page 8 of 39 In some cases, the automatic track detection will not work as desired. Luckily, you can manually create your own tracks with some built in tools. Select a track on the top track view. Click the "Split" button to split it into two tracks. Notice that it splits it exactly in half. Alternatively, you can right click at an exact position and select "Split Track At Cursor" to create tracks.
Spin It Again Page 9 of 39 anything with the word 'vinyl' in it.) Effect Presets Explained ** Please note: When you select an effect preset, it will be instantaneously applied! (You do not need to play the entire recording, unless you want to double check the quality of the noise removal effects.) Click "Play" to listen to your recording without record noise. The cleaning algorithms are applied in real time when you play the recording or burn a CD.
Spin It Again Page 10 of 39 The noise print will look like this: If it's still not sounding great, you can try right clicking on a noisy area and choose "Set As Noise Print". (Make sure to not choose an area with music.) Right click on the noise print and choose "Play Noise Print" to hear what it sounds like. You can also drag and drop the noise print. If it's sounding like it's under water or warbly, check out the noise reduction troubleshooting area.
Spin It Again Page 11 of 39 Use this for moderately damaged tape recordings. z Strong noise reduction z Aggressive vinyl declick & decrackle with hiss & hum reduction z "Classic V" EQ to reduce mid frequencies and boost bass and treble. Damaged Tape 2 Use this for severely damaged tape recordings. z Maximum noise reduction z Aggressive vinyl declick & decrackle with hiss & hum reduction z "Classic V" EQ to reduce mid frequencies and boost bass and treble.
Spin It Again Page 12 of 39 Use this to add a crazy echo effect in addition to noise reduction. Not that practical, but it sounds cool! z Light noise reduction z Aggressive vinyl declick & decrackle with hiss & hum reduction z Echos occur at 165 milliseconds after the original signal.
Spin It Again Page 13 of 39 Getting A Good Recording Level Click the "Level Wizard..." button to launch the Level Wizard. The Recording Level Wizard helps you get the best recordings. Step 1: Choose the right sound card and source If you have more than one sound device, make sure to choose the one that your record player or cassette player is plugged into. The software will automatically attempt to choose the "Line In" or equivalent.
Spin It Again Page 14 of 39 Example of a strong and desired recording level: Clean Your Records Before Recording Them Start with the cleanest records possible. If you can see dust on them, that will turn into clicks and pops in the recording. That should be avoidable. You can use a soft lint-free cloth or brush to clean them, or you can purchase a special spray. Do not use TAP water to clean the records as this can cause corrosion. If you are going to use water, purchase some distilled water.
Spin It Again Page 15 of 39 Hardware Hookup Wizard The Hardware Hookup Wizard guides you through the sometimes complicated process of hooking up your record or cassette player to your computer's sound card. Click the "Hookup Wizard" button to start it. (You can find this button on the first screen or on the recording screen.) The wizard may recommend some additional equipment: A cable to connect the tape or record player to your computer's sound device. z z A preamplifier for LP recordings.
Spin It Again Page 16 of 39 Sound card or USB sound device If you have more than one sound card or USB sound device, choose the sound card that you'd like to record from. Make sure that your record or tape player is connected to the line in of the selected sound card. Source Your sound card has multiple inputs, such as Microphone, Wave, Line In, CD, Auxiliary and others. If you are recording from the Line-In, make sure to choose a source that has "Line-In" in it's name.
Spin It Again Page 17 of 39 Example of a strong and desired recording level: Choose Tape, LP or Existing File Screen On the first screen of Spin It Again, you can choose to record an LP, tape or load an existing audio file. Record A Vinyl LP * Choose this option to record a 16's, 33's, 45's or 78's. Record A Cassette Tape * Choose this option to record cassette tapes, reel to reel or 8-tracks.
Spin It Again Page 18 of 39 whatever you'd like. Just choose either one of the recording buttons to record from a source other than LP or tape. Recording Screen Step 1: Make sure you are ready to record! If you haven't hooked up your cassette or record player to your computer, run the "Hardware Hookup Wizard" If you haven't adjusted your recording level, run the "Level Wizard" Step 2: Adjust "Auto Pause" if necessary. The software will automatically pause recording after a certain amount of time.
Spin It Again Page 19 of 39 Step 6: Finished Once the software senses the end of the side two or it auto-pauses, click "Next" to go to the "Preview And Edit" window. Tutorial : Record A LP/Tape To CD BUTTON REFERENCE Record / Pause button Press the Record button to start recording. As soon as you press Record, it turns into a Pause button. Clicking Pause will pause the recording so that you can take a break, flip over to another side, etc. Stop button The Stop button ends a recording.
Spin It Again Page 20 of 39 hum. By default, the software will automatically split up the recording into multiple tracks based on a silence location algorithm and/or typed or looked up track times. (In some cases, it doesn't accurately split up the tracks and you'll need to edit the tracks manually. See track splitting troubleshooting.) There are two views of the recording. The top view shows all the tracks, the track numbers and is a quick way of getting around the entire recording.
Spin It Again Page 21 of 39 (If you have typed in or looked up album track names, they will appear in the drop down list.) BUTTON REFERENCE Edit Album Info... button This pops up the Edit Track Information window that allows you to type in the track names, track lengths, album, genre, artist and year. In addition, you can click a button to look up the album information automatically online through the MusicBrainz.
Spin It Again Page 22 of 39 Fast Forward button This selects the next track. If it is currently playing, it plays the next track. Preview Play button This will play a few seconds of the start and end of each track. If the voice assistant is on, she will say "Start Of Track " and "End Of Track" before each preview. (The default mode is to auto preview play when you first go to this screen.) Zoom In button This will zoom in to the recording for a closer and more detailed view.
Spin It Again Page 23 of 39 Launches the settings & preferences screen. Tagging/Naming Your Recordings Screen Enter in the artist, album, genre, year and comments for your recording. Click on each track to type in a track name. If you want to double check a track, you can click it to play it back. If you have already entered the track or album information on a previous screen, it will already be entered. You can optionally click the "Look Up Album Information..." button to connect to the MusicBrainz.
Spin It Again Page 24 of 39 Print A CD Label... Choose this to print a CD label or jewel case cover for this CD. The track information will be sent to the optional Acoustica CD/DVD Label Maker. TIP: The "Next Operation" is shown below the buttons and if you always burn a CD, you can simply click "Next >>" Audio File Settings Screen Choose your audio format, bit rate and other format settings. This screen shows how much space is needed and how much space in MB is available.
Spin It Again Page 25 of 39 Choose which CD recorder to use, the speed, number of copies, CD-Text options and testing options. Please note that if your recording spans more than 80 minutes, it will require two or more CDs. If you don't wish to burn two CDs, go back to the Preview And Edit Screen and delete some tracks. CD Burner If you have more than one CD recorder or CD burner, select the one you want to burn with. Speed Choose the speed to burn a CD with.
Spin It Again Page 26 of 39 Click this to cancel any operation currently under progress. If it is currently burning a CD and you click Abort, the CD will become unusable. The Voice Assistant The Voice Assistant will add that extra help by speaking about current software actions and events. It will guide you through the following things: z Hooking up your record or tape player to your computer. z Setting a strong recording level.
Spin It Again Page 27 of 39 Recording Device If you have more than one sound device, choose the one you'd like to record from. Monitor Recording Device through Playback Device Some sound devices such as USB sound devices do not allow you to hear or monitor the incoming audio. This option instructs the software to play the recording audio through the playback device. Sample rate: Choose the sample rate to play audio at. The default is 44,100 (CD quality).
Spin It Again Page 28 of 39 If checked, the software will automatically split up the recording into multiple tracks. It will use the following parameters. Consider It A Track When The following parameters will help determine if audio is silence, garbage or a track. The volume is greater than X % - (Music Threshold) If the volume is greater than X %, we consider it signal/music and not record or tape noise.
Spin It Again Page 29 of 39 use. Delete Recorded Files After Use To help cut down on used hard drive space, the software will automatically delete recorded files when you quit the program or start another recording. Show Folder After Rendering Files The software will open the folder where the new audio files were created. Ask Before Allowing Level Wizard To Select The Best Input If checked, the software will ask to automatically change the recording input to "Line In" when running the Level Wizard...
Spin It Again Page 30 of 39 This settings page shows all effect presets which are actually combinations of effects and cleaning filters. You can create new effects, edit them, delete them or rename them. Click on an effect to edit, rename or delete it. New This creates a new effect. Edit This edits the currently selected effect. Rename This pops up a window which lets you rename the selected effect Delete This deletes the selected effect.
Spin It Again Page 31 of 39 And The Dog Walkers" latest hit, it would store all audio files in C:\My Documents\My Music\George And The Dog Walkers\ Use ARTIST in song's file name This will put the artist in each audio file. IE: "George And The Dog Walkers - Track X.wma" Use ALBUM in song's file name This will put the album in each audio file. IE: "George And The Dog Walkers - Walkin Ze Dawg Again - Track X.wma" Use TRACK NUMBER in song's file name. This will put the track number in each audio file.
Spin It Again Page 32 of 39 6. Make sure to click the "Open Mixer" button and double check that the correct source is not muted. Double check the recording settings. Click "Properties" from the "Options" menu. Select "Recording" and click "OK". Make sure that the correct source is selected. Normally, the correct source would be "Line In" or "Analog Mix".
Spin It Again Page 33 of 39 Music will sometimes have silence in it and if the software considered every silent area it found a new track, it would end up with a lot of false positive tracks. Usually, tracks will be separated with at least two seconds of silence. (The default is 1.75 seconds.) Note that this will consider silence to be anything under the music threshold % above. 3) Type in or look up track information and song lengths. Some recordings won't have clear gaps between tracks.
Spin It Again Page 34 of 39 The recording sounds like it's under water and warbly The most likely culprit is that the Acoustica Noise Reduction is on and has a bad noise print. The software uses a noise print to remove or subtract noise from the music. In order to work properly, it needs a good noise print. If the noise print is music and not actual noise, it will sound warbly. 1) Stop play back if it's currently playing. 2) Click the "Show Noise" button.
Spin It Again Page 35 of 39 need to restart your computer before some drivers are working properly. Make sure to restart, in this case. 3. Try turning on IMAPI in the Miscellaneous section of the Settings. You will have to restart the software. (This requires Windows XP) 4. Try using the Goldenhawk override which will cause Spin It Again to use a generic CD or DVD burner driver template for your CD or DVD burner. To do this, click "Settings", followed by clicking "Miscellaneous".
Spin It Again Page 36 of 39 What is the maximum length Spin It Again can record? Spin It Again is limited to recording 3.38 hours of audio at CD quality. However, you can change the sample rate and other factors to get more recording time. (IE: you are recording an 8 hour book on tape.) Max Time Format 62 minutes 192,000 hz, 24 bit, stereo 124 minutes 96,000 hz, 24 bit, stereo 6.76 hours 44,100 hz, 16 bit, stereo 13.52 hours 22,050 hz, 16 bit, stereo 54.
Spin It Again Page 37 of 39 1. If you your CD burner supports reading and writing of CD-Text, you can use the label maker to read the CD directly. 2. If you are still running Spin It Again, make sure to enter in the correct track info on the title "Name Your Recording!" and then click "Next". Click "Print a CD Label..." and it will launch the Acoustica CD/DVD Label Maker with your track information. 3.
Spin It Again Page 38 of 39 We now have two effects loaded. To adjust the parameters for either effect, click on the effect title on the left hand side and then adjust the parameters to the right. The list of effects that you choose is also called an "effect chain" because the audio will pass through each effect starting at the top effect going to the bottom effect. In the above case, the raw recording will first go through "Acoustica Advanced Vinyl Cleaner" and then "Acoustica Noise Reduction".
Spin It Again Page 39 of 39 Audio Files MP3, WMA, OGG or WAV files Buffer Under-Run Protection This is an option that most newer cd recorders have. If the CD recorder does not get data fast enough, it won't fail and it will pause the burn until it gets more data. Burn Proof Burn Proof, Just-Link is another name for Buffer Under-run Protection. Burning Engine Spin It Again uses two burning engines. Goldenhawk is the default.