Cover page Install And AdminCopyright Statement Copyright © Acronis International GmbH, 2002-2014. All rights reserved. “Acronis” and “Acronis Secure Zone” are registered trademarks of Acronis International GmbH. "Acronis Compute with Confidence", “Acronis Startup Recovery Manager”, “Acronis Active Restore”, “Acronis Instant Restore” and the Acronis logo are trademarks of Acronis International GmbH. Linux is a registered trademark of Linus Torvalds.
Table of contents 1 Installing..........................................................................................................................5 1.1 Requirements ............................................................................................................................5 1.1.1 1.1.2 1.1.3 1.1.4 1.1.5 1.2 Installing Acronis Access on your server....................................................................................7 1.3 Using the Configuration Utility ...........
9 Server Administration .................................................................................................... 94 9.1 Administering a Server.............................................................................................................94 9.2 Administrators and Privileges ..................................................................................................95 9.3 Audit Log ..........................................................................................
14 What's New ........................................................................................................... 134 14.1 What's New in Acronis Access Server ....................................................................................134 14.2 What's New in the Acronis Access app ..................................................................................148 14.3 Previous Releases ........................................................................................................
1 Installing In this section Requirements ............................................................................................. 5 Installing Acronis Access on your server .................................................... 7 Using the Configuration Utility .................................................................. 9 Using the Setup wizard ............................................................................10 1.
Android 2.2 or later (Devices with x86 processor architecture are not supported) The Acronis Access app can be downloaded from: For iOS http://www.grouplogic.com/web/meappstore For Android https://play.google.com/store/apps/details?id=com.grouplogic.mobilecho 1.1.3 Minimum Hardware Recommendation Processor: Intel/AMD Note: Acronis Access server can be installed on virtual machines. Memory: Production environments: 8 GB minimum. More recommended. Trial or Тest environments: 4 GB minimum.
Google Chrome Safari 5.1.10 or later 1.1.5 Network Requirements 1 Static IP Address. The machine running Acronis Access needs to be bound to the Windows Active Directory. Optional but recommended: DNS name matching the above IP address. Network access to a Domain Controller if Active Directory will be used. Network access to an SMTP server for email notifications and invite messages. The address 127.0.0.
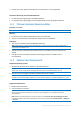
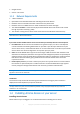
1. Download the Acronis Access installer. 2. Disable any anti-virus software you have or it may interrupt the installation procedure resulting in a failed installation. 3. Double-click on the installer executable. 4. 5. 6. 7. Press Next to begin. Read and accept the license agreement. Press Install. Select where the product will be installed and press Next. 8. Review the components which will be installed and press Install.
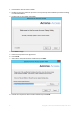
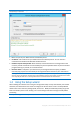
. Press Exit to close the installer. The Configuration Utility will launch automatically to complete the installation 1.3 Using the Configuration Utility The Acronis Access installer comes with a configuration utility, which allows you to quickly and easily set up the access to your Acronis Access Gateway server, File Repository and Acronis Access Server. Note: See the Network Requirements (p. 7) section for more information on best practices for the IP address configurations of Acronis Access.
Note: For information on adding your certificate to the Microsoft Windows Certificate Store, visit the Using Certificates (p. 110) article. Port - The port of your Web Interface and Gateway Server. Redirect requests from port 80 - When selected, Tomcat will listen for incoming traffic on the unsecure port 80 and redirect it to the HTTPS port you have specified above. If you have another program listening on port 80, do not check this box. File Store Path - Local path to your File Store.
Navigate to the Acronis Access's web interface using any of the available IP addresses and the port specified in the configuration utility. You will be prompted to set the password for the default administrator account. Note: Administrators can be configured later on, for more information visit the Server Administration (p. 94) section. This wizard helps you setup the core settings for the functionality of your product.
Going through the initial configuration process Licensing To start a trial: 1. Select Start Trial and press Continue. To license your Access Server: 1. Select Enter license keys. 2. Enter your license key and mark the checkbox. 3. Press Save.
General Settings 1. Enter a Server Name. 2. Specify the root DNS name or IP address where users can access the website (starting with http:// or https://). 3. Specify the DNS name or IP address to which the mobile users will enroll to. 4. Select the default language for the Audit Log. The current options are English, German, French and Japanese. 5. Press Save.
SMTP Note: You can skip this section, and configure SMTP later. 1. 2. 3. 4. 5. 6. Enter the DNS name or IP address of your SMTP server Enter the SMTP port of your server. If you do not use certificates for your SMTP server, unmark Use secure connection?. Enter the name which will appear in the "From" line in emails sent by the server. Enter the address which will send the emails sent by the server.
LDAP 15 Copyright © Acronis International GmbH, 2002-2014
Copyright © Acronis International GmbH, 2002-2014
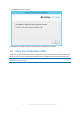
Note: You can skip this section, and configure LDAP later. 1. 2. 3. 4. 5. 6. 7. 8. Mark Enable LDAP. Enter the DNS name or IP address of your LDAP server. Enter the port of your LDAP server. If you use a certificate for connections with your LDAP server, mark Use Secure LDAP Connection. Enter your LDAP credentials, with the domain. (e.g. acronis\hristo). Enter your LDAP search base. Enter the desired domain(s) for LDAP authentication. (i.e.
2 Maintenance Tasks To backup all of Acronis Access's elements and as part of your best practices and backup procedures, you may want to read the Disaster Recovery guidelines (p. 18) article. In this section Disaster Recovery guidelines ...................................................................18 Backing up and Restoring Acronis Access ................................................20 Tomcat Log Management on Windows ...................................................
Note: The FileStore structure contains user files and folders in encrypted form. This structure can be copied or backed up using any standard file copy tool (robocopy, xtree). Normally this structure should be located in a high availability network volume or NAS so the location may differ from the default. PostGreSQL database. This is a discrete element running as a Windows service, installed and used by Acronis Access.
1. Boot up the recovery node. Adjust any network configuration like IP Address, Host Name if needed. Test Active Directory connectivity and SMTP access, 2. If needed restore the most recent Acronis Access software suite backup. 3. Verify that Tomcat is not running (Windows Control Panel/Services). 4. If needed, restore the FileStore. Make sure the relative location of the FileStore is the same as it was in the source computer.
Info: For more information on PostgreSQL backup procedures and command syntax please read this: http://www.postgresql.org/docs/9.2/static/backup.html http://www.postgresql.org/docs/9.1/static/backup.html Backing up your Gateway Server's database 1. Go to the server on which you have Acronis Access installed. 2. Navigate to the folder containing the database. Note: The default location is: C:\Program Files (x86)\Acronis\Access\Gateway Server\database 3. Copy the mobilEcho.
A "password for user postgres: " message may appear. If that happens, enter the postgres password that you set during the Acronis Access installation process. acronisaccess_production must be entered exactly as shown. This is the Acronis Access database name. 6. Once the process has completed successfully, restart the postgres service and start the Acronis Access Tomcat service. Note: Typing the password will not result in any visual changes in the Command Prompt window.
2.3 Tomcat Log Management on Windows As part of its normal operation Tomcat creates and writes information to a set of log files. Unless periodically purged, these files accumulate and consume valuable space. It is commonly accepted by the IT community that the informational value those logs provide degrades rapidly. Unless other factors like regulations or compliance with certain policies play, keeping those log files in the system a discrete number of days is what is required.
REM NumDays - Log files older than NumDays will be processed set NumDays=14 REM ===== END OF CONFIGURATIONS ====================== ECHO ECHO ===== START ============ REM ForFiles options: REM "/p": the path where you want to delete files. REM "/s": recursively look inside other subfolders present in the folder mentioned in the batch file path REM "/d": days for deleting the files older than the present date.
4. To automate the process, open Task Scheduler and create a new task. Define a name and a description for the task. 5. Set the task to run daily.
6. Define at what time the task should start. It is recommended to run this process when the system is not under extreme load or other maintenance processes are running. 7. Set the action type to “Start a program”.
8. Click the Browse button, locate and select the script (batch) file. 9. When done, click Finish. 10. In the tasks list you may want to right click on the task, select properties and verify the task will run whether a user is logged on or not, for unattended operation. 11. You can verify the task is properly configured and running properly by selecting the task, right clicking on it and selecting “Run”. The scheduler’s log should report start, stop and any errors. 2.
Creating the database backup script 1. Open Notepad (or another text editor) and enter the following: @echo off for /f "tokens=1-4 delims=/ " %%i in ("%date%") do ( set dow=%%i set month=%%j set day=%%k set year=%%l ) set datestr=%month%_%day%_%year% echo datestr is %datestr% set BACKUP_FILE=AAS_%datestr%_DB_Backup.sql echo backup file name is %BACKUP_FILE% SET PGPASSWORD=password echo on bin\pg_dumpall -U postgres -f %BACKUP_FILE% move "%BACKUP_FILE%" "C:\destination folder" 2.
On the Triggers tab: 1. Click New. 2. Select On a schedule for Begin the task. 3. Select daily and select the time when the script will be run and how often the script should be rerun (how often you want to backup your database). 4. Select Enabled from the Advanced settings and press OK. On the Actions tab: 1. 2. 3. 4. Click New. Select Start a program for Action. For Program/Script press Browse, navigate to and select the DatabaseBackup.bat file.
2. Click on the Acronis Access Tomcat Configuration tool shortcut. 3. Open the Java tab. 4. Change the Maximum memory pool to the desired size and press OK. 5. Restart the Acronis Access Tomcat service.
3 Mobile Access This section of the web interface covers all the settings and configurations affecting mobile device users. In this section Concepts...................................................................................................31 Policies .....................................................................................................33 On-boarding Mobile Devices ...................................................................43 Managing Your Gateway Server.......................
If client management is not needed, Data Sources can be setup on the local Gateway Server and the Access Mobile Clients will be able to access these Data Sources. Each user will be in control of his own app settings. Fig 1. Single Gateway server, many Access Mobile Clients Note: Details on installing Acronis Access are included in the Installing (p. 5) section of this guide. The configuration of Data Sources is explained in the Mobile Access (p. 31) section.
Acronis Access clients can be assigned a list of servers, specific folders within shared volumes, and home directories in their management policy. These resources will automatically appear in the Acronis Access app and the client app will contact these servers directly as needed for file access. Note: Details on enabling and configuring the client management are included in the Policies (p. 33) and Managing Mobile Devices (p. 127) section of this guide. 3.2 Policies In this section Group Policy .........
3.2.1.3 34 Security Policy App password creation - The Access Mobile Client application can be set with a lock password that must be first entered when launching the application. Optional - This setting will not force the user to configure an application lock password, but they will be able to set one from the Settings menu within the app if they desire. Disabled - This setting will disable the ability to configure an application lock password from the Settings menu within the app.
where you prefer that a user cannot set an app password and will lock other users out of the Access Mobile Client. App will lock - This setting configures the application password grace period. When a user switches from the Access Mobile Client to another application on their device, if they return to the Access Mobile Client before this grace period has elapsed, they will not be required to enter their application lock password.
3.2.1.4 Application Policy Require Confirmation When Deleting Files - When enabled, the user will be asked for confirmation each time they delete a file. If you would like the user to be able to later modify this setting, select Allow user to change this setting. Set the Default File Action - This option determines what will happen when a user taps a file in the Access Mobile Client application. If this is not set, the client application defaults to Action Menu.
Allow These settings can be used to disable certain Access Mobile Client application features and capabilities. All copy, create, move, rename, and delete settings apply to files or folders located on Gateway servers. Files in the mobile client's local My Files folder are stored on the device and are not affected. All other settings apply to any files in Acronis Access, both server-based and locally stored on the client.
or create new files or folders on the Gateway Server server Gateway Server. This setting supersedes any NTFS permissions that client may have that allow file creation. File Deletes - If this option is disabled, the user will not be able to delete files from the Gateway Server. This setting supersedes any NTFS permissions that client may have that allow file deletion.
3.2.1.5 Sync Policy Client is Prompted to Confirm Before Synced Files are Downloaded - Select the conditions under which the user must confirm before files in synced folders are downloaded. Options are: Always, While on cellular networks only, and Never. If Allow User to Change This Setting is enabled, clients will be able to change the confirmation options.
3.2.1.6 40 Home Folders Display the user's home folder- This option causes a user's personal home directory to appear in the Access Mobile Client app. Display name shown on client - Sets the display name of the home folder item in the Access Mobile Client app. Active Directory assigned home folder - The home folder shown in the Access Mobile Client app will connect the user to the server/folder path defined in their AD account profile.
3.2.1.7 Server Policy Required login frequency for resources assigned by this policy- sets the frequency that a user must log into the servers that are assigned to them by their policy. Once only, then save for future sessions - The user enters their password when they are initially enrolled in management. This password is then saved and used for any file server connections they later initiate.
For every connection - The user is required to enter their password each time they connect to a server. Allow user to add individual servers - If this option is enabled, users will be able to manually add servers from within the Access Mobile Client application, as long as they have the server's DNS name or IP address. If you want the user to only have their policy Assigned Servers available, leave this option disabled.
3.2.2 Default Access Restrictions This section allows you to set whether mobile clients need to be enrolled with the management server. 3.3 On-boarding Mobile Devices To get started with the Acronis Access app, users need to install it through the Apple App Store (iOS) or the Google Play Store (Android). Depending on your company's deployment of Acronis Access, the users may also need to enroll the Access Mobile app on their device with the Acronis Access Server.
Allow file and folder creation, renames and deletes Assigned folders can be configured to perform 1-way to 2-way syncing with the server Allow moving files Require confirmation when deleting Servers, folders, and home directories can be assigned so they automatically appear in the Access Mobile Client app In this section Server-side Management Enrollment Process.........................................44 User-side Management Enrollment Process ...........................................45 3.
4. 5. 6. 7. to batch invite all members in a group. You can optionally remove one or more of those group members before sending the invitations. You can perform 'begins with' or 'contains' searches for Active Directory groups. Begins with search will complete much faster than contains searches. Once you've added your first user or group, you can issue a new search and continue to add additional users or groups to the list. Review the list of Users to invite.
The email guides them through the process of installing the Access Mobile Client and entering their enrollment information. If the Access Mobile Client app has already been installed, and the user taps the "Tap this link to automatically begin enrollment..." option while viewing this email on their device, Acronis Access will automatically launch and the enrollment form will be displayed.
The username and password required are the user's Active Directory username and password. These credentials are used to match them to the group policy, to access the Gateway server and if the policy allows it, the saving of their credentials for Acronis Access server logins. If their management policy requires an application lock password, they will be prompted to enter one.
Connectivity requirements Acronis Access clients must have network access to the Acronis Access server in order to receive profile updates, remote password resets, and remote wipes. If your client is required to connect to a VPN before they can access Acronis Access, they will also need to connect to the VPN before management commands will be accepted.
Version - Shows the version of the Acronis Access Gateway Server. Status - Shows whether the server is Online or Offline. Active Sessions - Number of currently active sessions to this Gateway Server. Licenses Used - Number of licenses used and the number of available licenses. License - Shows the current type(s) of license(s) used by the Gateway Server. Search Index local data sources for filename search By default, indexed searching is enabled on all Gateway Servers.
Note: The Data Source's volume path must be a hostname or a fully qualified name in order to use content search on Windows Reshares. IP addresses are not supported by Windows Search. SharePoint Entering these credentials is optional for general SharePoint support, but required to enumerate site collections. For example, say you have two site collections: http://sharepoint.example.com and http://sharepoint.example.com/SeparateCollection.
Status The Status section gives you information about the Gateway Server itself. Information like the operating system, the type of the license, number of licenses used, version of the Gateway Server and more.
Active Users Displays a table of all users currently active in this Gateway Server. 52 User - Shows the user's Active Directory (full) name. Location - Shows the IP address of the device. Device - Shows the name given to the device by the user. Model - Shows the type/model of the device. OS - Shows the operating system of the device. Client Version - Shows the version of the Acronis Access app installed on the device. Policy - Shows the policy for the account used by the device.
3.4.2 Editing Gateway Servers General Settings Display Name - Sets the display name of the Gateway Server. Address for administration - Sets the address on which the Gateway Server is reachable by the Acronis Access Server. Address for client connections - Sets the address on which mobile clients will connect to the Gateway Server.
Logging The Logging section allows you to control whether the logging events from this specific Gateway Server will be shown in the Audit Log and allows you to enable Debug logging for this server. To enable Audit Logging for a specific gateway server: 1. 2. 3. 4. 5. 6. 7. 8. Open the web interface. Log in as an administrator. Open the Mobile Access tab. Open the Gateway Servers tab. Find the server for which you want to enable Audit Logging. Press the Details button.
7. In the Logging section check Debug Logging. 8. Press the Save button. Search Index local data sources for filename search By default, indexed searching is enabled on all Gateway Servers. You can disable or enable indexed searching for each Gateway Server in the Gateway’s Edit Server dialog. Default path By default on a standalone server, Acronis Access stores index files in the Search Indexes directory in the Acronis Access Gateway Server application folder.
SharePoint Entering these credentials is optional for general SharePoint support, but required to enumerate site collections. For example, say you have two site collections: http://sharepoint.example.com and http://sharepoint.example.com/SeparateCollection. Without entering credentials, if you create a volume pointing to http://sharepoint.example.com, you will not see a folder called SeparateCollection when enumerating the volume. The account needs to have Full Read access to the web application.
3. Under Web Applications click on Manage web applications. 4. Select your web application from the list and click on User Policy. 5. Select the checkbox of the user you want to give permissions to and click on Edit Permissions of Selected Users. If the user is not in the list, you can add him by clicking on Add Users.
6. From the Permission Policy Levels section, select the checkbox for Full Read - Has Full read-only access. 7. Press the Save button.
Advanced Note: It is recommended that these settings only be changed at the request of a customer support representative. Hide inaccessible items - When enabled, files and folders for which the user does not have the Read permission will not be shown. Hide inaccessible items on reshares - When enabled, files and folders located on a network reshare for which the user does not have the Read permission will not be shown.
Minimum iOS client version - When enabled, users connecting to this Gateway will be required to have this or a later version of the Acronis Access iOS client app.. Use Kerberos for SharePoint Authentication - If your SharePoint server requires Kerberos authentication, you should enable this setting. You will also need to make an update to the Active Directory computer object for the Windows server or servers that are running the Gateway server software.
Access to SharePoint 2007, 2010, 2013, 365 content Acronis Access can provide access to files residing in document libraries on SharePoint 2007, 2010, 2013 and 365 servers. An Acronis Access SharePoint data source can point to an entire SharePoint server, a specific SharePoint site or subsite, or a specific document library. These files can be opened, PDF annotated, edited, and synced, just like files that reside in traditional file server or NAS storage.
3.5.1 Folders In addition to Gateway Servers, Folders can also be assigned to Acronis Access user and group policies, allowing them to automatically appear in a user's Acronis Access Mobile client application. Folders can be configured to point to any Acronis Access Gateway Server, or even a subdirectory within a shared volume. This allows you to give a user direct access to any folders that might be important to them.
Creating a Data Source for a specific folder within a SharePoint Library When creating a Data Source for a specific folder within a SharePoint Library, you will have to fill in all fields. In the URL field you enter the address of your SharePoint site or subsite, for the Document Library Name field you enter the name of your Library and for the Subpath field you enter the name of the desired folder. e.g. URL: https://sharepoint.mycompany.com:43222 e.g. Document Library Name: Marketing Library e.g.
Creating a Data Source 64 Copyright © Acronis International GmbH, 2002-2014
To create a Data source: 1. 2. 3. 4. 5. 6. 7. 8. Open the Acronis Access Web Interface. Open the Mobile Access tab. Open the Data Sources tab. Go to Folders. Press the Add New Folder button. Enter a display name for the folder. Select the Gateway Server which will give access to this folder. Select the location of the data. This can be on the actual Gateway Server, on another SMB server, on a SharePoint Site or Library or on a Sync & Share server.
4 Settings Enrollment Settings Mobile Client Enrollment Address - specifies the address which mobile clients should use when enrolling in client management. Note: It is highly recommended to use a DNS name for the mobile client enrollment address. After successfully enrolling in management, the Acronis Access app stores the address of the management server.
5 Quick Start: Mobile Access This guide provides the essential steps for configuring your Group Policy, adding a Data Source and installing the Access Mobile Client app. For more detailed instructions on configuring the Acronis Access Gateway Server and the management components, see the Mobile Access (p. 31) section. In this section First Run ...................................................................................................67 Configuring your Group Policy .................................
2. Specify the root DNS name or IP address where users can access the website (starting with http:// or https://). 3. Specify the DNS name or IP address to which the mobile users will enroll to. 4. Select the default language for the Audit Log. The current options are English, German, French and Japanese. 5. Press Save. SMTP Note: You can skip this section, and configure SMTP later. 1. 2. 3. 4. 5. 6. Enter the DNS name or IP address of your SMTP server Enter the SMTP port of your server.
LDAP 69 Copyright © Acronis International GmbH, 2002-2014
Copyright © Acronis International GmbH, 2002-2014
Note: You can skip this section, and configure LDAP later. 1. 2. 3. 4. 5. 6. 7. 8. Mark Enable LDAP. Enter the DNS name or IP address of your LDAP server. Enter the port of your LDAP server. If you use a certificate for connections with your LDAP server, mark Use Secure LDAP Connection. Enter your LDAP credentials, with the domain. (e.g. acronis\hristo). Enter your LDAP search base. Enter the desired domain(s) for LDAP authentication. (i.e.
6 Configuring your Group Policy With the Group Policy, you can administer what your users can do with files and what they have access to. Configuring your Group Policy: 1. Open the Policies tab. 2. Click on the Default policy. 3. Make the necessary configurations in each of the tabs (Security (p. 34), Application (p. 36), Sync (p. 39), Home Folders (p. 40) and Server (p. 41)) and press Save. 6.1 Installing the Access Mobile Client application 1.
If your Acronis Access server allows access without your Access Mobile Client being centrally managed, you can get started by simply entering your Acronis Access server's name along with your username and password. Each user sent a management enrollment invitation will receive an email that contains: A link to install the Access Mobile Client from the Apple App Store. A link used to launch the Access Mobile Client app and automate the enrollment process. Their management server address.
The email guides them through the process of installing the Access Mobile Client and entering their enrollment information. If the Access Mobile Client app has already been installed, and the user taps the "Tap this link to automatically begin enrollment..." option while viewing this email on their device, Acronis Access will automatically launch and the enrollment form will be displayed.
The username and password required are the user's Active Directory username and password. These credentials are used to match them to the group policy, to access the Gateway server and if the policy allows it, the saving of their credentials for Acronis Access server logins. If their management policy requires an application lock password, they will be prompted to enter one.
Connectivity requirements Acronis Access clients must have network access to the Acronis Access server in order to receive profile updates, remote password resets, and remote wipes. If your client is required to connect to a VPN before they can access Acronis Access, they will also need to connect to the VPN before management commands will be accepted.
7 Quick Start: Sync & Share This guide provides the essential steps for setting up Sync & Share, using the web interface to access files and using the Acronis Access desktop client. For more detailed instructions on configuring these components, see the Sync & Share and Desktop Client sections. In this section First Run ...................................................................................................77 Web Client.............................................................................
2. Specify the root DNS name or IP address where users can access the website (starting with http:// or https://). 3. Specify the DNS name or IP address to which the mobile users will enroll to. 4. Select the default language for the Audit Log. The current options are English, German, French and Japanese. 5. Press Save. SMTP Note: You can skip this section, and configure SMTP later. 1. 2. 3. 4. 5. 6. Enter the DNS name or IP address of your SMTP server Enter the SMTP port of your server.
LDAP 79 Copyright © Acronis International GmbH, 2002-2014
Copyright © Acronis International GmbH, 2002-2014
Note: You can skip this section, and configure LDAP later. 1. 2. 3. 4. 5. 6. 7. 8. Mark Enable LDAP. Enter the DNS name or IP address of your LDAP server. Enter the port of your LDAP server. If you use a certificate for connections with your LDAP server, mark Use Secure LDAP Connection. Enter your LDAP credentials, with the domain. (e.g. acronis\hristo). Enter your LDAP search base. Enter the desired domain(s) for LDAP authentication. (i.e.
8 Web Client 1. Launch you web browser and navigate to: https://myserver https://myserver, where myserver is the URL or IP address of the computer running the Acronis Access server. 2. Login with your credentials. a. If you have just installed the Acronis Access server, login as administrator with the password you set after the installation process. If this is the first time you open the web interface, you will be asked to set the password now. b.
2. Press the Save button. Uploading files 1. Navigate into the new folder by clicking its name. 2. Click the Upload Files button, click the Add Files... button and select a file or files from your computer. 3. The file(s) will be uploaded to the folder you are in. Press Done.
Another way of uploading files is simply dragging and dropping them to the web page: 84 Copyright © Acronis International GmbH, 2002-2014
Clicking on a file or folder shows the available actions in the right sidebar. Downloading a file If you want to download a file, simply click on its name. You can also click on the row to the right of the file or folder name and press Download from the sidebar. Note: When using Internet Explorer you have to make sure that Do not save encrypted pages to disk is unchecked in order to be able to download files. This setting is found under Internet Options -> Advanced -> Security.
Sharing a Folder Note: If you want to share a file or folder that was shared with you by another user, you need to have the permissions to invite other users to that share. If you do not have the permissions to invite other users, you will not be able to share the files and folders with another user. The option Sharing in the right sidebar will not be visible as well. To share a folder with a colleague or business partner, do the following: 1. Click on Sync&Share. 2.
3. In the Sharing lightbox, enter an email address and an appropriate text message. An email containing your information and access instructions will be generated and sent to the recipient. Note: If the Allow editing and deletion check box is disabled, invited users can only download and read documents included in the shared folder.
c. Press Copy Link. d. Share the link via whatever method you prefer. Subscribing to email notifications You can subscribe to email notification alerts for folders shared with you. 1. To do so, simply enter the shared folder and click on Notifications in the sidebar. 2. Select the conditions you want to be notified for and press Save.
You can look at the history of events by opening the Log tab. Search and filter options are available. Event importance is marked with different colors. 8.1 Using the desktop client First Steps Note: If you haven't installed your Acronis Access Desktop Client yet, you can do so by following the Client Installation and Configuration guide. 1. Open the folder you selected for syncing during the configuration process.
4. Create another folder inside My Projects with a name Collaterals. 5. Place some files into it by copying them from your computer. 6. Now it’s time to share a folder with a colleague. You can do this in two different ways: directly from Windows Explorer or using your web browser. Follow step 7 to share content from your desktop using Windows Explorer, or follow step 8 to share content using your preferred web browser. Note: You can also share just a single file as described at the bottom of this article.
a. Right Click on it. b. From the context menu, select Share with Acronis Access c. This will launch a web browser and show you the invite dialog. d. In the Invite others dialog enter an email address and an appropriate text message.
If you prefer to use your web browser instead: 1. Open https://server.com/ https://server.com/, where server.com is the Acronis Access server address, and log in using your username and password credentials. 2. Click on Sync&Share. 3. Click on the folder you want to share and select Sharing from the sidebar.
4. In the Sharing lightbox, enter an email address and an appropriate text message. An email containing your information and access instructions will be generated and sent to the recipient. Note: If the Allow editing and deletion check box is disabled, invited users can only download and read documents included in the shared folder.
9 Server Administration In this section Administering a Server .............................................................................94 Administrators and Privileges ..................................................................95 Audit Log ..................................................................................................97 Server .......................................................................................................99 SMTP .........................................
9.2 Administrators and Privileges Provisioned LDAP Administrator Groups This section allows you to manage your administrative groups. Users in these groups will automatically receive administrative privileges. Using the Actions button you can delete or edit the group.
To add a provisioned LDAP administrator group: 1. 2. 3. 4. 5. Press the Add Provisioned Group. Mark if the group should have Sync & Share functionality. Find the group. Click on the group name. Press Save. Administrative Users This section lists all your Users with administrative rights, their authentication type (Ad-Hoc or LDAP), whether they have Sync & Share rights and their status (Disabled or Enabled). You can invite a new user with full using the Add Administrator button.
4. Press the Add Administrator button under Administrative Users. 5. Select either the Active Directory/LDAP or Invite by Email tab depending on what type of user you are inviting and what you want them to administer. LDAP users without emails cannot be given Sync & Share functionality. a) To invite via Active Directory/LDAP do the following: 1. Search for the user you want to add in the Active Directory and then click on their Common Name to select a user.
Timestamp – shows the date and time of the event. Type – shows the level of severity of the event. User – shows the user account responsible for the event. Message – shows information on what happened. If you have enabled Audit logging on a Gateway Server, you will also see the activity of your mobile clients. If you have allowed Desktop and Web clients to access mobile Data Sources, they will also be reflected in the log. Device Name – name of the connected device.
Automatically purge log entries more than X Y old - When enabled, logs older than a number of days/weeks/months will be automatically purged. Export log entries to file as X before purging - When enabled, exports a copy of the logs before purging them in either CSV, TXT or XML. 9.4 Export file path - Sets the folder where the exported logs will go.
Notification Settings Email administrator a summary of errors? – If enabled, a summary of errors will be sent to specified email addresses. 100 Email Addresses – one or more email addresses which will receive a summary of errors. Notification Frequency – frequency for sending error summaries. Sends emails only if errors are present.
9.5 SMTP Acronis Access Server uses the configured SMTP server to send emails to invite users to share or enroll mobile devices, as well as notify users and administrators of server activity. SMTP server address - enter the DNS name of an SMTP server that will be used to send email invitations to your users. SMTP server port - enter your SMTP server port. This setting defaults to port 587. From Name - this is the username that appears in the "From" line in emails sent by the server.
9.6 LDAP Microsoft Active Directory can be used to provide mobile access and sync and share access to users in your organization. LDAP is not required for unmanaged mobile access or sync and share support, but is required for managed mobile access. Other Active Directory products (i.e. Open Directory) are not supported at this time.
Copyright © Acronis International GmbH, 2002-2014
Enable LDAP? - If enabled, you will be able to configure LDAP. LDAP server address - enter the DNS name or IP address of the Active Directory server you would like to use for regulating access. LDAP server port - the default Active Directory port is 389. This will likely not need to be modified. Note: If you're supporting multiple domains you should probably use the global catalog port. Use LDAP secure connection? - disabled by default.
Available Parameters - The available parameters are different for each template and will change based on the template you've selected. Email Subject - The subject of the invitation email. Pressing the View Default link will show you the default subject for that language and email template. HTML Email template - Shows the HTML-coded email template. If you enter valid HTML code, it will be displayed.Pressing the Preview button will show you a preview of how your current template looks.
Note: Pressing the View Default button will show you the default template. Make sure you click the Save Templates button when you finished modifying your templates. 9.8 Licensing Licensing You will see a list of all your licenses. License - Type of the license (Trial, subscription etc). Clients - Maximum number of allowed licensed users. Current Licensed Client Count - Number of currently used user licenses. Current Free Client Count - Number of free users currently in the system.
Note: The supported licensed client counts are 50 and 100. If you've bought a 50 user license, you can upgrade it to a 100. Note: You can upgrade your instance of Acronis Access to Acronis Access Advanced by using a Acronis Access Advanced license key. All your current settings and configurations will be saved. 9.9 Debug Logging Settings in this page are designed to enable extended logging information that might be useful when configuring and troubleshooting Acronis Access.
Note: In the cases where the product was updated and not a new installation, the log files will be in C:\Program Files (x86)\Group Logic\Common\apache-tomcat-7.0.42\logs. Note: On a clean installation of Acronis Access, the log files will be in C:\Program Files (x86)\Acronis\Access\Common\apache-tomcat-7.0.42\logs 9.10 Monitoring The performance of this server can be monitored using New Relic.
9. Enter the path to the newrelic.yml including the extension (e.g C:\software\newrelic.yml). We recommend you put this file in a folder outside of the Acronis Access folder so that it will not be removed or altered on upgrade or uninstall. 10. Click Save and wait a couple of minutes or until the Active application(s) button becomes active on the New Relic site. 11. If more than 10 minutes pass, restart your Acronis Access Tomcat service and wait a couple of minutes. The button should be active now. 12.
10 Supplemental Material In this section Conflicting Software ...............................................................................110 Using trusted server certificates with Acronis Access ...........................110 Changing the Acronis Access Tomcat SSL Ciphers .................................112 How to support different Access Desktop Client versions.....................113 Customizing the web interface ..............................................................
Note: Contact your preferred certificate vendor for more information or help with this procedure. To generate a pair of private key and public Certificate Signing Request (CSR) for the web server "AAServer": 1. Open an elevated command prompt and enter the following command: openssl req -new -nodes -keyout myserver.key -out AAServer.csr -newkey rsa:2048 This creates a two files. The file myserver.key contains a private key; do not disclose this file to anyone.
Note: If you are importing a PFX file, you will need to change the file filter to “Personal Information Exchange (*.pfx, *.p12)” to display it. 14. If the certificate has a password, type the password on the Password page, and then click Next. 15. Check the following boxes: a. Mark this key as exportable b. Include all extended properties 16. On the Certificate Store page, click Place all certificates in the following store, and then click Next. 17.
6. Save the changes made to the server.xml file and restart the Acronis Access Tomcat service. 10.4 How to support different Access Desktop Client versions If you want to use a version of Access Desktop Client which is different from the latest, follow these steps: 1. Download the version of Access Desktop Client which you want to use. Make sure you have these 4 files: 2. 3. 4. 5. 6. 7. 8. 9. AcronisAccessMac.zip AAClientInstaller.msi AcronisAccessInstaller.dmg AcronisAccessClientInstaller.
10.6 Creating a Drop Folder This guide will cover setting up a Drop Folder using Acronis Access and Windows Active Directory. A Drop Folder is a folder in which certain users can only add new files and folders (without the ability to edit or delete any of the files) while other users have full control. In the Active Directory, do the following: 1. Either select two existing LDAP groups or create two new groups. One will be used for the superusers (e.g.
List Folder/Read Data Create Files/Write Data Read Permissions For the Creator Owner group Press Edit and under Allow, mark the following permissions: Delete In the Acronis Access Server web interface, do the following: 1. Expand the Mobile Access tab and open the Policies page. 2. Press Add Group Policy. 3. For the superuser group (Group A), fill out all policy tabs per your company's requirements. For more information visit the Policies (p. 33) section. 4.
11. If more than 10 minutes pass, restart your Acronis Access Tomcat service and wait a couple of minutes. The button should be active now. 12. You should be able to monitor you Acronis Access server via the New Relic website. All the information the Acronis Access server logs about trying to connect to New Relic and set up monitoring is in a file called newrelic_agent.log found here - C:\Program Files (x86)\Acronis\Common\apache-tomcat-7.0.34\logs.
10.8.2 Apache Tomcat Acronis Access Server uses ApacheTomcat for its web server. Acronis Access 2.7 and later installs its own version of Tomcat into the Group Logic\Common or Acronis\Common folder. Troubleshooting Tomcat Wiki https://wiki.openmrs.org/display/docs/Troubleshooting+Tomcat. Troubleshooting from the Apache website http://commons.apache.org/logging/troubleshooting.html. 10.8.
11 Sync & Share In this section Sharing Restrictions ...............................................................................118 LDAP Provisioning ..................................................................................118 Quotas ....................................................................................................119 File Purging Policies................................................................................119 User Expiration Policies................................
Members of groups listed here will have their user accounts automatically created at first login. LDAP Group This is the list of currently selected groups. Common Name / Display Name - The display name given to the user or group. Distinguished Name - The distinguished name given to the user or group. A distinguished name is a unique name for an entry in the Directory Service. 11.3 Quotas Administrators can set the amount of space dedicated to each user in the system.
document. Acronis Access allows administrators to define policies to determine how long deleted files will be preserved, the maximum number of revisions to keep and when older revisions will be deleted. Acronis Access can automatically purge old revisions or deleted files from the file repository based on the policies below. This can be used to manage the amount of storage used by Acronis Access. Purged files cannot be restored.
11.5 User Expiration Policies Users who expire will lose access to all their data. You can reassign the data from the Manage Deleted Users page. Delete passkeys after X days - If enabled, deletes all passkeys after a set number of days. Delete pending invitations after X days - If enabled, deletes all pending invitations after a set number of days. Delete adhoc users who have not logged in for X days - If enabled, deletes adhoc users who have not logged in for a set number of days.
11.6 File Repository These settings determine where files uploaded for syncing and sharing will be stored. The file system repository is installed on the same server as the Acronis Access Server. The File Repository is used to store Acronis Access Sync & Share files and previous revisions. The Acronis Access Configuration utility is used to set the file repository address, port and file store location.
11.7 Acronis Access Client These settings are for the Access Desktop Client. Force Legacy Polling Mode - Forces the clients to poll the server instead of being asynchronously notified by the server. You should only enable this option if instructed to do so by Acronis support. Client Polling Time - Sets the time intervals in which the client will poll the server. This option is available only when Force Legacy Polling Mode is enabled.
Minimum Client Version - Sets the minimum client version that can connect to the server. Allow Client Auto-update to Version - Sets the Access Desktop Client version that will be deployed to all Access Desktop Clients via auto-update checks. Select Do not allow updates to prevent clients from auto-updating at all. 124 Prevent Clients from Connecting - If enabled, Access Desktop Clients will not be able to connect to the server. In general, this should be enabled only for administrative purposes.
12 Upgrading In this section Upgrading from Acronis Access to a newer version ..............................125 12.1 Upgrading from Acronis Access to a newer version The upgrade procedure from a previous version of Acronis Access is a simplified process and requires almost no configuration. Note: This procedure can be used only for versions newer than Acronis Access 7.0. Users upgrading from versions older than Acronis Access 7.0 should upgrade to Acronis Access Advanced.
6. Review the components which will be installed and press Install. 7. Review the installed components and close the installer. 8. You will be prompted to open the Configuration Utility, press OK. 9. Verify that none of the settings in the Configuration Utility have changed. After you have verified all of your settings are as expected, press OK to close the Configuration Utility and start the Acronis Access services.
13 Users&Devices In this section Managing Mobile Devices ......................................................................127 Managing Users .....................................................................................130 13.1 Managing Mobile Devices Once an Access Mobile Client has enrolled with the Acronis Access Server, their device will appear on the Devices list. This list gives detailed status information for each device that is managed.
Device name – Policy – name and link of the management policy of the user. the device name set by the user. Model – type/model of the device. OS – version of the operating system of the device. Version – version of the Acronis Access Mobile app on the device. Status – the status of the enrollment of the Acronis Access Mobile app on the device. Last Contact – the date and time of the last connection between the management server and the client.
device user and the Acronis Access IT administrator, in order to enable Acronis Access to decrypt it's settings database and allow the user to set a new app password. To reset a Acronis Access for iOS or Android application password: 1. An end user will contact you requesting to have their Acronis Access app password reset, they will give you their Password Reset Code. 2. Open the Users & Devices tab. 3. Open the Devices tab. 4.
4. Press Remote wipe... 5. Confirm the remote wipe by pressing Queue remote wipe. 6. A 'Pending remote' status will appear in the Status column for that device. When the remote wipe has been accepted by the device, its Status will reflect this. Note: Remote wipes can be canceled at any time before the client next connects to the management server. This option appears in the Actions menu after a remote wipe has been issued.
LDAP users and users with administrative rights are automatically licensed at creation. They are able to create and upload files and folders as well as share those files and folders with other users. They can use the desktop client as well. Unless you have setup a Provisioned LDAP group (p. 118) you will have to create your LDAP users the same way as the Ad-hoc users, but you won't have to license them manually.
Adding an Ad-Hoc user 1. 2. 3. 4. 5. 6. 7. 8. 9. Open the Acronis Access Web Interface. Log in with an administrator account. Open the Sync & Share tab. Open the Users tab. Press the Add User button. Write the email of the user. Select whether the user should have administrative rights or not. Select the language of the invitation. Press the Add button. The user will receive an email with a link. Once he opens the link, he will be asked to set a name and password and his account will be complete.
Deleted users without any content are completely removed. Users which had content (files, folders) remain in the system and will be moved to this section. Administrators can access the list of deleted users with content still in the system. This content can be reassigned to another user or left alone to be purged automatically by the system according to the purging policies in effect. When deleting a user, a window will ask you if you want to reassign this user's content to another user.
14 What's New In this section What's New in Acronis Access Server ....................................................134 What's New in the Acronis Access app ..................................................148 Previous Releases...................................................................................149 14.1 What's New in Acronis Access Server Note: Numbers such as "[DE1013, US552, #2717]" refer to Acronis' internal change tracking system. Note: Numbers such as "[7.0.
Java version 7 U71 is used in this release. (US9486) The default threshold and interval for user notification as they approach their quota for Sync & Share can now be configured. (US8605) Apache Tomcat 7.0.56 is used in this release. (US9801) Improved audit logging when files are downloaded from direct download link. (DE10961) Sorting files by type is now allowed in the web client interface. (US6836) Postgres can now be removed using the 'Add/Remove Programs' control panel.
Acronis Access 6.1.3 ENHANCEMENTS The default SSL bindings of Acronis Access no longer support Internet Explorer 8 client connections. To enable unsecure Internet Explorer 8 connections on a new installation, please see this article: Changing the Acronis Access Tomcat SSL Ciphers (p. 112). (US8460) New Relic agent updated to the version 3.9.0.229. Please note that New Relic will stop working until it is upgraded to this release.
Java 7 Update 51 is used in this release. BUG FIXES Fixed an issue with downloading Sync & Share files from an Amazon S3 repository. Fixed an issue with populating the owner_name value in the exported logs. Fixed possible request timeout issue when enrolling a mobile client in a large Active Directory. Fixed a licensing message issue with running multiple Gateway servers on the same network using the same serial number.
Addressed a dependency issue that could prevent the Access Gateway service from starting automatically after a reboot on Windows Server 2008R2. Acronis Access 6.1 ENHANCEMENTS Web Services API for the Acronis Access Server administration. The API documentation is packaged within the Access server and is accessible by administrators. The link can be found in the footer. The Acronis Access audit log can now be configured to automatically export and purge old log entries.
The Acronis Gateway Server service is now dependent on other key services so it should be assured to start properly when the server starts up. When a Cluster Group is disbanded, any policies that were using that Cluster Group as the Gateway Server used to access “My Network Folders” (locations added by the user) will be updated to instead use the last Gateway Server that was a member of the Cluster Group. Fixed an issue with email address filtering for enrolled users.
Acronis Access 6.0.1 ENHANCEMENTS Added a new policy to specify which gateway or cluster group will be used to share users’ Active Directory assigned home folders. Active Directory assigned home folders will now automatically be shared by a gateway without the need to manually created a data source or enable the “Allow User to Add Network Folders by UNC path or URL” policy setting.
Clients who do not have sync and share enabled will no longer be incorrectly reported as “unmanaged” in the audit log. Files with Japanese or other characters in their filenames should no longer have the filenames changed when downloaded with Internet Explorer. Administrators should no longer see unresolvable errors when subscription licenses expire. Home directories should no longer be inaccessible after upgrades from pre-5.0 versions of mobilEcho. Miscellaneous localization bug fixes.
BUG FIXES The Default Language setting in Server Settings has been renamed to be clear that it is the default audit log language. If a data source for an Active Directory home folder cannot be resolved, the Mobile Clients will no longer see the home folder, instead of getting an error accessing the !HOME_DIR_SERVER. Miscellaneous bug fixes in the Acronis Access Desktop Client. Miscellaneous localization improvements. Acronis Access 5.1.
On Windows Server 2003, the uninstall process no longer reports that PostgreSQL was not installed by the Acronis Access Server installer. The Configuration Utility now generates an error if the Gateway Service is configured to bind to all address on a port and the Access Server on a specific address with the same port. By default on clean installs Tomcat is now configured to not listen for shutdown requests on port 8005. This prevents conflicts with other instances of Tomcat on a server.
BUG FIXES Email notifications are now sent properly after an upgrade when custom templates were used. Newly created data sources are now checked to see if they are searchable immediately. Previously they were only checked in 15 minute intervals. Search is now available on data sources that add search indexing after the Gateway Server has started. When configuring data sources the %USERNAME% token can now be used as part of a folder name, instead of the whole name. Acronis Access 5.0.
the following: ActiveRecord::JDBCError: ERROR: value too long for type character varying(255): INSERT INTO "password_resets" .... Customers that have this condition can upgrade to this new version of the server and the problem will be resolved automatically. Fixed an issue that could cause some clients to go into restricted mode after the upgrade to mobilEcho 5.0. The management server data sources table now shows the Gateway Server's display name instead of IP address. Acronis Access 5.0.
Sorting criteria chosen by the end user is now saved when browsing project folders. Notifications can now be configured to be sent when a file is downloaded / synced. Improved user interface responsiveness for re-assigning content when there are 1000s of users in the system. The Amazon S3 access key no longer displayed in plain text on the administration pages. Improved support for email invitations using different formats of email addresses.
A warning is presented if a user is invited for enrollment but does not match any existing user/group policy. The devices table now lists the user or group policy in use for each device. Content searching is now available against remote Windows file shares running Windows Search. A new token is available in the enrollment invitation templates to include the Active Directory user's Display Name.
14.2 What's New in the Acronis Access app Access Mobile Client 6.1 ENHANCEMENTS Added support for iOS 7 managed app configuration. Miscellaneous fixes and improvements. Updated MobileIron AppConnect integration to version 1.7. Addressed an issue where iWork files might appear as zip files. Added new mobilecho:// link variables (action=edit & action=preview) that can be used to automatically open the linked file. Access Mobile Client 6.0.
ENHANCEMENTS Added support for using smart cards to unlock the mobilEcho app and to authenticate with mobilEcho servers. This feature utilizes the Thursby PKard Reader app and the smart cards (CAC, PIV, etc) and card readers the Thursby app supports. Miscellaneous fixes and improvements. mobilEcho 4.5.1 mobilEcho now supports iOS 7, both when operating as a standalone app and when MobileIron AppConnect-enabled. Miscellaneous fixes and improvements. mobilEcho 4.
the full functionality of the combined product. To request this upgrade, please submit this web form. For the latest information, please visit the What' New in Acronis Access Server (p. 134) article. activEcho 5.1.
Folders can be downloaded as a ZIP file from the Projects view in the Web UI. Sharing invitation dialogs now support type-ahead against both local users and users in Active Directory / LDAP. The previous revisions feature for finding / downloading / restoring previous versions of files has been redesigned and is more flexible. Previous revisions can be selected to be "made current". activEcho desktop clients (Mac/Windows) now show progress indicators files being synchronized.
activEcho 2.7.3 (Released: June 2013) ENHANCEMENTS: Switched to using the official AWS library file for Amazon S3 connections. Files now can be successfully uploaded to any of the eight Amazon S3 bucket regions. BUG FIXES: Pending users can now be deleted without error. Files which were not fully uploaded to the Amazon S3 file repository will now be removed from the repository if the repository is accessible after the upload failure occurs.
activEcho 2.7.0 (Released: February 2013) ENHANCEMENTS: Mac and Windows sync clients will now be notified when they have updated content available for download. These notifications will reduce load on the server and improve performance by avoiding many unnecessary requests from clients to the server to check for updates when none are available. Mac and Windows sync clients have been made more resilient to errors on single files and folders.
Files will no longer be marked deleted if they can't be found in the repository. They will need to manually be removed. Tomcat no longer needs to be restarted when S3 repository settings are changed. All activEcho server logging is now written to a date-stamped activEcho.log file which is rotated daily. This log file can be found inside the Tomcat logs folder. A configuration flag has been added to allow the activEcho web server to support HTTP connections instead of HTTPS.
Duplicate files will no longer appear in the web interface if you pause and resume the client in the middle of uploading a file. Fixed a Mac client bug where the client receives an error when a file is deleted off the server side while the client is downloading the file. The sync client will no longer fail to complete in rare cases where folders are aggressively renamed with similar names. The sync client will no longer attempt to delete files repeatedly if it cannot succeed.
Quotas can now be defined specifically for administrative users. Automatic purging of user accounts if no activity has occurred, or a specific absolute time has passed. Support for configuring the length of time before expiration of shared links. New share permissions allow owner to hide display of share members to non-owners, and prevent non-owners from inviting others. New behavior when unsharing projects, local data will be deleted from the client on next connection.
The domain for LDAP authentication list can use either ; or , as a delimiter. Various improvements on syncing files and folders where an item or the parent folder(s) have been deleted. Fixed files modification dates that were not set properly based on timezones under some circumstances. Period is a valid character in S3 bucket names when using Amazon S3 for the file repository. Fixed high CPU usage on both Mac and Windows desktop clients. Miscellaneous other bug fixes. activEcho 2.5.
The activEcho 2.5 client is not compatible with the 2.1 server. Please upgrade your server to 2.5 first, and then upgrade the clients. The activEcho 2.1 client is compatible with the 2.5 server but will not have all of the new features available. ENHANCEMENTS: Support for quotas. Different quotas values can be set for Active Directory vs. ad-hoc users, as well as based on Active Directory group membership.
Email template notification errors could occur after a user is deleted from activEcho if they were sharing content. LDAP settings are no longer validated if LDAP has been disabled in the management settings. When a folder is unshared, the owner can now see past events in the web log for that folder. The web log allows filtering of past events for users who are no longer part of the shared folder.
Miscellaneous usability enhancements. BUG FIXES: Various bug fixes related to authentication with Active Directory via email addresses. The built-in Administrator account will now never use Active Directory for authentication. Miscellaneous bug fixes in desktop syncing. activEcho 2.0.2 (Released: March 2012) BUG FIXES: Improvements to desktop syncing when Microsoft Office files are edited directly in the activEcho Folder. Various bug fixes in desktop syncing.
ENHANCEMENTS Users with mobilEcho 5.1 or later on iOS can now create their data sources directly from the application to access any file share or SharePoint location. Users enter UNC paths or SharePoint URLs from the client. New policy settings have been introduced on the management server to control whether clients are allowed to create these data sources, and which Gateway Servers are used for these requests. Multiple Gateway Servers can now share a common configuration via a Cluster Group.
mobilEcho 5.0.3 BUG FIXES When configuring data sources the %USERNAME% token can now be used as part of a folder name, instead of the whole name. Newly created data sources are now checked to see if they are searchable immediately. Previously they were only checked in 15 minute intervals. Search is now available on data sources that add search indexing after the Gateway Server has started. mobilEcho 5.0.
mobilEcho 5.0 ENHANCEMENTS The mobilEcho Client Management Server is integrated with Acronis Access Server and built on Apache Tomcat and PostgreSQL database for improved scalability and resilience. The mobilEcho Administrator previously used to manage individual mobilEcho servers has been removed; Access Gateway Servers (formerly mobilEcho File Access Servers) are now managed directly within the Acronis Access Server web administration user interface.
BUG FIXES Home directory configuration is now retrieved properly when LDAP is configured to use the global catalog. Improved handling of Active Directory lookups when trailing spaces are used. The "Enrolled at" date is now formatted properly when exporting to .CSV file. Improved support for displaying Unicode via the web administration user interface. SharePoint folders ending with a space can now be enumerated by clients.
Increased the maximum volume name length to 127 UTF-8 characters to allow for longer volume names when using Unicode characters. Added separate columns to the exported .csv devices list for display name and common name to make the usernames more clear. BUG FIXES: Fixed an issue where the exported .csv devices list would display the domain name incorrectly if the domain name contained numerical characters.
mobilEcho 4.3 (Released: March 2013) ENHANCEMENTS: The mobilEcho server now supports mobilEcho clients with optional support for MobileIron AppConnect activated. The server now allows administrators to require or restrict mobilEcho access to iOS clients with AppConnect enabled. This setting is located in the "Settings" window of the "mobilEcho Administrator" application, on the "Security" tab. BUG FIXES: Fixed an issue where clients upgrading from mobilEcho Server 4.0.
Fixed a problem where whitelists and blacklists could not be assigned when adding or editing a user or group profile. Fixed a problem where files that were already on the device could sync again unnecessarily if the sync source was within an activEcho volume. The password field on the login page of the client management web UI now has auto-complete disabled. Removing a user or group profile now causes the name information for that user/group to be removed from cache.
Added a column to the LDAP search table for Distinguished Name so that users with the same name in different subdomains can be distinguished. Added new management profile setting to allow or disallow users from opening and/or sending links to files. Added client Good Dynamics status in the management server Devices list. Devices enrolled with Good Dynamics will no longer have the "Reset App Password" option available. The app password is managed within the Good Control console in this scenario.
Fixed a problem where selecting the "Reindex all volumes" button in the mobilEcho Administrator would generate an invalid error message. Fixed a problem where filtering on a Unicode string in the Client Management Administrator could generate an "incompatible character encodings" error. SharePoint "Wiki Page Gallery" libraries are now removed from site enumerations because they are not supported by mobilEcho. Fixed a problem where new profile settings could become corrupted on upgrade.
ENHANCEMENTS: Added profile settings for "Number of days to warn of pending lock" and "Number of days to warn of pending wipe". These settings relate to existing settings that can wipe or lock the mobilEcho app if the device does not contact the management server for a specified period of time. Added pagination, filtering and sorting to the Users and Groups pages within the mobilEcho Client Management server.
The mobilEcho Client Management server can now filter the invitations tables by username. The mobilEcho Client Management server can now export the devices list to a .csv file. The mobilEcho Client Management server now sorts and paginates the devices, users, groups and invitations tables. Added a profile setting to allow/disallow users from creating bookmarks. Added a profile setting to disable My Files while still allowing sync folders.
Fixed a problem where users could fail to see their home directories if the client authenticated to the management server with a user principal name (UPN) such as user@domain.com. Fixed a problem where the "%USERNAME%" wildcard would fail to use the correct username if the client authenticated to the management server with a user principal name (UPN) such as user@domain.com. mobilEcho 3.6 (Released: April 2012) ENHANCEMENTS: Improved performance of Active Directory lookups for users and groups.
Fixed a problem where the server could allow mobilEcho clients to overwrite files that were flagged as read-only. Fixed some mobilEcho Client Management display issues on Mac Safari. Fixed a problem where Verizon iPad 3 devices were displayed as "AT&T" (and vice versa) in the mobilEcho Client Management devices page. Fixed a problem where the mobilEcho Administrator could crash when viewing the list of connected users. Fixed a problem where the invitation email would fail to show the username. mobilEcho 3.
HKEY_LOCAL_MACHINE\SYSTEM\CurrentControlSet\services\mobilEcho\Parameters4\Refreshable\P ez\GetShowHiddenSMBShares BUG FIXES: Fixed a problem where the mobilEcho Client Management server would appear to allow access without a proper username and password. Fixed a problem where files would incorrectly require a sync after a change in daylight savings time. Fixed a problem where renamed files would continue to be returned in search results when searching under the old filename.
The text of enrollment invitation emails can be customized. Please visit the GroupLogic Knowledge Base for more information: http://support.grouplogic.com/?p=3749 Added a setting to the management configuration file to control the name that enrollment invitation emails appear from (e.g. "mobilEcho Invitation ". Version 3.0 only allowed an address to be specified (e.g. "mobilEcho_invitation@example.com").
Fixed a problem in the mobilEcho Administrator where the Help button would not adjust properly as the Users window was resized. mobilEcho 3.0 (Released: October 2011) ENHANCEMENTS: Centrally managed device enrollment. Client enrollment invitations are now generated and emailed to the user from the mobilEcho Client Management Administrator. These invitations include a one-time use PIN number required for client enrollment. Remote wipe and remote reset of app passwords is now performed on a per-device basis.
Fixed a bug when listing the contents of folders which may have resulted in slow performance or client timeouts if many of the folders were not accessible to the client. mobilEcho 2.1.0 (Released: July 2011) ENHANCEMENTS: Added the ability to create mobilEcho shares that reshare data on a remote system. The mobilEcho reshare feature is only available for customers with an enterprise license. Reshares can be a particular share (e.g. "\\server\share") or an entire server ("\\server\").