Acronis Backup Advanced for vCloud Update 1 Administrator's Guide
Table of contents 1 Administrator's Guide ......................................................................................................4 1.1 About this document .................................................................................................................4 1.2 Introduction to Acronis Backup Advanced for vCloud...............................................................4 1.2.1 1.2.2 1.2.3 1.2.4 1.3 What's new in Update 1 .................................................
2.4.6 2.4.7 2.5 Operations with backups .........................................................................................................48 2.6 Operations with backup plans .................................................................................................49 2.6.1 2.6.2 2.6.3 2.6.4 3 Recovering files from a virtual machine backup ......................................................................................... 46 Monitoring protection statuses ...........................
1 Administrator's Guide 1.1 About this document This document is intended for system administrators of VMware vCloud Director who want to provide a backup service to vCloud organizations by using Acronis Backup Advanced for vCloud.
When enabling backup for an organization (p. 27), you can select a system backup plan that will be automatically applied to all current and future virtual machines in the organization. Adding network adapters during recovery Before recovering a virtual machine (p. 45), you can add or remove network adapters for the machine and specify the settings for those adapters. Recreating the original vApp during recovery When recovering a virtual machine, (p.
Agents for VMware, formerly known as Agents for ESX(i), run as virtual appliances. Agent for VMware performs backup and recovery of ESX(i) virtual machines without installing agents into the guest systems. The following components run in the management cluster: Management Server needs to be installed on a virtual machine running Windows. The management server integrates with vCenter Server (the one that is allocated for the resource group), deploys Agents for VMware, and manages backup and recovery.
Virtual machines that run Acronis Backup Advanced for vCloud components are colored light blue. Virtual machines that run VMware vCloud components are colored light green. 1.2.4 Planning hardware resources Consider how much vSphere capacity you need for running Acronis Backup Advanced for vCloud and where you will store the backups. 1.2.4.1 vSphere capacity requirements Agent for VMware (Virtual Appliance) Agents for VMware run as virtual appliances in the vCloud resource group.
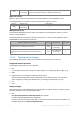
1 GB 6 GB (thick provisioning) 2 (the default Virtual Appliance setting) 4-8 (recommended if backing up 5-10 VMs simultaneously) Agent for vCloud Agent for vCloud needs to be imported from the OVF template to the management cluster. The following table shows vSphere capacity requirements for Agent for vCloud.
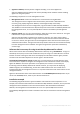
BSP bsp://ServerX/VaultName (for example: bsp://StorageNode/Backups) SMB smb://ServerX/.../FolderName (for example, smb://Server/Backups/Organizations/OrgName) \\ServerX\ShareA\...\FolderName (for example, \\Server\Backups\Organizations\OrgName) FTP ftp://ServerX/.../FolderName (for example, ftp://Server/Backups/Organizations/OrgName) SFTP sftp://ServerX/...
a) The folder allows read/write access. b) You have a user account that will act as the anonymous account, and you know the user ID and group ID of this account. To find out the user ID and group ID, run the id command. c) All user accounts are mapped to the anonymous account.
1.3.2 Installing and configuring RabbitMQ Server Agent for vCloud obtains events from vCloud Director via the RabbitMQ Server AMQP broker. If your vCloud Director already uses RabbitMQ Server, make sure that the exchange type is set to topic, and continue to "Installing Acronis Backup Management Server" (p. 12). If RabbitMQ Server is already installed, but not used by vCloud Director, skip to step 5 of the following procedure. To install and configure RabbitMQ Server 1.
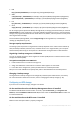
a. In AMQP Host, specify the name or IP address of the RabbitMQ Server host. b. In AMQP Port, type 5672. c. In Exchange, specify the name of the new exchange that you created in step 8. d. In vHost, type /. e. In Prefix, type vcd. f. In User Name, type guest. g. In Password, type guest. 14. Click Apply. 1.3.3 Installing Acronis Backup Management Server Acronis Backup Management Server stores its configuration, logs, and statistics in Microsoft SQL databases.
For example: C:\>cscript enable_remote_sql_access.js User 123 -p 3322 If you do not specify the port, it will be chosen automatically. Examine the port number that was chosen by the script: Port 1433 is picked Important. Remember the credentials and the port number. You will be asked for them when configuring Agent for vCloud. 1.3.3.
Make sure that the TCP Dynamic Ports field is blank. 6. If you made changes to the fields in the previous steps, restart the service for the instance. Preparing SQL Server account for the management server Decide whether the management server will use Windows Authentication or SQL Server Authentication to connect to the SQL Server. Do one of the following, depending on your choice.
Installing the management server 1. 2. 3. 4. 5. On the machine that will act as the management server, log on as an administrator. Start the Acronis Backup Advanced setup program. Click Install Acronis Backup. Accept the terms of the license agreement. On the How do you want to use this machine page: Select the Centrally monitor and configure backing up of physical and virtual machines check box. 6. 7. 8. 9.
If you chose SQL Server Authentication when installing the management server, use the SQL Server login account that you specified for the management server (see step 10b in "Installing the management server" (p. 15)). If you chose Windows Authentication for the management server, use the user account that you specified for the management server service (see step 9 in "Installing the management server" (p. 15)).
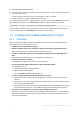
To integrate the management server with the vCenter Server 1. Connect the console to the management server as described in "Using the management console" (p. 16). 2. In the Navigation tree, click Virtual machines and then click Configure VMware vCenter integration. 3. Select the Enable integration with the following vCenter Server check box. 4. Specify the IP address or name of the vCenter Server for the resource group. Provide access credentials for the server. Details.
c. The Network configuration link enables you to select whether the agent will use a dynamic (provided by a DHCP server) or a static IP address. If you want to leave the default setting of using a dynamic address, skip this step. If you want the agent to use a static IP address: Click Network configuration. Select Use the following network settings. Specify the appropriate network settings for the agent, and then click OK.
1.3.8 Configuring Acronis Backup Agent for vCloud Before configuring Acronis Backup Agent for vCloud, make sure that Acronis Backup Management Server is installed (p. 12) and configured (p. 16). Logging in Log in as a root user to the machine with Agent for vCloud. The default credentials are: User name: root Password: Default0 (case-sensitive) Configuring the time zone Set the time zone to that of the vCloud Director machine.
User name: guest Host name or IP address of the management server machine Password: guest 5. Provide the Acronis Backup Management Server connection parameters: The user name and password of a user who is a member of the Acronis Centralized Admins and Acronis Remote Users group on the management server machine 6. Provide the connection parameters for the SQL Server instance that stores the management server databases.
Configuring network settings The machine with Agent for vCloud has two network adapters: eth0 for the internal network and eth1 for the external network. eth0 connects to the internal network where Acronis Backup Advanced for vCloud components communicate with VMware vCloud components. It also accepts incoming connections from SSH clients and web browsers in the internal network. eth1 accepts incoming connections from web browsers in the external network.
To change the connection parameters Run the configure.sh command, choose the Change agent configuration scenario, and then select the connection to change the configuration for. To enable or disable recovering files from virtual machine backups 1. Run the configure.sh command and choose the Change agent configuration scenario. 2. Choose Configure recovery of individual files from backups of VMs. 3.
The management server and the external SQL Server use the range 1025–5000 (if installed in Windows prior to Windows Vista) or 49152–65535 (if installed in Windows Vista and later). Normally, the standard ranges are already open. For the machine with Agent for vCloud, eth0 and eth1 show the network adapter through which the connection is performed. * The port is configurable. The diagram shows the default value. 1.3.
No additional licenses are required for the update. Prerequisites Before proceeding with the update, make sure that: You have the setup program of the new version of Acronis Backup Advanced. No backups will run during the update. To ensure this, you can disable backup (p. 30) for all organizations for the time of the update. You have the update script for Agent for vCloud. The name of the script file is update1.sh. The machine with Agent for vCloud is connected to the Internet.
6. If you disabled backup for the time of the update, log in to the service and re-enable backup (p. 27). Optional: Enabling the file recovery functionality for an organization If you have made the file recovery functionality available (see step 5 above), do the following to enable this functionality for an organization: 1. Log in to the service as the system administrator. 2. Select the organization, and then click Configure. 3.
When connecting from an internal network: is the fully qualified domain name, or the IP address of the Agent for vCloud host in this network. For example, https://vcloudagent.vcloud.example.com/ or https://10.200.200.10/ When connecting from an external network: is the URL of the backup service as it appears on the public side of a firewall, load balancer, NAT/reverse proxy, and other network components that you may have in front of your infrastructure.
Backup storage The path to the organization's backup storage, the storage quota for the organization, and the space occupied by the organization backups. System backup plans The system backup plans (p. 32) available in the organization. Privileges for organization users The actions that the organization users are allowed to perform. 1.5.
In Backup storage, specify the path to the shared folder allocated for storing organization's backups. If authentication is required to access the folder, specify the credentials of a user account that has read/write permissions for this folder. We strongly recommend that each organization has a separate backup storage.
If you clear the Log in to the backup service check box, only system administrators will be able to use the backup service for this organization. For information about how to do this, refer to "Operating within an organization" (p. 29). 8. Confirm the changes. 9. If this is the first time that a backup for this organization is being enabled, perform a test backup to ensure that Agent for VMware is properly deployed to the organization's cluster. a. Enter the organization (p. 29). b.
5. Depending on the operation you want to perform, refer to the corresponding section of the Acronis Backup Advanced for vCloud User's Guide (p. 40). 1.5.4 Disabling backup for an organization To disable backup for an organization 1. 2. 3. 4. 5. 6. Log in to the service. Click the Organizations tab. Select the organization to disable backup for. Click Configure. Clear the Enable backup for an organization check box. Confirm the changes.
Specify how many virtual machines Agent for VMware may back up simultaneously. The default value is 5. The maximum value is 10. The value you specify is effective for a backup plan. If an agent runs more than one backup plan simultaneously, the number of machines being backed up may exceed the setting, but it still cannot exceed 10. A backup plan that requires to back up the 11th machine will not start until one of the backup operations is finished. Tip.
infrastructure. The URL must include either an external IP address or a valid DNS name that can be resolved by the users' DNS servers. For example: https://www.backup.example.com/ After this public URL is specified, the backup service address for MyOrganization will look as follows: https://www.backup.example.com/org/MyOrganization 1.6.1 Managing system backup plans What is a backup plan? A backup plan is a set of rules that defines how to protect virtual machines.
Details. Because a system backup plan can be distributed across many organizations, you cannot enable backup options (such as encryption or notifications) when creating or editing the plan. Instead, you can enable different backup options in each organization where the plan is available. To enable backup options, switch to a specific organization (p. 29), select the plan in the list, and then click Set options. Organization users can also enable or change these options. 7. Click OK.
Backed-up data: The total amount of data that was backed up. This amount includes the initial content of the virtual machine disks and the subsequent incremental changes to that content.
To collect logs by using the web interface 1. Log in to the service. 2. Click Help -> Collect logs. 3. If prompted by your web browser, specify where to save the file. If you cannot log in to the service because of a web server problem, you can collect logs by using a script. To collect logs by using a script 1. Log in as a root user to the machine with Agent for vCloud. The default credentials are: User name: root Password: Default0 (case-sensitive) 2.
Multi-core processor with at least 2.5 GHz clock rate At least 32 GB of RAM A 64-bit Windows operating system To set up deduplication 1. On the machine that will act as the storage node, run the setup program of Acronis Backup Advanced. 2. Install the storage node as described in the "Getting started with a storage node" section of the Acronis Backup Help. 3. Create a number of user accounts on the storage node, one account per organization.
The management server names backup plans by using the following template: %OrgName%_%BackupPlanOwner%_%BackupPlanName%, where %OrgName% is the name of an organization, %BackupPlanOwner% is the name of the backup plan owner as it is displayed in the Acronis Backup Advanced for vCloud interface, and %BackupPlanName% is the name of the backup plan as it is displayed in the Acronis Backup Advanced for vCloud interface. For example, MyOrg_OrgUser_Daily. 4.
With the default certificate, users who log in to the service will see a security alert similar to the following: We recommend that you change the default certificate to your own certificate before you allow wide use of the service. To change the SSL certificate 1. Make sure that you have a .pem file with your certificate. You can buy a certificate from a certificate authority (CA) or create a certificate by using a tool such as openssl. 2. Copy the .pem file to the machine with Agent for vCloud.
b. Uncomment this line by removing the symbols. c. Save the file. 4. On the machine with Agent for vCloud, edit the /opt/acronis/vcd-agent/client/resources/css/custom.css file as follows: a. In the .login-header-logo and .header-logo class selectors, replace the logo file names with the new names. Those class selectors define the logo on the login page and in the main interface, respectively. b.
2 User's Guide 2.1 About the backup service This service enables backup and recovery of virtual machines managed by VMware vCloud Director. The service is available through a web interface. To log in to the backup service, use your vCloud Director credentials. What you can do after logging in depends on the settings made by a system administrator for your organization. Due to these settings, some of the operations described in this guide may be not available to you. 2.
2.4 Basic operations This section describes typical usage of the backup service. 2.4.1 Logging in to the service You can log in to the backup service under the following conditions: You are an organization administrator in vCloud Director. A system administrator has enabled use of the service for your organization. To log in to the backup service 1. Go to the login page of the backup service. The URL of the login page looks like: https://backup.example.
Starting a backup Select one or more virtual machines that you want to back up, and then click Back up now. If you want backups to run on a schedule, apply a backup plan (p. 42) instead. Monitoring a backup A backup may start with a delay, depending on the backup service load. When the backup starts, you can see its progress in the machine details area on the right. The number of machines that are backed up simultaneously and the order in which they are backed up are defined by the backup service.
To apply a backup plan to virtual machines 1. Select one or more virtual machines in the All virtual machines list, or select an entire vApp in the vApps list. If you select an entire vApp, the backup plan will be applied to all machines in the vApp and to any new machines that appear in the future. 2. Click Apply backup plan. 3. Select the backup plan that you want to apply to the machines. For example, select Daily.
Overwriting a machine means that only the content of its original disks is overwritten. The content of hard disks that were added after the backup will remain the same. The machine settings, such as CPU and memory settings, and the MAC addresses (also known as physical addresses) of the network adapters are also preserved. A machine that was renamed or moved to a different vApp is considered a new machine. To overwrite it, you need a backup that was created after renaming or moving the machine.
2.4.5 Recovering a virtual machine This is a common recovery procedure. Unlike overwriting an existing virtual machine, this enables you to recover a deleted virtual machine, create a new virtual machine by recovering it from a backup, and change the machine's network settings. Setting up the recovery 1. Open the Backup storage tab. 2. In the list of backed-up machines, select the machine that you want to recover, and then click Recover. 3.
In Computer name, change or specify the name that the machine will have on the network. This is the name defined in the guest operating system (Control Panel > System > System Properties > Computer Name). Under Network adapters, change or specify the settings for the existing adapters, or add or delete network adapters. Details. To add a network adapter, click Add network adapter, and then specify the settings for it. To delete a network adapter, click the Delete ( ) button next to it.
The service shows the volumes, files, and folders that were present on the machine at that time. Volumes that you cannot recover files from are not shown. Select the files and folders that you want to recover, and then click OK. After the recovery is completed, the link to download the .zip file appears on the Backup storage tab in the machine details area on the right. The link is valid for 24 hours. You can use the link only when you are logged in to the service. The files are stored in the .
2.4.7 Monitoring protection statuses The Protection status column on the organization tab indicates how well a virtual machine or a vApp is protected. Protection statuses of machines The table below lists protection statuses of a machine by order of severity, from the least severe to the most severe. Status Meaning Not protected No backup plan is applied to the machine. Never backed up A backup plan is applied to the machine, but no backup has been run.
The column chart represents backup storage usage for the last 30 days. In the chart, red columns show days when the storage quota was exceeded and orange columns show days when the storage quota was almost reached. To generate a comprehensive report on the storage usage for a specific period, click Generate usage report (p. 53). 2.6 Operations with backup plans The Backup plans tab shows the backup plans that you can apply to your virtual machines.
The scheduled time is displayed according to the time zone set on the machine from which you are logged in to the backup service. If you schedule backups to run, say, at 07:00, they will run when your machine clock reaches 07:00, regardless of the time zone where the vCloud infrastructure is physically located. If you change the time zone setting on the machine, the schedule will not change, but you will see different start time.
Monthly backups: 12 months Example Suppose that you use the default settings (run backups Monday through Friday, Weekly/Monthly backups on Friday, the default retention rules) and apply the backup plan on Monday, March 1. The following table shows which daily (D), weekly (W), and monthly (M) backups will remain on Friday, April 30. Backups that are shown on the gray background will be deleted by that day.
This option is effective only for files and folders that are stored on the following file systems: FAT NTFS Ext3 Ext4 Regardless of the file system, this option is not effective for volumes that are managed by Linux Logical Volume Manager (LVM), also known as logical volumes; and for multiple-disk (MD) devices, also known as Linux Software RAID.
To edit a backup plan 1. 2. 3. 4. Open the Backup plans tab. Select the backup plan that you want to edit, and then click Edit. View or change the name, schedule, retention rules (p. 49), and backup options (p. 51). Click OK. Consequences of changing encryption If you need to change the Encryption setting (to enable or disable encryption or to change the password), consider the following: Retention rules will no longer apply to the backups with the old encryption setting.
Number of protected VMs: The total number of protected machines (that is, the machines to which backup plans are applied), no matter whether backups of those machines exist Storage usage: The total size of all backups in the backup storage (in gigabytes) Disk size of protected VMs: The total size of hard disks of the protected machines (in gigabytes), regardless of the occupied space on those disks RAM size of protected VMs: The total amount of memory of the protected machines (in gigabytes
3 Terminology reference Agent for vCloud The main component of Acronis Backup Advanced for vCloud that runs on a dedicated virtual machine within a vCloud Director management cluster. Backup (operation) An operation that saves information about a virtual machine in a packaged form, for the purpose of recovery. Backup (recovery point) The result of a single backup operation. A backup represents a point in time to which a user can recover the virtual machine.
Recovery An operation that creates or overwrites a virtual machine by using the data that was earlier saved in a backup. When you select for recovery the same machine that was backed up, it is overwritten. Otherwise, a new virtual machine is created. Resource group One or more ESX(i) clusters that contain virtual machines of vCloud Director organizations. Retention rules A part of backup plan that specifies how long backups are kept.
Copyright Statement Copyright © Acronis International GmbH, 2002-2014. All rights reserved. “Acronis” and “Acronis Secure Zone” are registered trademarks of Acronis International GmbH. "Acronis Compute with Confidence", “Acronis Startup Recovery Manager”, “Acronis Active Restore”, “Acronis Instant Restore” and the Acronis logo are trademarks of Acronis International GmbH. Linux is a registered trademark of Linus Torvalds. VMware and VMware Ready are trademarks and/or registered trademarks of VMware, Inc.