
User Guide

Copyright © Acronis, Inc., 2000-2010 191
Save the selected log
entries to a file
1. Select a single log entry or multiple log entries.
2. Click
Save Selected to File.
3. In the opened window, specify a path and a name for the file.
Save all the log entries
to a file
1. Make sure, that the filters are not set.
2. Click
Save All to File.
3. In the opened window, specify a path and a name for the file.
Save all the filtered log
entries to a file
1. Set filters to get a list of the log entries that satisfy the filtering criteria.
2. Click
Save All to File.
3. In the opened window, specify a path and a name for the file. As a result, the log
entries of that list will be saved.
Delete all the log entries
Click
Clear Log.
All the log entries will be deleted from the log, and a new log entry will be created. It
will contain information about who deleted the entries and when.
6.1.3.2 Filtering and sorting log entries
The following is a guideline for you to filter and sort log entries.
To Do
Display log entries for a
given time period
1. In the From field, select the date starting from which to display the log entries.
2. In the To field, select the date up to which to display the log entries.
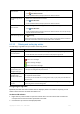
Filter log entries by type Press or release the following toolbar buttons:
to filter error messages
to filter warning messages
to filter information messages
Filter log entries by the
original backup plan or
managed entity type
Under the Backup plan (or Managed entity type) column header, select the backup plan
or the type of managed entity from the list.
Filter log entries by task,
managed entity,
machine, code, owner
Type the required value (task name, machine name, owner name, etc.) in the field below
the respective column header.
As a result you will see that the list of log entries fully or just partly coincide with the
entered value.
Sort log entries by date
and time
Click the column's header to sort the log entries in ascending order. Click it once again to
sort the log entries in descending order.
Configuring the log table
By default, the table has seven columns that are displayed, others are hidden. If required, you can
hide the shown columns and show the hidden ones.
To show or hide columns
1. Right-click any column header to open the context menu. The menu items that are ticked off
correspond to the column headers presented in the table.
2. Click the items you want to be displayed/hidden.