Copyright © Acronis, Inc., 2008. All rights reserved. “Acronis”, “Acronis Compute with Confidence”, and the Acronis logo are trademarks of Acronis, Inc. Linux is a registered trademark of Linus Torvalds. Windows is a registered trademark of Microsoft Corporation. All other trademarks and copyrights referred to are the property of their respective owners. Distribution of substantively modified versions of this document is prohibited without the explicit permission of the copyright holder.
ACRONIS, INC. End User License Agreement (EULA) BEFORE INSTALLING AND USING THE SOFTWARE PRODUCT WHICH EITHER YOU HAVE DOWNLOADED OR IS CONTAINED ON THESE DISKS (“SOFTWARE”) YOU SHOULD CAREFULLY READ THE FOLLOWING LICENSE AGREEMENT (“AGREEMENT”) THAT APPLIES TO THE SOFTWARE. CLICK “ACCEPT” IF YOU FULLY ACCEPT AND AGREE TO ALL OF THE PROVISIONS OF THIS AGREEMENT. OTHERWISE, CLICK “DO NOT ACCEPT.
Standard Software license. A standard Software License is the general license that is available to LICENSEE.
RESULTS AND PERFORMANCE OF THE SOFTWARE IS ASSUMED BY LICENSEE. FURTHERMORE, LICENSOR DOES NOT WARRANT OR MAKE ANY REPRESENTATIONS REGARDING THE USE OR THE RESULTS OF THE USE OF THE SOFTWARE OR RELATED DOCUMENTATION IN TERMS OF THEIR CORRECTNESS, ACCURACY, RELIABILITY, CURRENTNESS, OR OTHERWISE. NO ORAL OR WRITTEN INFORMATION OR ADVICE GIVEN BY LICENSOR SHALL CREATE A WARRANTY OR IN ANY WAY INCREASE THE SCOPE OF THIS WARRANTY. Liability Limitations.
Table of Contents CHAPTER 1. INTRODUCING ACRONIS® RECOVERY FOR MS EXCHANGE ................. 10 1.1 WHAT IS ACRONIS RECOVERY FOR MS EXCHANGE? ................................................................ 10 1.2 WHY ACRONIS RECOVERY FOR MS EXCHANGE?...................................................................... 12 1.3 TWO ACRONIS RECOVERY FOR MS EXCHANGE EDITIONS ........................................................ 12 1.4 ADVANTAGES ............................................................
5.1.5 Storage Groups and Information Stores .................................................................................. 32 5.1.6 Circular Logging...................................................................................................................... 33 5.1.7 Disaster Recovery Plan............................................................................................................ 33 5.1.8 Continuous Data Protection .................................................................
.1.9 Selecting Start Parameters................................................................................................... 58 8.1.10 Echo Task Selection......................................................................................................... 58 8.1.11 Restore Summary............................................................................................................. 58 8.2 RESTORING MAILBOXES ...................................................................................
Scenario ............................................................................................................................................ 82 Acronis solution ................................................................................................................................ 82 A.3 BACKING UP SEVERAL DATABASES .................................................................................................. 83 Scenario ..................................................................
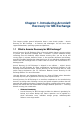
Chapter 1. Introducing Acronis® Recovery for MS Exchange This chapter provides general information about a new Acronis product - Acronis Recovery for MS Exchange – its features and advantages. You will learn about supported databases, operating systems and platforms. 1.1 What is Acronis Recovery for MS Exchange? Acronis Recovery for MS Exchange offers a fast and reliable disaster recovery solution to protect your Microsoft Exchange data.
With Acronis Recovery for MS Exchange you can restore your crucial mailboxes or single emails from different kinds of backup – not only from brick-level backups, but from a whole-database backup archive as well. • Smaller, more manageable archives Award-winning Acronis technology provides superior image file optimization. Customizable compression rates reduce the amount of data to store and transfer, leading to direct cost savings in storage and labor.
production server (operating system and whole information store) on bare metal from bootable CD or from a PXE. • Easy Administration Intuitive wizard-driven GUI allows even non-DBAs to confidently configure and implement professional backup strategies. 1.2 Why Acronis Recovery for MS Exchange? Comprehensive recovery requires more than just a backup of information stores.
Acronis Recovery for MS Exchange Assistant provides an intuitive GUI for easy creation and implementation of a backup strategy, even without DBA experience • Disaster Recovery Plan Automatically creates and e-mails Disaster Recovery Plans with step-by-step instructions on recovering databases.
• Notifications Configure notification via e-mail and SNMP • Automated recovery staging Every restore scenario can be executed in one step.
• x86-64 1.8 Supported Operating Systems for Acronis Recovery for MS Exchange Agent For Acronis Recovery for MS Exchange: • Windows 2000 (SP4 Rollup 1) • Windows Server 2003 (both 32-bit and 64-bit versions) • Windows 2008 Server For Acronis Recovery for MS Exchange Small Business Edition: • Windows SBS 2003 • Windows SBS 2008 1.
Trial Serial Numbers Acronis allows you to have a trial serial number to be able to use Acronis Recovery for MS Exchange for 14 days without buying the product. You may obtain the trial serial number in one of the following ways: • in the CD box • contacting Acronis sales representatives. Visit http://www.acronis.com/enterprise/products/ARExchange/gettrial/ You have to sign in (or register) to obtain a trial serial number.
Chapter 2. Understanding Acronis Recovery for MS Exchange This chapter provides common information about working with Acronis Recovery for MS Exchange. 2.1 Components Acronis Recovery for MS Exchange includes the following components: • Management Tools including Management Console • Acronis Recovery for MS Exchange Agent Acronis Recovery for MS Exchange 2.1.
Integration between Acronis Recovery for MS Exchange and Acronis Recovery for MS Exchange Agents 2.3 Integration with Acronis True Image Echo Enterprise Server Acronis Recovery products are integrated with Acronis True Image Echo Enterprise Server Update (build 8115 or later) that provides the ability to automatically execute preconfigured restore tasks in case of disaster.
Configuring Bare Metal Restore To restore all necessary information stores on bare metal or to create a bootable media, you need a previously created archive with required information stores backed up. After creating an archive, do the following: 1. Launch a Restore wizard to schedule a restore task and choose a Bare Metal Restore option in the first step. 2. Specify a task execution account. 3.
Chapter 3. Installation of Acronis Recovery for MS Exchange From this chapter you will learn how to install Acronis Recovery for MS Exchange components both locally and remotely. 3.1 Minimum System Requirements Acronis Recovery for MS Exchange requires the following hardware: • Pentium processor or higher • 1024 MB RAM • Mouse (recommended) 3.2 Security Policy 3.2.1 Credentials Acronis Recovery for MS Exchange obtains access to networked computers using two types of credentials. 1.
Naturally, you are free to use administrator credentials for both purposes. This will work, but make sure it conforms to the security policy set in your network. 3.2.
3.3.2 Installing Acronis Recovery for MS Exchange Agent Remotely To install Acronis Recovery for MS Exchange Agent remotely on a database server, you first need Acronis Recovery for MS Exchange Management Console installed on the local computer. The remote system must meet the requirements described in 3.1 “Minimum System Requirements”. Before remotely installing Acronis Recovery for MS Exchange Agent on Windows 2008 Server, open port 25001 for TCP protocols for an inbound connection.
3.3.3 Extracting Acronis Components Recovery for MS Exchange To install Acronis Recovery for MS Exchange from the command line, you need to extract the .msi file prior to starting the installation process. Here are the steps for extracting the file: • run the Acronis Recovery for MS Exchange setup file; • in the Install Menu, right-click on the component name and select Extract; • select a location for the setup file and click Save. 3.3.
Chapter 4. Getting started with Acronis Recovery for MS Exchange This chapter will help you to start working with Acronis Recovery for MS Exchange, and will guide you through connecting to a remote server, and remote installation of Acronis Recovery for MS Exchange Agent. 4.
4.2 Acronis Recovery for MS Exchange Workspace Acronis Recovery for MS Exchange workspace includes the Acronis Recovery for MS Exchange Management Console window - the primary tool for managing data backup/restore on local and remote computers where Acronis Recovery for MS Exchange Agent is installed. The workspace consists of the main area with operation icons, as well as the menu, the toolbar, and the common tasks bar. On the left there is a sidebar featuring the Computers or Help panels.
• Restore E-mails – restore separate e-mails from a previously created archive • Manage Tasks – manage tasks scheduled on a computer • Logs – open the Log Viewer window • Disaster Recovery Plan – generate step-by-step instructions on how to restore your databases in case of any kind of failure 4.2.2 Computers Pane The Computers pane is located on the left side of the main program window.
• Options – open a window for editing default backup/restore options, setting text appearance (fonts), configuring notifications etc The View menu contains an item for managing the appearance of the program window: • Status Bar – enables/disables the status bar Acronis Recovery for MS Exchange allows using shortcut keys to navigate through the program menu. To do this, hold down and press the access key (the underlined letter) of the required menu item.
4.5 Discovering Servers The purpose of discovering servers is to find servers on the network automatically and add them to the list in the Computers pane. The first time the program is executed, the list in the Computers pane list is empty and you will be prompted to discover servers. In order to be able to create backup and recovery operations on servers, you should launch the search or add servers to the list manually.
• Specify the username (as ) and password on the server you want to connect to, in the corresponding fields • Select the Save Password check box if you want to save the password. Note, that username (including the domain name) and password must be defined explicitly while connecting to a stand-alone Microsoft Exchange Server. Having provided all the necessary information for connection, click Connect to establish connection.
Chapter 5. Creating Backup Archives This chapter provides general information about backup types, describes how to backup Microsoft Exchange information stores, storage groups or even mailboxes/public folders, and which options can be set using Acronis Recovery for MS Exchange. 5.1 General Information Backup is crucial to maintaining a timely and consistent record of your Microsoft Exchange servers for recovery in case of failure.
database from a full database backup to a chosen location. Enough of the transaction log is included in the backup to let you recover the database to the time when the backup finished. When the database is recovered, uncommitted transactions are rolled back. The restored database matches the state of the original database when the backup finished, minus any uncommitted transactions. For a small database that can be backed up quickly, it is convenient to use only full database backups.
5.1.4 Server Roles As a messaging system that is widely used in both large organizations and small businesses, Microsoft Exchange Server has always been scalable in both directions. However, new demands on messaging – such as compliance, security, and disaster recovery – have created new challenges for delivering a messaging system that works well in small businesses and large enterprises alike.
Thus, an individual database in Microsoft Exchange is only a dependent part of a storage group, and backing it up separately becomes pointless, because it does not guarantee a data integrity after restoring. 5.1.6 Circular Logging The Microsoft Windows 2000 Active Directory service and the Microsoft Windows Server 2003 Active Directory service use the circular logging feature to maintain transactions in the database file (Ntds.dit).
5.1.8 Continuous Data Protection Continuous data protection (CDP, but also may be called continuous backup) technology makes it possible to save data changes automatically and uninterruptedly, restoring your data to its exact state at the moment of failure. When you choose CDP technology during the creation of a backup task, you will have to schedule only full backups. Acronis Recovery for MS Exchange controls folders with archived logs and backs up all new logs into a CDP archive.
Backup and restore operations on a tape drive proceed in the same way as with other devices with the following exceptions. 1. You do not have to provide filenames for backups. 2. As soon as the tape is full and the Acronis Recovery for MS Exchange Management Console is connected to the computer, a dialog window with a request to insert a new cartridge will appear. 3. If the tape already contains data, but is not full, new contents will be appended.
While creating a backup task, you have to select, which way to back up your data. Note, transaction logs files require considerable disk space, so you will have to delete (or move to another place for storing) them manually, taking into account which files are safe to remove. For more information about backup types see 5.1.2 “Backup Types”. 5.2.
Selecting Storage Groups to Back Up Select the specific storage group you want to back up. The right pane will display its name, size, number and total size of associated databases, as well as circular logging status (enabled/disabled). After selecting the appropriate object for back up, click Next to continue. 5.2.
operation. You can change this behavior by specifying additional settings in backup options (see 5.4.7 for detailed information). Please note that unsupported Acronis Backup Server versions will not be displayed in the Acronis Backup Servers list. To provide compatibility with Acronis Recovery for MS Exchange, please install most up-to-date version, available at: http://www.acronis.com/enterprise/download/ATIBS .
• 10 Minutes – use when significant changes occur at least every ten minutes (this option is available only while backing up an information store and is disabled for mailboxes because the backup technology does not allow specifying such short periods of time) • Hour – select this option if you want to back up the selected data hourly • Day - select this option if you want to back up the selected data daily Click Next to continue.
Table of Backup Strategies The table below describes different backup strategies according to your requirements for storage space and speed. The final strategy created by Acronis Recovery for MS Exchange Assistant will be displayed in a Schedule page (see 5.2.6 for details).
Enter a task name in the Task Name field to identify and organize tasks by operation (edit, delete, etc.). You may provide comments for the archives you create. The backup file size and creation date are automatically appended to the description, so you do not need to enter this information. 5.2.9 Backup Summary The final stage of the backup is the summary window, which displays the list of operations to be performed. Click Finish to save the created schedule or start the backup creation task immediately.
credentials will be used during each task execution for connecting to the server and by default for connecting to the Microsoft Exchange. The task would run as if it was started by the specified user. Enter the user name and password, then click Next. Note, the domain name must also be specified if the user is a member of a domain (DOMAIN\Username). Note, this step will be skipped if you selected the Create a Backup Now in the previous step (5.3.1 Defining a Backup Strategy). 5.3.
Select Exclude the following objects from the backup to enable excluding options and then select the required ones: • “Deleted Items” folder – exclude the “Deleted Items” folder from the backup file to be created • “Sent Items” folder – exclude the “Sent Items” folder from the backup file to be created • Items that were modified before – select day, month and year to exclude objects modified earlier than the chosen date • Attachments larger than – select this item and specify the maximum attachment s
Acronis Backup Server This software application, when installed on a networked computer, automatically manages backup archives and retention policies for the specified location and ensures optimal usage of storage space. Outdated archives will automatically be deleted as specified in the retention policies set by the administrator. In addition, Acronis Backup Server facilitates the creation and execution of group backup tasks. Acronis Backup Server is shipped with Acronis True Image Echo Enterprise Server.
last day of each month. You can specify Weekly and Monthly parameters to schedule the necessary operation. 5.3.8 Backup Options Select the backup options (pre/post commands, compression level etc.). You may Use default options (see 5.4 for detailed information about backup options) or Set the options manually. If you set the options manually, the settings will only be applied to the current backup task. 5.3.
• Select commands to be executed before the backup process starts in the Before backup process field. To create a new command or select a new batch file click the Edit button. • Select the command to be executed after the backup process ends in the After backup process field. To create a new command or select a new batch file click the Edit button. 5.4.2 Compression Level Select the compression level for the backup.
Please keep in mind that in the Restore Data wizard, Acronis Recovery for MS Exchange will ask for a password after you select a folder within the archive location. Only those archives that were protected with the password you typed in or non password-protected archives will be displayed. Best practices suggest using the same password for backup archives in the same folder within the archive location.
This parameter is selected by default, which allows backing up metadata. 3. Overwrite data on the tape Select this parameter if you use tapes as a backup location and want to choose an overwrite mode. See 5.1.9 for detailed information. 4. Fast incremental backup Select this parameter to create only brick-level (document level) backup, which provides quicker restoring of individual e-mails and mailboxes. 5.
Chapter 6. Disaster Recovery Plan It is extremely important for all organizations and users to have detailed instructions describing the process for recovering data quickly and efficiently in case of disaster – a Disaster Recovery Plan. This plan should contain all of the required information to guide someone through the recovery process.
You can check if the settings are correct by clicking the Send test E-Mail message button 5. The final stage of the Disaster Recovery Plan Creation wizard is the summary window, which display the list of operations to be performed. Click Finish to obtain the Disaster Recovery Plan immediately. In the latter case an e-mail will be sent to the address you specified or a HTML version of the Disaster Recovery Plan will be opened in your web browser after you click Finish. 6.
Chapter 7. Backup Location Clean-up Sooner or later the backups you create will fill up the assigned storage space. Acronis Recovery for MS Exchange allows you to clean up backup locations by specifying how long to store the archive and/or the maximum number of full backups to store. By default, these options are disabled. Launch the Backup Location Clean-up wizard by clicking on the icon in the main program window. 7.
Click Next to provide a password, if one is required, for archives in the selected backup location. 7.3 Providing a Password If there are any password-protected backup archives in the location you have selected (see 7.2), you will need to enter the password to clean up the archive location. Click Next to continue. 7.4 Specifying Cleaning Options At this step specify the GFS or Simple (selected by default) scheme to use for location cleaning.
7.4.1 GFS Scheme Select this option to enable GFS clean-up scheme. GFS (Grandfather-Father-Son) scheme will keep three sets of backups in the selected location. This scheme, if chosen, is activated on the day the first full backup was created: all backup archives (full and incremental) for the current week (7 days starting from the day of creating the first full backup); one full backup for each week of the current month; and finally one full backup for each month of the current year.
7.6 Backup Location Clean-up Summary The final stage of the backup location clean-up is the summary window, where the list of operations that will be performed is displayed. Click Finish to save the created schedule or start the backup location clean-up task immediately.
Chapter 8. Restoring the Backup Data Acronis Recovery for MS Exchange restores storage groups and mailboxes from previously created backup archives. 8.1 Restoring Information Stores Launch the Restore Information Store wizard by clicking on the restore operation icon in the main workspace. 8.1.1 Restoration Time Selection In the first step of the Restore Data wizard you will select when to run the restoration process.
You can also select specific Acronis backup locations (such as Acronis Backup Server). The following resources may also be selected as backup locations: • Entire disk or disk folder • Network share, SAN, NAS • FTP • Tapes, Autoloaders, Tape Libraries • Acronis Backup Server The number of archives in the selected folder is displayed in the right pane. Click Next to continue. 8.1.
• to a specific point in time - Acronis Recovery for MS Exchange allows you to specify a date and time to restore your data from. Note, to be able to restore to a specific point in time, Microsoft Exchange transaction logs must be backed up. Data will be restored to the time of the last created backup before the specified time, and then transaction logs will be applied. • from the selected backup – select this option to choose a backup from which to restore.
Important! After a successful completion of a database restore process, the database will remain in dismounted. One of the possible ways to avoid this situation is increasing permission privileges for the database being restored. For more details please visit http://support.microsoft.com/kb/827283. Click Next to continue. 8.1.8 Restore Options Select the options for the restoration process (Pre/Post commands, restoration process priority etc.). You can Use default options (See 8.
8.2.1 Restoration Time Selection In the first step of the Restore Data wizard you decide when to run the restoration process. There are two choices: • Now – select this option to execute the restore operation immediately after you finish the wizard • On schedule – select this option to schedule the operation 8.2.
8.2.5 Providing a Password If there are any password-protected backup archives in the location you have selected (see 9.1.3), you will need to enter the password to restore your data from archives. Click Next to continue. 8.2.6 Restore Point Selection Specify to which state you want to restore your data. Acronis Recovery for MS Exchange offers four ways for restoring your data: • to the point of failure – the data will be restored to the state at the point of failure.
You can restore mailboxes to their original location or choose another mailbox database as a new location. In the latter case the Next button will be disabled until you choose a mailbox to restore to. Restoring Public Folders Choose a Storage Group, Public Folder Store and Public Folder from which you want to restore a specific folder. Information about the selected items will be displayed on the right. In the drop-down list, specify the public folder you want to restore.
8.3 Restoring Individual E-mails In addition to restoring storage groups and mailboxes, Acronis Recovery for MS Exchange can restore individual e-mails. Start the e-mail restoration process by clicking on the restore operation icon in the Tools group. 8.3.1 Selecting a Backup Location To view available storage groups and mailboxes select the appropriate backup location by clicking the Select location… link or specify the path to it manually in the Backup location field.
8.3.3 Setting Additional Search Options Filter Acronis Recovery for MS Exchange allows using a filter to display only the required items in the tree. Type a word, which will help you to define the necessary folders, in the Filter field. Only Mailboxes containing this word will be displayed in the tree below. Text to search You can enter a text you want to search for in e-mails’ subjects in a corresponding field and click the Search button.
8.4.1 Pre/Post Commands You can specify commands or batch files to be automatically executed before and after the restore procedure. Click Edit to open the Edit Command window and input the command, its arguments and the working directory, or browse folders to find a batch file. Interactive commands (commands that require user input) are not supported). 8.4.
Changing the restore process priority may have an adverse effect on the performance of other programs running simultaneously. The priority of any process running in the system determines the amount of CPU usage and system resources allocated to that process. 8.4.3 Additional Settings Backup archive validation Before data is restored from the archive, Acronis Recovery for MS Exchange can check its integrity.
Using Dial Tone Recovery Restoring a huge Microsoft Exchange Server database may take several hours before users can start working with it again after a disaster. But Acronis Recovery for MS Exchange makes it possible to use a dial tone to recover e-mail service in the first place, and only then restore users’ data as it becomes available (only in Microsoft Exchange Server 2007). Main advantages of using dial tone mode are independence from the log’s size and almost instant access to the e-mail service.
Chapter 9. Scheduling Tasks 9.1 What is a task? A task is a job you execute for a database that includes the type of operation (backup, restore, etc.), parameters of the operation (what to backup, what to restore, etc.) and a schedule (optional). Each time you want to perform an operation with specific parameters, you should create a task. Once the task is created, you can execute it manually at any time or run it on a scheduled basis (if provided).
Daily - the task will be executed daily at the specified time. You can set the following parameters: Parameter Description Recur every (…) The task execution frequency days Start time Time for starting the task.
End date Select this check box to specify the date when this schedule will be disabled Monthly - the task will be executed monthly at the specified time and day. You can set the following parameters: Parameter Description Months Select months for the task execution from the drop-down list. Then choose one of the following parameters: Days - choose this parameter to specify days of the selected months for task execution. Choose the dates from the dropdown list.
One time - the task will be executed once at the specified time and day. You can set the Start time parameter: specify the date and time to start the operation. Current time is set by default. All the settings you made are displayed in the Result field at the bottom of the window. To save your settings, click OK. To quit task scheduling without saving, click Cancel. Note, Acronis Recovery for MS Exchange allows you to set multiple schedules for one task.
Chapter 10. Managing Tasks To manage operations, click Manage Tasks in the Pick a Tool group or select the Tools -> Manage tasks menu item. All the scheduled tasks appear in the Scheduled Tasks pane in the Manage Computer Tasks window of the Acronis Recovery for MS Exchange Management Console. Information about the task name, credentials, the type of backup, its status (completed, scheduled), the task’s schedule and the date and time when it was run last is displayed.
Chapter 11. Notifications Acronis Recovery for MS Exchange can notify you when a task is complete using an SNMP service or via e-mail. By default all notifications are disabled. 11.1 E-mail Notifications Specify a singular default e-mail account that will be used for notifications regarding the backup operation process. Provide the e-mail address to which notifications will be sent and the outgoing SMTP server name. A username and a password may also be needed if the SMTP server requires authentication.
You can check if the settings are correct by clicking the Send Test E-mail Message button. 11.2 SNMP You can choose whether to send event log messages issued by Acronis Recovery for MS Exchange to computers running SNMP (Simple Network Management Protocol) management applications. To specify SNMP settings, check the Send Notification with SNMP parameter to enable SNMP notification.
Chapter 12. Viewing Logs Acronis Recovery for MS Exchange working logs. The logs provide information about scheduled task results, including failure reasons, if any. To view logs, click the Logs item in the Pick a Tool group. The log browsing window contains two panels: the left panel features the log list, and the right panel displays the selected log’s contents. You can set up list parameters to only display messages of a particular type, display particular columns, or select a sorting order.
Chapter 13. Command-line Mode Acronis Recovery for MS Exchange supports the command-line mode. The commandline user interface provides the ability to execute most of Acronis Recovery for MS Exchange functionality.
Lists an archive location’s URI. The path may be specified in one of the following ways: “C:\path\to\dir\”, “\\computer\share\dir\”, “ftp://host/mybackups/” or “bsp://host/BackupServer”.
Displays parent item information /pit:
Specifies the encryption method of the created archive /password: Displays a password for the required archive location /substitute Specifies substitution /throttle Specifies throttle bandwidth in kb/s (the value can be from 0 to 100000 kb/s) /validate Specify this parameter to validate the created backup archive /priority: Specifies priority of the backup operation /forceBrick Use this parameter to force brick level backup method.
/item:- This is an optional parameter. It specifies a parent item in the following format: “//StorageGroup_name/Mailbox_name/Folder_name” To restore all storage groups set “//” as the parameter’s value.
Appendix A. Acronis Recovery for MS Exchange: Best Practices This section provides instructions for best practices when using Acronis Recovery for MS Exchange. A.1 Protect your server from hardware failure, user errors and viruses Scenario The company is running several internet and intranet applications on several Windows 2000 servers using Microsoft Exchange as the back end (using different information stores). Since all transactions are stored in the database, any data loss is not acceptable.
e. Use default settings for backup f. Add the necessary comments for the task g. Save the created task To recover all data in case of hardware failure For every damaged server perform the following actions: 1. Install and configure a new server. Install the necessary Microsoft Exchange information stores on the server. 2. Install Acronis Recovery for MS Exchange Agent on the server 3. Connect to the server from Acronis Recovery for MS Exchange Management Console using the appropriate credentials 4.
Only one database will be restored to the selected point in time. To recover all data in case of a virus attack For all servers perform the following actions: 1. Recover the server from viruses, reinstall the operating system or replace the server with a new one. 2. Connect to the server from Acronis Recovery for MS Exchange Management Console using the appropriate credentials 3. Launch the Restore Data wizard and follow the instructions to restore the database: a. Select a backup archive location b.
A.3 Backing up several databases Scenario The company uses only one Microsoft Exchange instance for running several databases. All databases have different levels of importance concerning data loss: some of them need to be backed up every day, others require only weekly backups. Acronis solution The database administrator should create independent tasks for different databases. While creating a task, the database administrator specifies the appropriate schedule for each database. A.
Acronis solution The database administrator can use previously created backup tasks and start them manually from the Acronis Recovery for MS Exchange Management Console. Another option is to start a new task for creating full backups. The administrator can specify it so that it will only be executed manually.
Appendix B. Installing Acronis Recovery for MS Exchange from command line Acronis Recovery for MS Exchange supports the Microsoft Installer utility (msiexec.exe) with all its commands. Here is the MSI installation command and options: Install Options /i Installs or configures a product.
Reinstall Options /f[p|o|e|d|c|a|u|m|s|v]
w - Logs nonfatal warnings e - Logs all error messages a - Logs startup of actions r - Logs action-specific records u - Logs user requests c - Logs initial user interface parameters m - Logs out-of-memory p - Logs terminal properties v - Logs verbose output. To use v, specify /L*v + - Appends to existing file ! - Flushes each line to the log * - Logs all information except for the v option. This is a wildcard LogFile.
Options for Advertising Using a Transform msiexec /j[u][m] component /t TransformList User Interface Level Options msiexec /q{n|b|r|f|n+|b+|b-} /qn - Displays no user interface /qb - Displays a basic user interface /qr - Displays a reduced user interface with a modal dialog box displayed at the end of the installation /qf - Displays the full user interface with a modal dialog box displayed at the end /qn+ - Displays no user interface, except for a modal dialog box displayed at the end /qb+ - Displays a basi