
User`s guide


179 Copyright © Acronis International GmbH, 2002-2012
7. Check your settings in the summary screen and click Proceed.
8. Burn the .ISO to a CD using a third-party tool (for example, Nero) and you will have a bootable
Windows PE disc with True Image 2013.
Once a machine boots into WinPE, True Image 2013 starts automatically. Be aware that startup may
take a considerable amount of time.
8.2.3.2 Adding the Acronis Plug-in to the existing WinPE 2.x or 3.0 ISO
To be able to add the Acronis Plug-in, you must first install True Image 2013 Plus Pack on your PC.
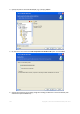
1. Unpack all files of your Win PE 2 or 3 ISO to a separate folder on the hard disk.
2. Select Acronis -> True Image 2013 Plus Pack -> Acronis WinPE ISO Builder from the Start
menu.
3. Specify the path to the folder with the WinPE files.
4. Specify the full path to the resulting ISO file including the filename or leave the default path and
filename (AcronisMedia.iso).
5. Check your settings in the summary screen and click Proceed.
6. Burn the .ISO to a CD using a third-party tool (for example, Nero) and you will have a bootable
Windows PE disc with True Image 2013.
Once the machine boots into WinPE, True Image 2013 starts automatically. Be aware that startup
may take a considerable amount of time.
8.2.3.3 Adding the Acronis Plug-in to WinPE 2.x or 3.0 WIM
1. Select Acronis True Image 2013 Plus Pack Acronis WinPE ISO Builder from the Start menu.
2. Specify the path to the source WINPE.WIM file. The standard path to this file for x86 hardware is
\Program Files\Windows AIK\Tools\PETools\X86\winpe.wim.