
Operation Manual


89 Copyright © Acronis International GmbH, 2002-2015
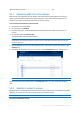
By default all notifications are disabled.
Free disk space threshold
You may want to be notified when the free space on the backup storage becomes less than the
specified threshold value. If after starting a backup Acronis True Image 2016 finds out that the free
space in the selected backup location is already less than the specified value, the program will not
begin the actual backup process and will immediately inform you by displaying an appropriate
message. The message offers you three choices - to ignore it and proceed with the backup, to browse
for another location for the backup or to cancel the backup.
If the free space becomes less than the specified value while the backup is being run, the program
will display the same message and you will have to make the same decisions.
To set the free disk space threshold:
Select the Show notification message on insufficient free disk space check box
In the Size box, type or select a threshold value and select a unit of measure
Acronis True Image 2016 can monitor free space on the following storage devices:
Local hard drives
USB cards and drives
Network shares (SMB/NFS)
The message will not be displayed if the Do not show messages and dialogs while processing (silent mode)
check box is selected in the Error handling settings.
This option cannot be enabled for FTP servers and CD/DVD drives.
E-mail notification
You can specify an email account that will be used to send you email notifications.
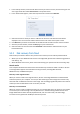
To configure the email notifications:
1. Select the Send e-mail notifications about the operation state check box.
2. Configure email settings:
Enter the email address in the To field. You can enter several email addresses in a
semicolon-delimited format.
Enter the outgoing mail server (SMTP) in the Outgoing mail server (SMTP) field.
Set the port of the outgoing mail server. By default the port is set to 25.
If required, select the SMTP authentication check box, and then enter the user name and
password in the corresponding fields.
3. To check whether your settings are correct, click the Send test message button.
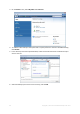
If the test message sending fails, then perform the following:
1. Click Show extended settings.
2. Configure additional email settings:
Enter the e-mail sender address in the From field. If you are not sure what address to specify,
then type any address you like in a standard format, for example aaa@bbb.com.
Change the message subject in the Subject field, if necessary.
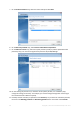
Select the Log on to incoming mail server check box.
Enter the incoming mail server (POP3) in the POP3 server field.