
User Guide

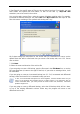
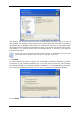
Table Of Contents
- Chapter 1. Introduction
- Chapter 2. Acronis True Image Enterprise Server installatio
- Chapter 3. General information and proprietary Acronis tech
- 3.1 The difference between file archives and disk/partition
- 3.2 Full, incremental and differential backups
- 3.3 Acronis Secure Zone
- 3.4 Acronis Startup Recovery Manager
- 3.5 Acronis Backup Server
- 3.6 Acronis Snap Restore
- 3.7 Acronis Universal Restore
- 3.8 Using dynamic disks and volumes
- 3.9 Backing up to tape drive
- 3.10 Viewing disk and partition information
- Chapter 4. Using Acronis True Image Management Console
- Chapter 5. Using Acronis True Image Enterprise Server (loca
- Chapter 6. Creating backup archives
- Chapter 7. Restoring the backup data
- 7.1 Restore under Windows or boot from CD?
- 7.2 Restoring files and folders from file archives
- 7.3 Restoring disks/partitions or files from images
- 7.3.1 Starting the Restore Data Wizard
- 7.3.2 Archive selection
- 7.3.3 Restoration type selection
- 7.3.4 Selecting a disk/partition to restore
- 7.3.5 Selecting a target disk/partition
- 7.3.6 Changing the restored partition type
- 7.3.7 Changing the restored partition file system
- 7.3.8 Changing the restored partition size and location
- 7.3.9 Assigning a letter to the restored partition
- 7.3.10 Restoring several disks or partitions at once
- 7.3.11 Using Acronis Universal Restore
- 7.3.12 Setting restore options
- 7.3.13 Restoration summary and executing restoration
- 7.4 Setting restore options
- Chapter 8. Scheduling tasks
- Chapter 9. Managing Acronis Secure Zone
- Chapter 10. Creating bootable media
- Chapter 11. Other operations
- Chapter 12. Mounting an image as a virtual drive
- Chapter 13. Transferring the system to a new disk
- 13.1 General information
- 13.2 Security
- 13.3 Executing transfers
- 13.3.1 Selecting Clone mode
- 13.3.2 Selecting source disk
- 13.3.3 Selecting destination disk
- 13.3.4 Partitioned destination disk
- 13.3.5 Old and new disk partition layout
- 13.3.6 Old disk data
- 13.3.7 Destroying the old disk data
- 13.3.8 Selecting partition transfer method
- 13.3.9 Partitioning the old disk
- 13.3.10 Old and new disk partition layouts
- 13.3.11 Cloning summary
- 13.4 Cloning with manual partitioning
- Chapter 14. Adding a new hard disk
- Chapter 15. Command-line mode and scripting
Chapter 6. Creating backup archives
To be able to restore the lost data or roll back your system to a predetermined state, you
should first create a data or entire-system backup file.
If you are not concerned about restoration of your operating system along with all settings
and applications, but plan to keep safe only certain data (the current project, for example),
choose file/folder backup. This will reduce the archive size, thus saving disk space and
possibly reducing removable media costs.
Backing up the entire system disk (creating a disk image) takes more disk space but enables
you to restore the system in minutes in case of severe data damage or hardware failure.
Moreover, the imaging procedure is much faster than copying files, and may significantly
speed the backup process when it comes to backing up large volumes of data (see details in
3.1 The difference between file archives and disk/partition images
).
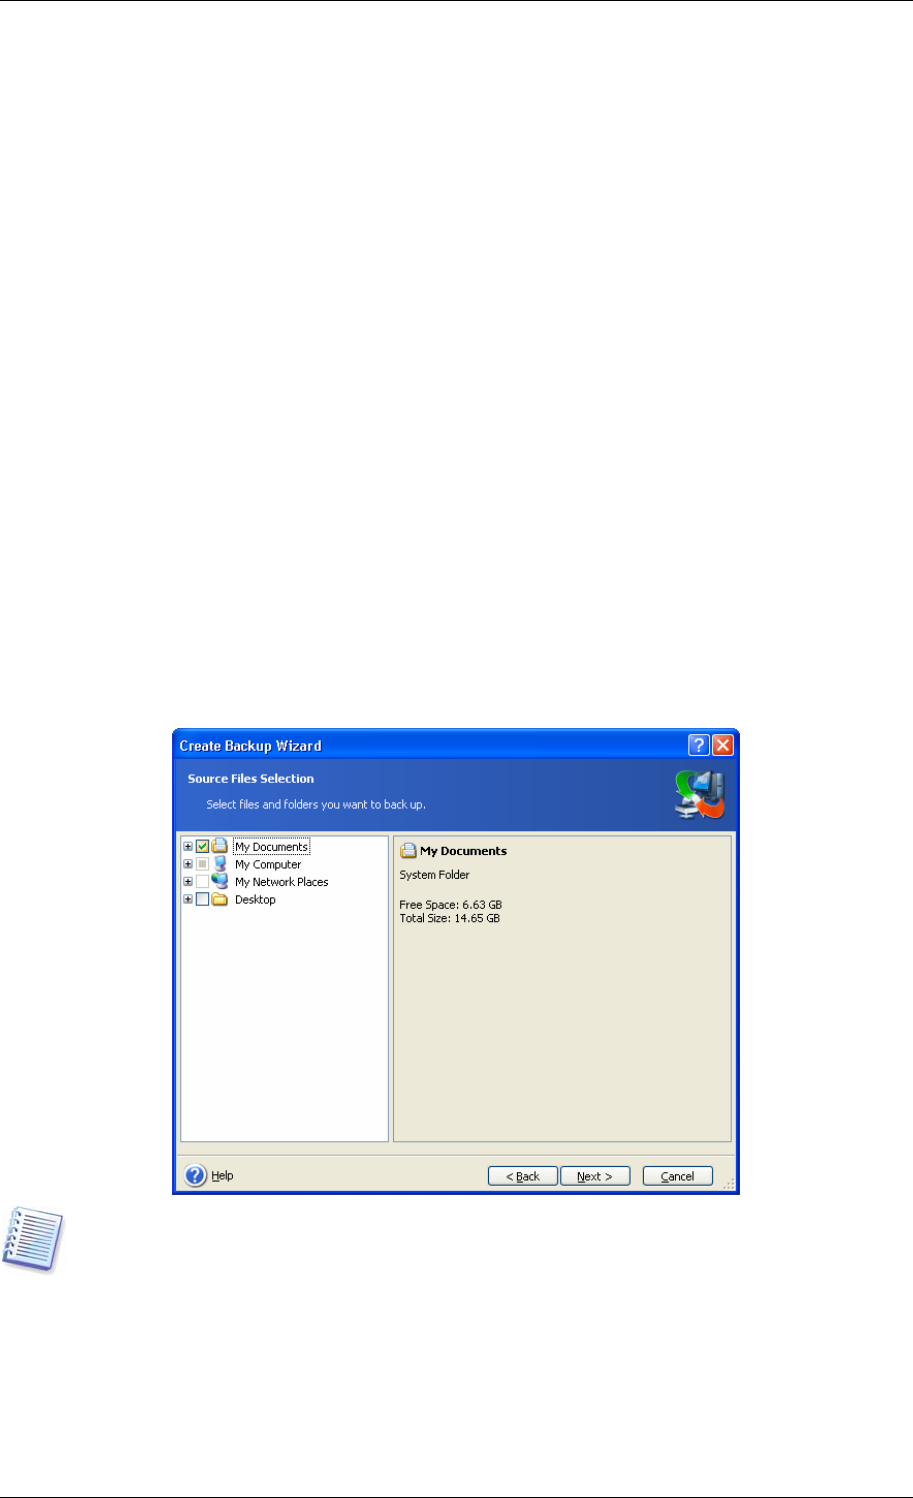
6.1 Backing up files and folders (file backup)
1. Invoke the Create Backup Wizard by clicking on the backup operation icon in the main
program window.
2. Click Next.
3. Select Files and folders and click Next.
4. From the tree pane, select files and folders to back up. You can select a random set of
files, folders, partitions, disks and even computers.
If you select a partition, disk or computer, and archive all its files, including system and
hidden files, the bare-metal restore of that disk (partition, computer) still will not be
possible. You also may not be able to boot the restored operating system. Therefore, it is
recommended that you select only files and folders containing user data. To back up a disk
or partition, use image backup.
5. Click Next.
46 Copyright © Acronis, Inc., 2000-2006