
User Guide

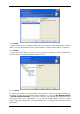
Table Of Contents
- Chapter 1. Introduction
- Chapter 2. Acronis True Image Enterprise Server installatio
- Chapter 3. General information and proprietary Acronis tech
- 3.1 The difference between file archives and disk/partition
- 3.2 Full, incremental and differential backups
- 3.3 Acronis Secure Zone
- 3.4 Acronis Startup Recovery Manager
- 3.5 Acronis Backup Server
- 3.6 Acronis Snap Restore
- 3.7 Acronis Universal Restore
- 3.8 Using dynamic disks and volumes
- 3.9 Backing up to tape drive
- 3.10 Viewing disk and partition information
- Chapter 4. Using Acronis True Image Management Console
- Chapter 5. Using Acronis True Image Enterprise Server (loca
- Chapter 6. Creating backup archives
- Chapter 7. Restoring the backup data
- 7.1 Restore under Windows or boot from CD?
- 7.2 Restoring files and folders from file archives
- 7.3 Restoring disks/partitions or files from images
- 7.3.1 Starting the Restore Data Wizard
- 7.3.2 Archive selection
- 7.3.3 Restoration type selection
- 7.3.4 Selecting a disk/partition to restore
- 7.3.5 Selecting a target disk/partition
- 7.3.6 Changing the restored partition type
- 7.3.7 Changing the restored partition file system
- 7.3.8 Changing the restored partition size and location
- 7.3.9 Assigning a letter to the restored partition
- 7.3.10 Restoring several disks or partitions at once
- 7.3.11 Using Acronis Universal Restore
- 7.3.12 Setting restore options
- 7.3.13 Restoration summary and executing restoration
- 7.4 Setting restore options
- Chapter 8. Scheduling tasks
- Chapter 9. Managing Acronis Secure Zone
- Chapter 10. Creating bootable media
- Chapter 11. Other operations
- Chapter 12. Mounting an image as a virtual drive
- Chapter 13. Transferring the system to a new disk
- 13.1 General information
- 13.2 Security
- 13.3 Executing transfers
- 13.3.1 Selecting Clone mode
- 13.3.2 Selecting source disk
- 13.3.3 Selecting destination disk
- 13.3.4 Partitioned destination disk
- 13.3.5 Old and new disk partition layout
- 13.3.6 Old disk data
- 13.3.7 Destroying the old disk data
- 13.3.8 Selecting partition transfer method
- 13.3.9 Partitioning the old disk
- 13.3.10 Old and new disk partition layouts
- 13.3.11 Cloning summary
- 13.4 Cloning with manual partitioning
- Chapter 14. Adding a new hard disk
- Chapter 15. Command-line mode and scripting

partitions must be included into the image. Any partitions which are missing from the image
will be lost.
If you want more functionality during restoration, write a standalone version of Acronis
True Image Enterprise Server to the rescue disk. Then you will be able to configure the
restore task using Restore Data Wizard, use Acronis Snap Restore or Acronis Universal
Restore etc.
Under Advanced tab you can select full, safe or both Acronis True Image Enterprise Server
loader version. The safe version does not have USB, PC card or SCSI drivers and is useful
only in case the full version does not load. If you want the computer, booted from the
media, to be accessible for remote control with Acronis True Image Management Console,
add Acronis Bootable Agent to the media. If you have other Acronis products, such as
Acronis Disk Director Suite, installed on your computer, the bootable versions of these
programs’ components will be offered as Advanced as well.
In case you check Do not place additional components if there is no free space box,
the program will try to write at least basic component to media, short of space.
6.3.11 Additional settings
1. Validate backup archive upon operation completion
The default setting – disabled.
You can choose to check the backup data integrity. Verification will be performed
immediately after the archive is created.
To check data from an incremental backup, you must have all previous incremental backup
files and the initial full backup. If any of successive backups is missing, validation is not
possible.
To check data from a differential backup, you must have the initial full backup as well.
However, if you created several differential or both incremental and differential backups
based on the same full backup (and therefore, in the same folder), you will need ALL of
these successive backups to validate the archive.
2. Overwrite data on a tape without user confirmation
The default setting – disabled.
A full backup, when created on a tape drive, overwrites all data stored on the tape (see
3.9
Backing up to tape drive
for more information). In this situation, Acronis True Image
Enterprise Server will warn that you are about to lose data on the tape. To disable this
warning, check the middle box.
3. Ask for first media while creating backup archives on removable media
The default setting – enabled.
You can choose whether to display the Insert First Media prompt when backing up to
removable media. With the default setting, backing up to removable media may be not
possible if the user is away, because the program will wait for pressing OK in the prompt
box. Therefore, you should disable the prompt when scheduling a backup to removable
media. Then, if the removable media is available (for example, CD-R/RW inserted) the task
can run unattended.
Copyright © Acronis, Inc., 2000-2006 57