
User Guide
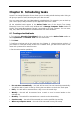
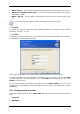
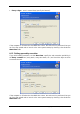
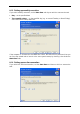

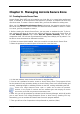
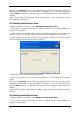

Table Of Contents
- Chapter 1. Introduction
- Chapter 2. Acronis True Image Enterprise Server installatio
- Chapter 3. General information and proprietary Acronis tech
- 3.1 The difference between file archives and disk/partition
- 3.2 Full, incremental and differential backups
- 3.3 Acronis Secure Zone
- 3.4 Acronis Startup Recovery Manager
- 3.5 Acronis Backup Server
- 3.6 Acronis Snap Restore
- 3.7 Acronis Universal Restore
- 3.8 Using dynamic disks and volumes
- 3.9 Backing up to tape drive
- 3.10 Viewing disk and partition information
- Chapter 4. Using Acronis True Image Management Console
- Chapter 5. Using Acronis True Image Enterprise Server (loca
- Chapter 6. Creating backup archives
- Chapter 7. Restoring the backup data
- 7.1 Restore under Windows or boot from CD?
- 7.2 Restoring files and folders from file archives
- 7.3 Restoring disks/partitions or files from images
- 7.3.1 Starting the Restore Data Wizard
- 7.3.2 Archive selection
- 7.3.3 Restoration type selection
- 7.3.4 Selecting a disk/partition to restore
- 7.3.5 Selecting a target disk/partition
- 7.3.6 Changing the restored partition type
- 7.3.7 Changing the restored partition file system
- 7.3.8 Changing the restored partition size and location
- 7.3.9 Assigning a letter to the restored partition
- 7.3.10 Restoring several disks or partitions at once
- 7.3.11 Using Acronis Universal Restore
- 7.3.12 Setting restore options
- 7.3.13 Restoration summary and executing restoration
- 7.4 Setting restore options
- Chapter 8. Scheduling tasks
- Chapter 9. Managing Acronis Secure Zone
- Chapter 10. Creating bootable media
- Chapter 11. Other operations
- Chapter 12. Mounting an image as a virtual drive
- Chapter 13. Transferring the system to a new disk
- 13.1 General information
- 13.2 Security
- 13.3 Executing transfers
- 13.3.1 Selecting Clone mode
- 13.3.2 Selecting source disk
- 13.3.3 Selecting destination disk
- 13.3.4 Partitioned destination disk
- 13.3.5 Old and new disk partition layout
- 13.3.6 Old disk data
- 13.3.7 Destroying the old disk data
- 13.3.8 Selecting partition transfer method
- 13.3.9 Partitioning the old disk
- 13.3.10 Old and new disk partition layouts
- 13.3.11 Cloning summary
- 13.4 Cloning with manual partitioning
- Chapter 14. Adding a new hard disk
- Chapter 15. Command-line mode and scripting
Chapter 8. Scheduling tasks
Acronis True Image Enterprise Server allows you to schedule periodic backup tasks. Doing so
will give you peace of mind, knowing that your data are safe.
You can create more than one independently scheduled task. For example, you can back up
your current project daily and back up the application disk once a week.
All the scheduled tasks appear in the Active Tasks area of the Acronis True Image
Enterprise Server local version main window and in Manage Computer Tasks window of
Acronis True Image Management Console, connected to the local computer. You can start,
stop, edit, delete and rename the scheduled tasks from these windows.
8.1 Creating scheduled tasks
1. To invoke the Schedule Task Wizard, click on its icon on the Active Tasks toolbar or
select Operations -> Schedule Task from the main menu.
2. Click Next.
3. Configure a backup task in the usual way (see
Chapter 6. Creating backup archives
). If
you choose to create the backup archive on a network drive, you will have to enter a user
name and a password for network access.
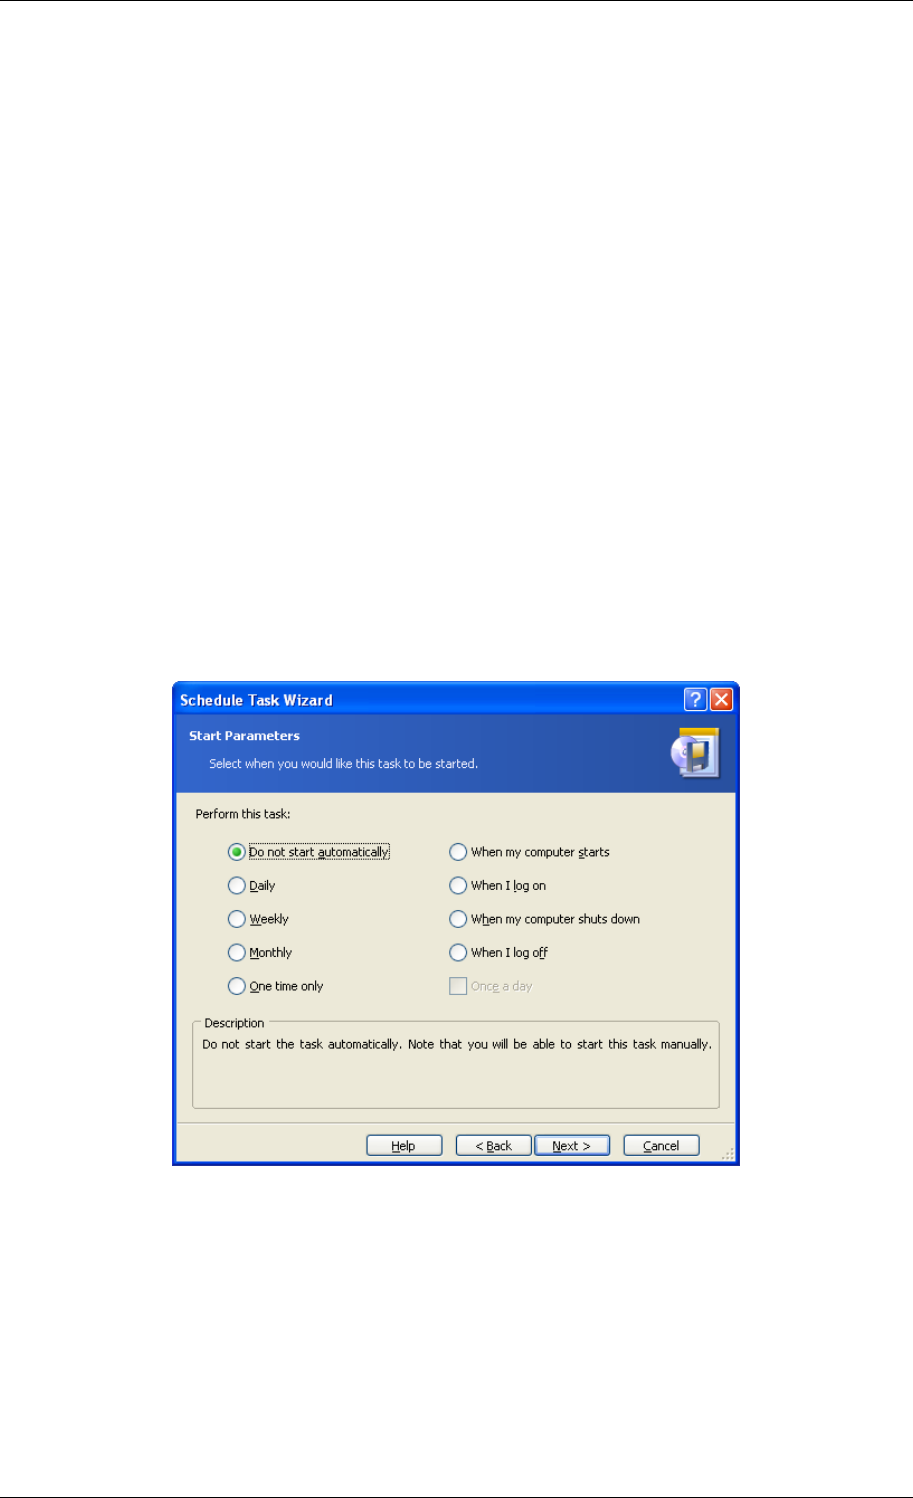
4. Set the task execution periodicity.
• Do not start automatically – the task will be saved, but not launched automatically.
You will be able to launch it later by clicking the start button on the Active Tasks pane
• Daily – the task will be executed once a day or once in several days
• Weekly – the task will be executed once a week or once in several weeks on the
selected day
• Monthly – the task will be executed once a month on the selected day
• One time only – the task will be executed once at the specified time and day
• When my computer starts – the task will be executed at every OS startup
72 Copyright © Acronis, Inc., 2000-2006