
User Guide

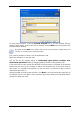
Table Of Contents
- Chapter 1. Introduction
- Chapter 2. Acronis True Image Enterprise Server installatio
- Chapter 3. General information and proprietary Acronis tech
- 3.1 The difference between file archives and disk/partition
- 3.2 Full, incremental and differential backups
- 3.3 Acronis Secure Zone
- 3.4 Acronis Startup Recovery Manager
- 3.5 Acronis Backup Server
- 3.6 Acronis Snap Restore
- 3.7 Acronis Universal Restore
- 3.8 Using dynamic disks and volumes
- 3.9 Backing up to tape drive
- 3.10 Viewing disk and partition information
- Chapter 4. Using Acronis True Image Management Console
- Chapter 5. Using Acronis True Image Enterprise Server (loca
- Chapter 6. Creating backup archives
- Chapter 7. Restoring the backup data
- 7.1 Restore under Windows or boot from CD?
- 7.2 Restoring files and folders from file archives
- 7.3 Restoring disks/partitions or files from images
- 7.3.1 Starting the Restore Data Wizard
- 7.3.2 Archive selection
- 7.3.3 Restoration type selection
- 7.3.4 Selecting a disk/partition to restore
- 7.3.5 Selecting a target disk/partition
- 7.3.6 Changing the restored partition type
- 7.3.7 Changing the restored partition file system
- 7.3.8 Changing the restored partition size and location
- 7.3.9 Assigning a letter to the restored partition
- 7.3.10 Restoring several disks or partitions at once
- 7.3.11 Using Acronis Universal Restore
- 7.3.12 Setting restore options
- 7.3.13 Restoration summary and executing restoration
- 7.4 Setting restore options
- Chapter 8. Scheduling tasks
- Chapter 9. Managing Acronis Secure Zone
- Chapter 10. Creating bootable media
- Chapter 11. Other operations
- Chapter 12. Mounting an image as a virtual drive
- Chapter 13. Transferring the system to a new disk
- 13.1 General information
- 13.2 Security
- 13.3 Executing transfers
- 13.3.1 Selecting Clone mode
- 13.3.2 Selecting source disk
- 13.3.3 Selecting destination disk
- 13.3.4 Partitioned destination disk
- 13.3.5 Old and new disk partition layout
- 13.3.6 Old disk data
- 13.3.7 Destroying the old disk data
- 13.3.8 Selecting partition transfer method
- 13.3.9 Partitioning the old disk
- 13.3.10 Old and new disk partition layouts
- 13.3.11 Cloning summary
- 13.4 Cloning with manual partitioning
- Chapter 14. Adding a new hard disk
- Chapter 15. Command-line mode and scripting

Chapter 13. Transferring the system to a
new disk
13.1 General information
Sooner or later any computer user finds out that the hard disk is too small. If you just don’t
have space for more data, you can add another disk just for data storage as described in the
following chapter.
However, you might find that your hard disk does not have enough space for the operating
system and installed applications, preventing you from updating your software. In this case,
you have to transfer the system to a higher-capacity hard disk.
This feature is available in Acronis True Image Enterprise Server local version only.
Transferring systems using Acronis True Image Management Console is not possible.
To transfer the system, you must first install the disk in the server. If a server doesn’t have a
bay for another hard disk, you can temporarily install it in place of your CD-ROM. If that is
not possible, you can clone a hard disk by creating its image and restoring it to a new hard
disk with larger partitions.
There are two transfer modes available: automatic and manual.
In the automatic mode, you will only have to take some simple actions to transfer all the
data, including partitions, folders and files, to a newer disk, making it bootable if the original
disk was bootable.
There will be only one difference between these disks – partitions on the newer disk will be
larger. Everything else, including the installed operating systems, data, disk labels, settings,
software and everything else on the disk, will remain the same.
This is the only result available in the automatic mode. The program can only duplicate the
original disk layout to the new one. To obtain a different result, you will have to answer
additional questions about cloning parameters.
The manual mode will provide more data transfer flexibility.
1. You will be able to select the method of partition and data transfer:
• as is
• new disk space is proportionally distributed between the old disk partitions
• new disk space is distributed manually
2. You will also be able to select operations to perform on the old disk:
• leave partitions (and data!) on the old disk
• remove all information from the old disk
• create new partitions on the old disk (and remove all the older information)
On program screens, damaged partitions are marked with a red circle and a white cross
inside in the upper left corner. Before you start cloning, you should check such disks for
errors using the appropriate operating system tools.
92 Copyright © Acronis, Inc., 2000-2006