
User's Manual

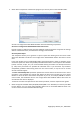

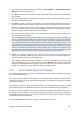


2. Select which components of the Acronis programs you want to place on the bootable media.
Acronis True Image Home 2010 Netbook Edition offers the following components:
Acronis True Image Home 2010 Netbook Edition full version
Includes support of USB, PC Card (formerly PCMCIA) and SCSI interfaces along with the storage
devices connected via them, and therefore is strongly recommended.
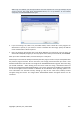
Acronis System Report
This component allows you to generate a system report after booting from the rescue media
when both Windows and Acronis True Image Home 2010 Netbook Edition full version cannot
start.
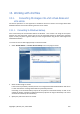
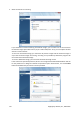
In the next window you can set Bootable media startup parameters in order to configure rescue
media boot options for better compatibility with different hardware. Several options are available
(nousb, nomouse, noapic, etc.). For all the available startup parameters see Startup Parameters
(p. 149). These parameters are provided for advanced users. If you encounter any hardware
compatibility problems while testing boot from the rescue media, it may be best to contact
Acronis Technical Support.
The Start automatically after parameter specifies the timeout interval for the boot menu. If this
parameter is not specified, the program will display the boot menu and wait for you to select
whether to boot the OS or the Acronis component. If you set, for example, 10 sec for Acronis
rescue media, the standalone Acronis True Image Home 2010 Netbook Edition will launch 10
seconds after the menu is displayed.
To find out more about components of other Acronis products, see their respective user guides.
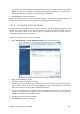
3. Select the type of bootable media (CD-R/RW, DVD+R/RW or 3.5” diskettes) to create. If your BIOS
has this feature, you can create other bootable media such as removable USB flash drives. You
can also choose to create a bootable disk ISO image.
102 Copyright © Acronis, Inc., 2000-2009