
User's Manual


14. Exploring archives and mounting images
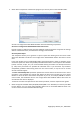
Acronis True Image Home 2010 Netbook Edition offers two kinds of archive contents management:
mounting for images and exploring for both images and file-level archives.
Exploring images and file-level archives lets you view their contents and copy the selected files to a
hard disk. To explore a backup archive, double-click on the corresponding tib file. You can also right-
click on the file and choose Explore in the shortcut menu.
When you copy files from a backup being explored, the copied files lose the "Compressed" and "Encrypted"
attribute. If you need to keep these attributes, it is recommended to recover the backup.
Mounting images as virtual drives lets you access them as though they were physical drives. Such
ability means that:
• a new disk with its own letter will appear in the drives list
• using Windows Explorer and other file managers, you can view the image contents as if they were
located on a physical disk or partition
• you will be able to use the virtual disk in the same way as the real one: open, save, copy, move,
create, delete files or folders. If necessary, the image can be mounted in read-only mode.
The operations described in this chapter are supported only for the FAT and NTFS file systems.
Please keep in mind that, though both file archives and disk/partition images have a default ".tib"
extension, only images can be mounted. If you want to view file archive contents, use the Explore
operation. The following is a brief summary of the Explore vs Mount operation:
Explore Mount
Archive type File-level, disk or partition
image
Partition image
Assigning a letter No Yes
Archive modification No Yes (in R/W mode)
File extraction Yes Yes
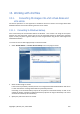
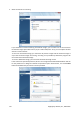
14.1. Mounting an image
1. Start the Mount Wizard by selecting Tools & Utilities → Mount Image in the main program
menu or by right-clicking on an image archive on the Data recovery and backup management
screen and selecting Mount Image in the shortcut menu.
Copyright © Acronis, Inc., 2000-2009 109