
User's Manual
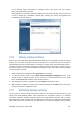


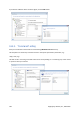

In our example, when consolidation is complete, disk G will contain two new archives
Disk1_backup2 and Disk1_backup4.
Disk1_backup2 is a full backup and Disk1_backup4 is an incremental backup. You can make sure
of this by starting the consolidation wizard again, selecting the archive Disk1_backup and
proceeding to the next window.
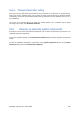
17.6. Moving backup archives
Now Acronis True Image Home 2010 Netbook Edition allows you to move backup archives to another
location. This may come in handy if you want to free space for a new backup, but want to keep an
earlier backup archive at another location, for example, a network share. Another possible scenario -
you want to recover a disk used for keeping your backup archives. As the program cannot recover if
the backup archive is on the same hard disk you are going to recover, you need to move the backup
archive to another hard disk.
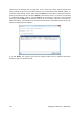
1. Select the archive for moving after clicking Recovery on the sidebar.
2. To move the archive, select it on the Data recovery and backup management screen. If the
archive consists of several backups, you can select any of them because Acronis True Image
Home 2010 Netbook Edition always moves the entire archive.
3. After making your selection, right-click and choose Move in the shortcut menu.
4. When moving is complete, the path to the archive will change in the Path column of the Data
recovery and backup management screen.
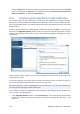
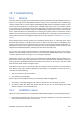
17.7. Removing backup archives
You may want to remove backups and backup archives you no longer need. Because Acronis True
Image Home 2010 Netbook Edition stores information on the backup archives in a metadata
information database, deleting unneeded archive files using Windows Explorer will not delete
information about these archives from the database and Acronis True Image Home 2010 Netbook
Edition will consider that they still exist. This will result in errors when the program tries to perform
Copyright © Acronis, Inc., 2000-2009 131