
Professional Enhanced Scan Tool User's Manual


Table Of Contents
- Safety Precautions
- Section 1 - Using This Manual
- Section 2 - Getting Started
- Section 3 - Using The Scan Tool
- Section 4 - Global OBDII Diagnostics
- Section 5 - GM Diagnostics
- Section 6 - Ford Diagnostics
- Ford Historic Self-Test Routines
- Manual Info
- Read KOEO Codes
- Read KOER Codes
- Review Codes
- Erase Codes
- Wiggle Test (EEC-IV Vehicles)
- Output Switch Test (EEC-IV Vehicles)
- Cylinder (Cyl) Balance Test (EEC-IV Vehicles)
- IVSC-Speed Ctrl (EEC-IV Vehicles)
- STAR Test Mode (EEC-IV, MECS and MCU Vehicles)
- Code Lookup
- Print Data
- DCL Data Functions (EEC-IV Vehicles)
- Ford Enhanced (OBD II) Diagnostics
- Ford Historic Self-Test Routines
- Section 7 - Chrysler Diagnostics
- Section 8 - Import Diagnostics
- Section 9 - Help & Troubleshooting
- Appendix A - Data Link Connectors
- Appendix B - Glossary
Using The Scan Tool
3 – 8 • • • • • • • • • • • • • • • • • • • • • • • • • • • • • • • • • • • • • • • • • • • • • • • • • • • • • • • •
3
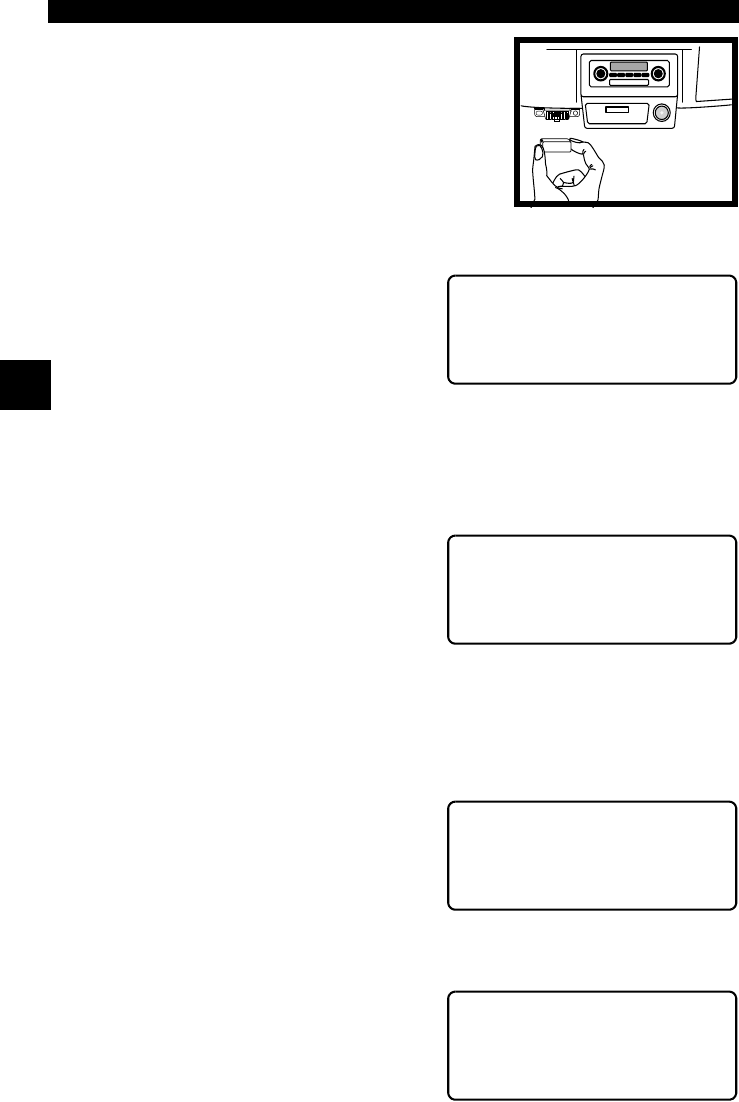
CONNECTING THE SCAN TOOL
To diagnose a vehicle, connect the DLC and
power adapter (if applicable) to the scan tool.
Refer to “Diagnostic Link Connectors (DLC)”
on page 2-5 of Getting Started.
If you just want to power up the tool to do its
self-tests, code lookup, review or printing data
from the last vehicle tested, then you do not need
to attach the cable to the Data Link Connector. The internal battery provides
power for this.
When the scan tool powers up, a series
of messages display on the screen
beginning with a “Welcome” screen and
ending with a “Key Button Help” screen.
If you wish to review the key button
definitions, push the
HELP
key;
otherwise, press
ENTER
to continue.
Vehicle Selection
When the tool powers up, the “Key Button Help” screen is followed by a Main
Menu screen.
Pick Vehicle Diagnosis to begin
Vehicle Selection. If there is a previous
vehicle present, the tool displays that
vehicle. You can choose the last vehicle
selected or setup for a new vehicle. The
tool retains all data retrieved from the
last vehicle selected until any of the
following occurs:
❒ A new vehicle is selected
❒ Internal AAA batteries are depleted or disconnected
❒ Tool is flash programmed to update software
❒ The last vehicle selected is kept but you choose Erase Data
You can either keep the previously
selected vehicle or change it. If
changing the vehicle, press the
RIGHT
arrow key and press
ENTER
.
Otherwise, press
ENTER
to keep the
current one.
Keep Current Vehicle
The next screen asks if you want to
erase the stored data. The default is NO.
After pressing
ENTER
, the function list
displays.
Diagnostic
Co nnect or
Welcome To The
Professional
Enhanced Scan Tool
SW ID: XXXX
Main Menu ?
` Vehicle Diagnosis
Tool Setup [
Tool Self-Tests ~
1995 Neon
C=2.0L SFI SOHC
<KEEP> CHANGE
Erase All Stored
Data For Selected
Vehicle?
YES <NO>