
User Manual
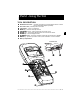
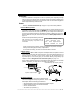
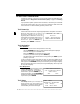
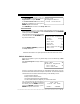
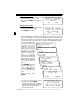

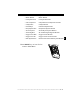
Table Of Contents
- Safety Precautions
- Getting Started
- Using The Tool
- Global OBD II Diagnostics
- GM Historic Diagnostics
- Ford Historic Diagnostics
- Chrysler Historic Diagnostics
- Help & Troubleshooting

• • • • • • • • • • • • • • • • • • • • • • • • • • • • • • • • • • • • • • • • • • • • • • • • • • • • • • • • • 2 – 5
• • • • • • • • • • • • • • • • • • • • • • • • • • • • • • • • • • • • • • • • • • • • • • • • • • • • • • • • Using The Tool
2
Measurement Units
To change the measurement units, use
the
83'2:1
arrow keys to select
English/Metric and press
(17(5
.
In the Measurement Units menu, select
English or Metric and then press
(17(5
. English is the default.
Press
(17(5
again to return to the Setup Tool menu.
Tool Information
This function allows you to view specific tool information that may be needed
when contacting customer service. Select Tool Information with the
83'2:1
arrow keys and press
(17(5
.
The information shown to the right displays
on the screen. Use the
83'2:1
arrow
keys to view all the lines.
Press the
%$&.
or
(17(5
key to return to
the Setup Tool menu.
✓ Write this information in the space provided on the inside of the front cover.
Vehicle Selection
When the tool powers up, the “Key Button Help” screen is followed by a Main
Menu screen.
Pick Vehicle Diagnosis to begin Vehicle
Selection.
If there is a previous vehicle present, the tool displays that vehicle. You can
choose the last vehicle selected or setup for a new vehicle. The tool retains all data
retrieved from the last vehicle selected until any of the following occurs:
❒ A new vehicle is selected
❒ Battery is dead or disconnected
❒ Tool is flash programmed to update software
❒ The last vehicle selected is kept but you choose Erase Data
You can either keep the previously
selected vehicle or change it. If changing
the vehicle, press the
5,*+7
arrow key
and press
(17(5
. Otherwise, press
(17(5
to keep the current one.
'7FGB (AA>
[ S@9>;E:/!7FD;5
S(AA>@8AD?3F;A@
(AA> @8AD?3F;A@
[ '7D;3> "A
'+
+ *7D
AAF *7D
$DA6
A3D6
GD@ 3F7 //
GD@ A5
!3;@!7@G ^
[ *7:;5>7;39@AE;E
(AA>'7FGB ]
(AA>'7>8W(7EF
"7A@
X ''#
$"