
User Guide


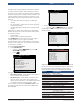


Table Of Contents
- 1 Safety Precautions
- 1.1 Read All Instructions
- 2 Important Safety Warnings and Instructions
- 3 Getting Started
- 4 Using the Scan Tool
- 5 Diagnostic Menu
- 5.1 I/M Monitors (Emissions)
- 5.2 Read Codes
- 5.3 Erase Codes
- 5.4 MIL Status
- 5.5 State OBD Check
- 5.6 View Data
- 5.7 Record Data
- 5.8 View Freeze Data
- 5.9 Drive Cycle Monitor
- 5.10 O2 Monitor Tests
- 5.11 Diagnostic Monitor Tests
- 5.12 On-Board Systems
- 5.13 Vehicle Information
- 5.14 Oil Light Reset
- 5.15 Battery Reset
- 5.16 Charging System Monitor
- 5.17 Modules Present
- 6 Troubleshooting
- 7 Appendix A— PID Definitions
- 8 Appendix B—Glossary
- 9 Limited Warranty

573102 | REV. B | 03.2016
Bosch Automotive Service Solutions Inc.
CP9680
AutoScanner® Plus
|
User guide | 23
|
en
From the Main Menu or Diagnostic Menu.
1. Select Acronyms.
• Use the UP and DOWN keys until Acro-
nyms is highlighted.
• Press .
Main Menu
Vehicle Diagnostics
Acronyms
Review Data
Print Data
Code Lookup
System Setup
2. Select the alphabetical group range for the desired
acronym.
• Use the UP and DOWN keys until the
desired group range is highlighted.
• Press .
Acronyms
# - 24X C
24X S - 5
A - AF 1/1
AF 1/2 - AI
Al - B-
BA - CA
Ca - CL
Cl - c
C - DIA
3. Select the acronym.
• Use the UP and DOWN keys until the
desired acronym is highlighted.
• Press .
Acronyms
# Of Emiss
# Of Pwrt
#CMP/CKP LOSS
#TRP SNC MISF
#TRPS SNC MISF
% Alcohol
% GRADE
% METHANOL
% of Pdl
4. View selected acronym.
• Press to return to the Diagnostic Menu.
# Of Emiss
Number Of Emission Related DTC
4.14 Component Locator
Component Locator provides a vehicle-specific location
of components found on the selected vehicle. It is a
useful companion function to CodeConnect®. CodeCon-
nect® will indicate components that repaired a problem
associated with a DTC, and Component Locator pro-
vides the location of the component
Component Locator can be selected from the Diagnos-
tic Menu. Because Component Locator provides vehicle-
specific component locations, a previous vehicle must
be stored in the scan tool.
From the Diagnostic Menu.
1. Select Component Locator.
• Use the UP and DOWN keys until Compo-
nent Locator is highlighted.
• Press .
Diagnostic Menu
Datastream
Diagnostic Codes
Special Tests
Component Locator
Acronyms
Review Data
Print Data
Code Lookup
System Setup
2. Select the alphabetical group range for the desired
component.
• Use the UP and DOWN keys until the
desired group range is highlighted.
• Press .
Component Locator
A - Fuel Injector (No 4
Fuel Injector (No 5 - K
M - W