
Installation Guide


2 3
Features & Benets
Congratulations on your new AcuRite product. To ensure the best
possible product performance, please read this manual in its entirety
and retain it for future reference.
Unpacking Instructions
Remove the protective lm that is applied to the LCD screen prior to using this
product. Locate the tab and peel off to remove.
Package Contents
1. Display unit with tabletop stand
2. Wired temperature sensor
3. Instruction Manual
PRODUCT REGISTRATION
Register online
to receive 1 year
warranty protection
www.AcuRite.com
IMPORTANT
PRODUCT MUST BE REGISTERED
TO RECEIVE WARRANTY SERVICE
►
Register a Product
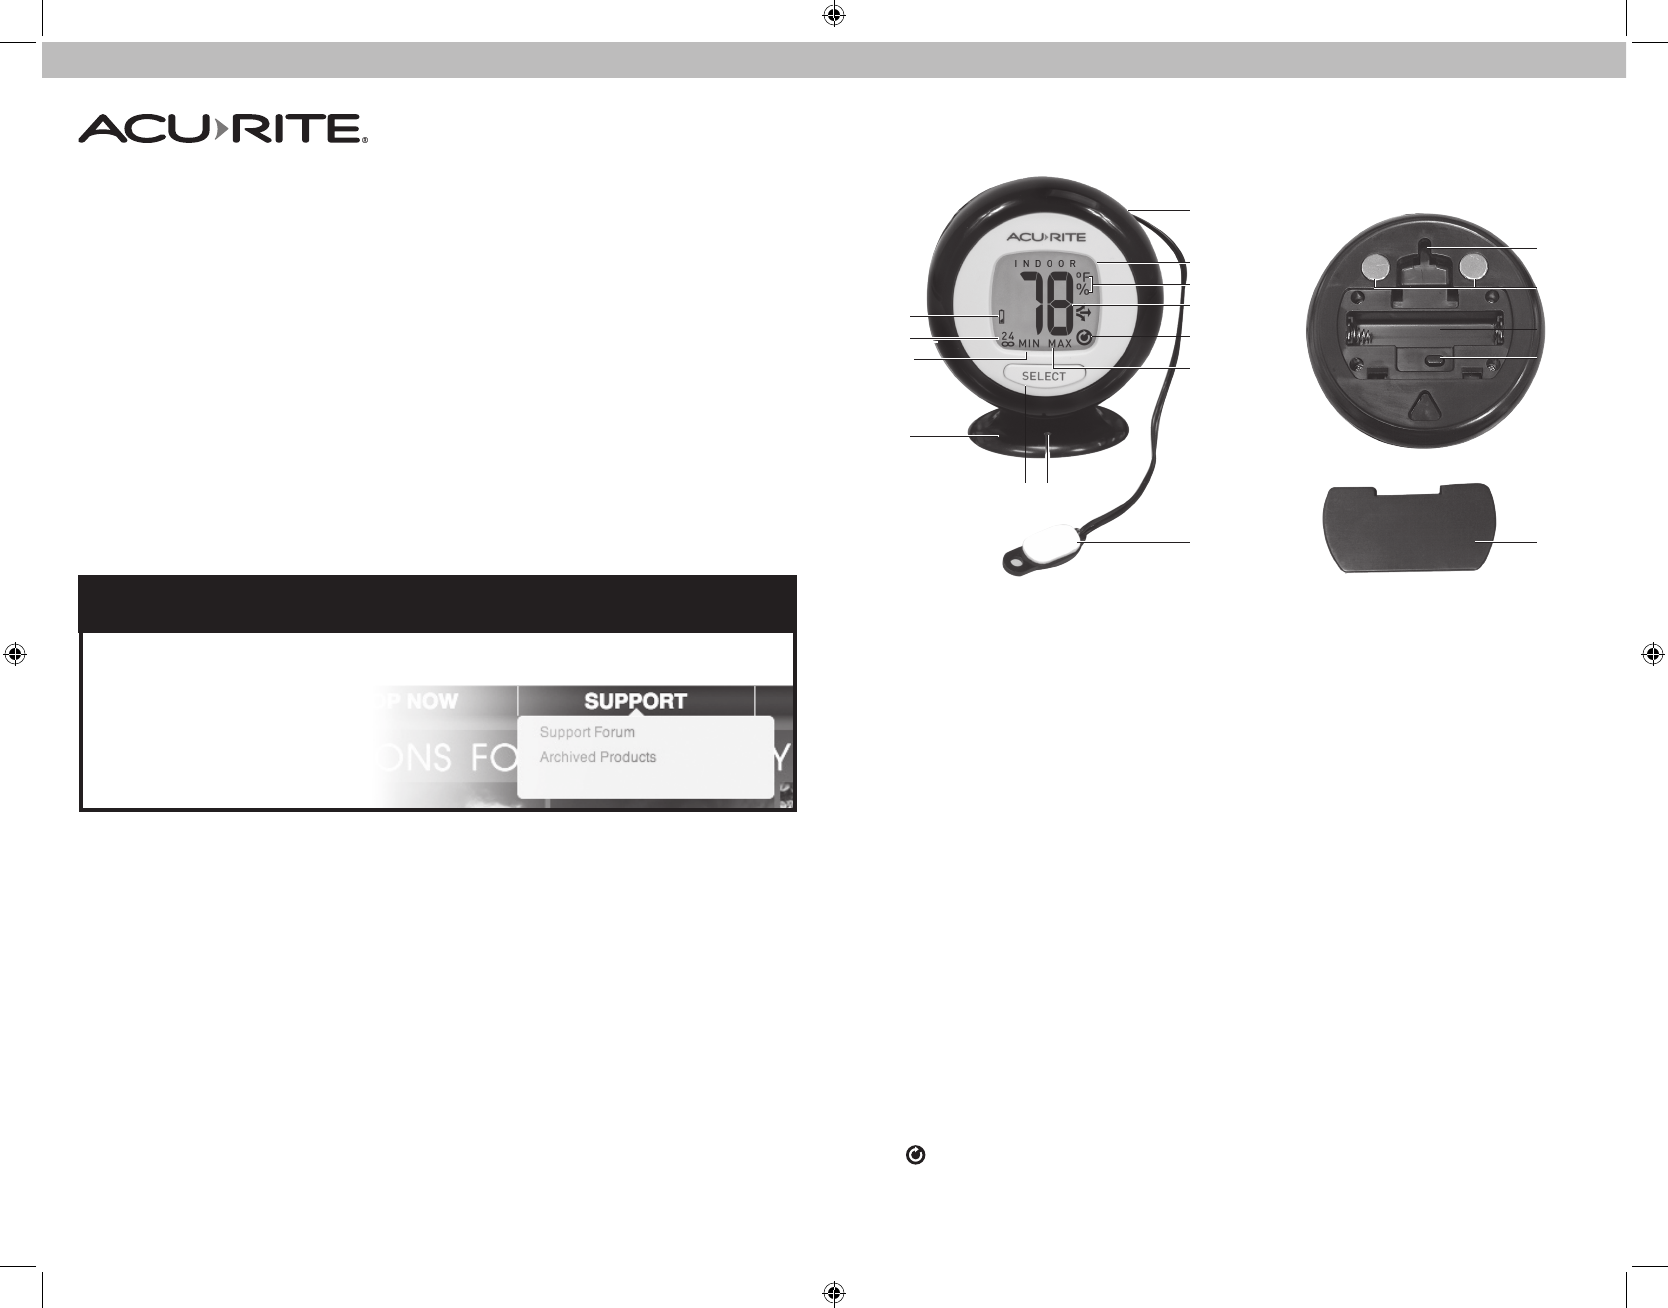
FRONT
1. Low Battery Icon
2. Timespan for Records
Indicates records are being displayed for
either the past 24 hours or all-time.
3. MIN Indicator
Indicates low temperature record or low
humidity record is being displayed.
4. Removable Tabletop Stand
5. SELECT Button
Press to manually cycle through current
readings and records.
6. Wired Sensor Retention Slot
For cord management.
7. Wired Temperature Sensor with
Adhesive Pad
8. MAX Indicator
Indicates high temperature record or high
humidity record is being displayed.
9. Auto-Cycle Icon
Indicates auto-cycle mode is active.
1
2
4
3
5 6
7
9
10
12
13
17
15
16
18
14
8
11
10. Current Temperature or Humidity
Arrow icon indicates direction temperature or
humidity is trending.
11. °F or % Icons
Indicates either temperature or relative
humidity is being displayed.
12. INDOOR/OUTDOOR Indicator
Indicates viewing readings for INDOOR
(display) or OUTDOOR (sensor).
13. Wired Sensor Storage
Secure excess wire and the wired sensor.
BACK
14. Battery Compartment Cover
15. °F/°C Button
Select temperature units.
16. Battery Compartment
17. Integrated Magnets
For magent-mountable placement.
18. Integrated Hang Hole
For easy wall mounting.