
Instructions / Assembly

10
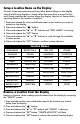
Sync a New Monitor or Sensor with the Display
To manually add a new Monitor or Sensor to the display:
1. Press and release the color-coded button next to a location on the display with
the name “AVAILABLE.” Next, “ADD MONITOR” will ash at the top of the
display.
2. Press the “SET” button. “SELECT MONITOR STYLE” and “
” or ” ” will
ash on the display.
3. Press and release the “
▲
“ or “
▼
“ buttons to highlight the icon that represents
the type of product you are adding.
4. Press the “SET” button to conrm your selection. “SELECT ID” appears on the
display.
5. Press and release the “
▲
“ or “
▼
“ buttons to cycle through the Monitors and/
or Sensors that the display has wirelessly identied.
6. Press the “SET” button to conrm your selection. “SELECT NAME” appears on
the display.
7. Press and release the “
▲
“ or “
▼
“ buttons to cycle through the available
location names. Select the name that most closely matches the location where
the Monitor or Sensor that is reporting data for the location is installed.
8. Press the “SET” button to conrm your selection.
The new Monitor or Sensor will now synchronize with the display. It may
take a few minutes for synchronization to complete. Please refer to the
troubleshooting section of this manual if anything appears to be functioning
improperly.
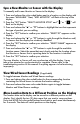
View Wired Sensor Readings (if applicable)
To toggle between Monitor and Wired Sensor readings:
1. Press and release the color-coded button for the corresponding location
containing the Wired Sensor to activate the location settings.
2. Press and release the same color-coded button again to toggle between
Monitor and Wired Sensor readings.
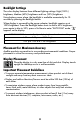
Move Location Data to a Different Position on the Display
The location data on the display can be moved to a different position on the
display. First, identify the two (2) data areas that you want to swap positions.
Press and HOLD the color-coded buttons found next to each area simultaneously
for 5 seconds. The data will switch positions on the display.