Cinema Rhapsody Mach IV Home Theater Controller Installation Manual HDMI 1.4 - April 2011 602-610 Mamaroneck Avenue, White Plains, NY, 10605, www.ada-usa.
Contents Safety Instructions & Electrical Warning.........................................................................................3 AC Connections..................................................................................................................................4 Power Amplifier (& Powered Subwoofer) Connections..................................................................5 Introduction - Front Panel Controls & Displays...............................................................
Safety Instructions & Electrical Warning READ INSTRUCTIONS - All the safety and operating instructions should be read before the appliance is operated. RETAIN INSTRUCTIONS - The operating instructions should be retained for future reference. HEED WARNING - All warnings on the appliance and in the operating instructions should be adhered to. FOLLOW INSTRUCTIONS - All operating and use instructions should be followed.
AC Connections AC Connection The Cinema Rhapsody Mach 4 features a dualprimary type of power supply that operates on 115V~/60Hz as well as 230V~/50Hz. When using the Cinema Rhapsody Mach 4 with non-US Standard AC power cords, the user must supply the appropriate EIC Female to Male AC power cord. Before You Begin As you remove the Cinema Rhapsody Mach 4 from its packaging, inspect the condition of the component prior to proceeding with the following steps for AC connection.
Power Amplifier (& Powered Subwoofer) Connections Audio Connections The Cinema Rhapsody’s Audio Outputs are clearly marked in a white field on the back of the unit. ADA strongly suggests not using directional interconnects that lift the grounds. This diagram includes ADA’s PTM-8150 Eight Channel Power Amplifier.
Introduction - Front Panel Controls & Displays Overview The Cinema Rhapsody Mach 4 is factory set for optimum operation. This section details the front panel features of the Cinema Rhapsody Mach 4. All component functions can be operated through the three control knobs located on the units front panel. The front panel displays are also explained in this section.
Power On, Mute, Off, & Master Volume Control When the Cinema Rhapsody Mach 4 is off, turning any knob or pushing any knob other than the Volume knob will cause the Cinema Rhapsody Mach 4’s center LCD display to indicate that you need to push the knob to turn it on. Power On Press the Cinema Rhapsody Mach 4’s Volume knob to engage power on. Front Plate To turn on the Cinema Rhapsody Mach 4, providing the unit is not in Mute, press the Volume knob once.
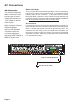
Input Selector T INPUT r elect To S pon Anoth n ent e m ur Co SELECTOR The Cinema Rhapsody Mach 4 permits you to scroll to the next input without having all of the components you are passing actively process through the Cinema Rhapsody Mach 4. This prevents the clicking that is commonly associated with changing TV channels up and down. To best access another component from the front of the Cinema Rhapsody Mach 4, turn the Input Selector knob.
Mode Selector & Mode Descriptions Tu MODE SELECTOR Front View r Select An To Mode oth n e r The Cinema Rhapsody Mach 4 permits you to scroll through available modes without necessarily engaging the mode until you have found the one you wish to use. As you turn the mode knob, the top line of the Cinema Rhapsody Mach 4’s display will read the modes available. The lower left-hand of the display indicates the current mode. When the desired mode displayed on the top line, press the Mode knob.
Dolby Pro Logic IIx Audio Stream Processing Algorithm (Continued) PL2 Mve +THX LF/RF/C/LS/RS/LB/RB/Sw Adds THX filters to Pro Logic 2 Movie PL2 Custom LF/RF/C/LS/RS/LB/RB/Sw Custom settings for Pro Logic 2 Movie - permits adjustment of PL II PL2 Cstm1 +THX LF/RF/C/LS/RS/LB/RB/Sw Adds THX filters to PL Custom mode (above) PL2 Custom 2 LF/RF/C/LS/RS/LB/RB/Sw Custom 2 settings for Pro Logic 2 Movie - permits adjustment of PL IIPL2 Cstm2 +THX LF/RF/C/LS/RS/LB/RB/Sw Adds THX filters to PL Custom mode (above) PL2
Rear Panel Connections Composite HDMI S-Video Ethernet HDMI ADA Bus Low Component Video Input (8) Audio/Video Input (8) & 10/100T Audio/Video Data Voltage Video Input (8) & Output (4) Input (8) Output (2) Jack Input (8) Port Triggers (2) & Output (2) Cinema Rhapsody Mach 4 Analog Audio Stereo Input (8) Analog Record Output Balanced Eight Channel Audio Output (7.1) Digital Audio Analog 8-Ch Main Eight Bypass Channel Audio TOS-Link (3) & Coax (5) Input Input Output (7.
Custom Input Configuration The Cinema Rhapsody Mach 4 is an incredibly flexible home theater controller that can accommodate a wide array of components. For easy and quick setup, one can use the “Out of the Box” input configuration. One can also elect to do a completely “Custom Input” configuration or a combination of “Out of the Box” and “Custom Input” configurations.
Setup - Entering & Navigation The Cinema Rhapsody Mach 4 can be setup using either the unit’s front panel display and knobs or by using the Cinema Rhapsody Mach 4 PC Program. ADA strongly suggests using the PC program when ever possible as it is more intuitive. When setting up the Cinema Rhapsody Mach 4 from its front panel, the Mode, Input and Volume knobs are used to move the display’s cursor and to make changes or selections.
Customizing Virtual Inputs The Cinema Rhapsody Mach 4 features 20 virtual inputs that can be limited in number, renamed, reassigned to different AV jacks, carry default modes along with recalling presets for volume, balance (with delay), tone, parametric EQ, speaker configuration, and even audio delay. While each input label is unique, several input labels can be set to access the same source.
Inputs Labels Once on the Setup screen, navigate to the LABELS/AV setup feature, by turning the Mode knob until the cursor is PRO SETUP and then press the Mode knob. The first option will be the LABELS/AV option. Press the Mode knob again. Note that these pages also feature a PREV arrow pointing left (Previous page). If you wish to return to the prior screen, navigate the cursor using the Mode knob until it rests on this arrow and press the Mode knob. Doing the same on the left MAIN arrow exits setup.
Audio Input Jack Assignment The Cinema Rhapsody Mach 4 makes it possible to assign any audio and video jack to an Input Label. For audio, there are: 3 TOS-Link Optical inputs, 5 digital coax inputs 8 analog audio inputs An 8-channel bypass input 8 HDMI inputs (A/V) When using an HDMI interconnect, you may still opt to use any one of the other audio inputs. If you want to extract the audio for that source from the HDMI input used for video, instead of selecting a digital or analog audio input, select HDMI.
Video Input Jack Assignment While the Cinema Rhapsody Mach 4 tracks only one audio input per input label, it is capable of assigning a composite video, S-Video, component video and HDMI video input to each input label (not available on the Cinema Rhapsody Mach 4-B, HDMI video only). When using an external video processor (scaler), you can still run all sources’ video through the Cinema Rhapsody Mach 4 by connecting the appropriate video outputs to the video processor you are using.
Input Presets The Cinema Rhapsody Mach 4 has the ability to engage certain feature sets when an input is selected. One of these is: Auto Delay - Rated in milliseconds (0-200). In addition to setting the Audio Delay, you can also assign one of four inputs for each of the following. Volume - The volume preset lets you assign a starting volume level for a specific input.
Default Modes The Cinema Rhapsody Mach 4 features ADA’s unique Double Default Mode Auto-Detection that automatically engages a surround sound mode for each input - one for 7.1/5.1 and another for 2 channel audio. This way, regardless of what mode was last used, the right decoding takes place each time an input is selected. Default Modes are loaded to the Cinema Rhapsody Mach 4 along with the Input Labels, AV Input Jack Assignments and Input Presets.
DC Triggers & Loading Custom Input Configurations As a reminder to how the Cinema Rhapsody Mach 4 operates, when you adjust most every feature on the unit, the changes occur in real time (immediately). That is not the case when it comes to labeling of inputs, assigning AV jacks, altering input presets, assigning DC trigger operation, or changing default modes. For these specific features, you must load them into the Cinema Rhapsody Mach 4.
Final Input The Final Input feature lets you limit the number of inputs visible to the user as they turn the Input knob during normal operation. So instead of scrolling through all twenty (factory default) input labels, you can set the unit to display just the inputs available in your system. Sometimes, the final input number corresponds to the number of source devices connected to the Cinema Rhapsody Mach 4.
Setup 1 - Speaker Size & Crossover Frequency The Cinema Rhapsody Mach 4 uses the description of Small (SM), Large (LG), and None (NO) with respect to the speakers. Small refers to speakers that are not designed to handle low frequencies. Bass information is redirected to the subwoofer. Large refers to speakers that are capable of playing low frequencies and typically, no bass redirection takes place. None refers to that speaker not existing in your system (i.e.
When setting up your speaker array using the PC program, select the side THEATER tab, the PRO SETUP top tab and then the 1-SPEAKERS sub tab. To select the speaker’s size, press NONE, SMALL or LARGE. To adjust the frequency roll-off point for just that speaker(s), adjust FREQ UP or DN. When adjusting the Back Surround speakers, note that you must have the Surround speakers set to either LARGE or SMALL in order to have Back Surround speakers at all.
Setup 2 - Speaker Level The Cinema Rhapsody Mach 4’s makes it easy to balance the speaker channels for the optimum home theater experience. Prior to entering this step, you should already have completed the positioning of your speakers and programmed their size into the Cinema Rhapsody Mach 4.
When setting up your speaker array using the PC program, select the side THEATER tab, the PRO SETUP top tab and then the 2-LEVELS sub tab. In the window toward the right are the text buttons that engage the pink noise generator. Here you can SEQUENCE (noise will move from speaker to speaker automatically), ADVANCE (go to the next speaker in order when pressed), or select a specific speaker in which the noise will remain until another option is selected or the Noise Test OFF button is pressed.
Setup 3 - Delay Settings The adjustment of the Delay setting can be configured independently for each of the Cinema Rhapsody Mach 4’s eight channels (including the subwoofer channel). The goal of setting channel delays is to have the sound from each speaker reach the primary seating position at the same time or perhaps better put, the correct time.
When setting up your speaker array using the PC program, select the side THEATER tab, the PRO SETUP top tab and then the 3-DELAYS sub tab. Here you can increase (UP) or decrease (DN) the delay levels by channel. All changes occur in real-time (instantly). The Master Delay is a global delay or lip sync delay. This feature can be added to remote control or touchscreen permitting the end user to compensate for lip sync issues which can vary from source to source and even program content.
Setup 4 - Bass Limiter The Cinema Rhapsody Mach 4 provides you with the ability to engage a Bass Peak Limiter that operates in a range from 0 dB (decibels) to -24 dB. The function of the Bass Peak Limiter is to reduce the possibility of overloading the subwoofer in cases of extreme volume and/or software that provides extremely dynamic bass information. If your subwoofer is capable of providing a large level of bass without bottoming out, you may not need to engage the Bass Peak Limiter (leaving it Off).
Setup 5 - THX The Cinema Rhapsody Mach 4 permits the adjustment of features that are specific to THX Ultra 2. Boundary Gain Control (BGC) When the chosen listening room layout (for practical or esthetic reasons) results in the listener being too close to the rear wall, the resulting bass level can be sufficiently reinforced by the boundary that the overall sound quality becomes “boomy”. Boundary Gain Compensation (BCG) can be switched ON to restore the correct bass performance.
Modes, DTS Enhancements & THX Options Modes have become so numerous that it may become difficult to manage them. Here, the Cinema Rhapsody Mach 4 is specifically designed to minimize mode clutter. In addition to Default Modes per input, ADA begins by placing modes in one of two camps, Two-Channel Modes or MultiChannel Modes. Both groups are never available at the exact same time. So when the Cinema Rhapsody Mach 4 senses a two-channel source playing, it makes Two-Channel modes available.
Simulated Surround & Dynamic Range Settings Stereo & Mono Enhance Settings The Cinema Rhapsody Mach 4 features two ADA modes that are designed to enhance your experience when viewing stereo or mono source material such as older films, TV shows, or other programming that is neither Dolby Pro Logic or 5.1 encoded. Stereo Enhance is designed to provide spatial separation using the entire speaker array. This mode will work well for both strong and weak stereo signals.
Dolby Pro Logic II Music & Custom Settings The Cinema Rhapsody Mach 4 features Dolby Pro Logic decoding. While the parameters behind the Dolby Pro Logic II Movie mode are not adjustable (the top image of the PC program shows that all features are greyed-out when in this mode), some of these parameters are adjustable for Dolby Pro Logic II Music mode (middle screen shot). All of the parameters are available for the three Dolby Pro Logic II Custom modes.
Reverb Mode Settings The Cinema Rhapsody Mach 4 features several modes that incorporate Reverb. Uniquely, ADA permits you to fully adjust these modes including features that permit you to determine the Size of the affect, the Mix percentage, the Low Frequency Cut, the Reverb Time and the Damping frequency. These features can be individually set for each of the six Reverb modes. Once set, the features are preserved.
Maximum & Turn-On Volume Settings The Cinema Rhapsody Mach 4 features a comprehensive volume control stage that in addition to letting you access a volume point numerically, also lets you set a maximum volume level, four volume presets, and select one of the four volume presets as your turn-on volume level. On the PC Program tab labeled VOL SETUP, the slider permits you to jump to a specific volume point.
Dolby Volume The Cinema Rhapsody Mach 4 features Dolby Volume, an intelligent volume control system that resolves and improves audio frequency response and volume inconsistencies. Dolby Volume can be turned on or off as can be the two main modules of Dolby Volume: Volume Modeler and Volume Leveler.
Tone Settings & Loudness On/Off The Cinema Rhapsody Mach 4 features a loudness contour filter and parametric tone control (where in you can adjust Bass and Treble Levels as well as set a Frequency points for both bass and treble). To turn Loudness on or off, press the button. To set the Tone Controls using the PC program, select the Tones tab and then either Group A or B. Here speakers are toggled into or out of a group. You can also raise or lower the frequency points and levels for both bass and treble.
Parametric EQ (PEQ) Setup The Cinema Rhapsody Mach 4 features a multiband parametric equalizer (PEQ) that provides you with tools to dramatically correct acoustical imperfections. Typically, best results are achieved using acoustical measurement systems. The PEQ is a separate PC program to the Cinema Rhapsody Mach 4 PC program. ADA suggests running one or the other but not both at the same time for optimal results. You can also set and adjust the PEQ from the front of the Cinema Rhapsody Mach 4.
HDMI Down Mix The Cinema Rhapsody Mach 4 featured a HDMI Equalizer in the units with HDMI 1.3. For all units featuring HDMI 1.4, this feature is no longer functional although the menu options still display on both the front panel and PC software. Making adjustments here does not provide any functionality. The only feature that is still is functional is the HDMI Down Mix feature.
Solo Test The Cinema Rhapsody Mach 4 features a Solo Test that allows you to turn off speakers while leaving others playing. The affect could be described as unplugging speakers during a performance. The obvious difference is that the Cinema Rhapsody Mach 4 does this safely and quickly. You can use this feature to determine if you have a blown speaker driver or if your speakers are out of phase.
Saving (& Loading) Input Configuration & PROM Files The Cinema Rhapsody Mach 4 allows you to save the configuration of your inputs to your PC. This preserves the Input Lables, the connectivity of the jacks, the default modes and the input presets. By storing input configurations to your PC, you can recall them in the event that there is ever a problem with the Cinema Rhapsody Mach 4.
Recalling Factory & Storing/Recalling Installer Defaults The Cinema Rhapsody Mach 4 features both a Factory Default as well as an Installer Default. The Factory Default can be recalled in the event you wish to begin the process of setting up the Cinema Rhapsody Mach 4 from a clean start. Note that recalling the Factory Default does not reset the Installer Default, providing one was saved first. To recall the Factory Default is available only in the PC program. Simply press the Factory Default Recall button.
ADA Bus Address, IR Receiver & Display Blanking The Cinema Rhapsody Mach 4 features 9 potential ADA Bus Addresses such that a system with several Cinema Rhapsody Mach 4s can have each one on its own unique control address. The ADA Bus address can be changed from either the PC program or the setup menu of the Cinema Rhapsody Mach 4. Changing the Address takes place in real time - there is no loading of the new address. The most typical address for the Cinema Rhapsody Mach 4 is ADA Bus Address 0.
TEQ Tracking The Cinema Rhapsody Mach 4 is designed to operate in conjunction with ADA’s TEQ series of Trinnov based room optimization equalizers. Because the TEQ sits in line between the Cinema Rhapsody Mach 4 and the power amplifiers and subwoofers, the goal in this portion of the setup is to have the TEQ become the device that controls Master Volume. The Cinema Rhapsody Mach 4 enables you to engage TEQ Master Volume Control (TEQ ON).
View HEX Commands & Feedback The Cinema Rhapsody Mach 4 is controllable via HEX commands and also provides feedback in HEX that can be translated to ASCII. For each and every function described in this manual, there is a matching HEX command. This includes update requests (feedback updates) which in addition to an Update All command, include update requests specific to a function or section of functions thus keeping the incoming data stream shorter.
HEX Codes for System Integration Comments/Notes All Commands below use 00 for the Unit Address number. When the unit address is changed, Byte number 6 (the Checksum Byte) increments by one step in Hex. For example, using the Discrete On Command on with the unit address changed to 01; the Checksum Byte changes to 26. The various commands below have been grouped together based on common function. On Off, Input Selection and Volume are together; Direct Mode and Mode related are together, etc.
Command Name Hex Command Volume Recall 1 FF, 03, 00, 01, 89, 8D, FF Volume Recall 2 FF, 03, 00, 01, 8A, 8E, FF Volume Recall 3 FF, 03, 00, 01, 8B, 8F, FF Volume Recall 4 FF, 03, 00, 01, 8C, 90, FF Volume Store 1 FF, 03, 00, 01, 8D, 91, FF Volume Store 2 FF, 03, 00, 01, 8E, 92, FF Volume Store 3 FF, 03, 00, 01, 8F, 93, FF Volume Store 4 FF, 03, 00, 01, 90, 94, FF Volume Limiter Up FF, 03, 00, 10, D8, DC, FF Volume Limiter Down FF, 03, 00, 01, D9, DD, FF Turn On Volume Preset Up FF, 03, 00, 01, DA, DE, FF Tur
Back 1 Large Back 2 Small Back 2 Large Back Crossover Freq Up Back Crossover Freq Dn Track Crossover Freq Up Track Crossover Freq Dn Boundary Gain On Boundary Gain Off Back Speakers: > 12" Back Speakers: 12-48" Back Speakers: < 48" LFE Attenuation Enable LFE Attenuation Disable LFE Attenuation Up LFE Attenuation Down Speaker Recall 1 Speaker Recall 2 Speaker Recall 3 Speaker Recall 4 Speaker Store 1 Speaker Store 2 Speaker Store 3 Speaker Store 4 Noise Sequence Noise Advance Noise Left Noise Right Noise Lef
Solo Left and Right Surround FF, 03, 00, 01, 9F, A3, FF Solo Surround Back Left FF, 03, 00, 01, A0, A4, FF Solo Surround Back Right FF, 03, 00, 01, A1, A5, FF Solo Surr.
Tones Store 2 FF, 03, 00, 01, D5, D9, FF Tones Store 3 FF, 03, 00, 01, D6, DA, FF Tones Store 4 FF, 03, 00, 01, D7, DB, FF Command Name Hex Command Mode Scroll Up FF, 03, 00, 10, 2E, 41, FF Scroll Down FF, 03, 00, 10, 2F, 42, FF THX FF, 03, 00, 10, 6B, 7E, FF User Mode FF, 03, 00, 10, 6C, 7F, FF Stereo FF, 03, 00, 10, 6D, 80, FF Mono FF, 03, 00, 10, 6E, 81, FF Direct 5.1 FF, 03, 00, 13, 70, 86, FF Direct 7.1 FF, 03, 00, 13, 71, 87, FF Direct 2.
THX Ultra 2 Music FF, 03, 00, 10, 38, 4B, FF Downmix Cinema FF, 03, 00, 14, 06, 1D, FF Downmix Club FF, 03, 00, 14, 07, 1E, FF Downmix Hall FF, 03, 00, 14, 08, 1F, FF Downmix Arena FF, 03, 00, 14, 09, 20, FF Downmix Cathedral FF, 03, 00, 14, 0A, 21, FF Downmix Quad Reverb FF, 03, 00, 14, 0B, 22, FF Stereo Enhance Attn Up FF, 03, 00, 01, E2, E6, FF Stereo Enhance Attn Down FF, 03, 00, 01, E3, E7, FF Stereo Enhance Delay Up FF, 03, 00, 01, E4, E8, FF Stereo Enhance Delay Down FF, 03, 00, 01, E5, E9, FF Mono E
PEQ PEQ PEQ PEQ PEQ PEQ PEQ PEQ PEQ PEQ PEQ Dolby Volume Dolby Volume Dolby Volume Dolby Volume Dolby Volume Dolby Volume Dolby Volume Dolby Volume Dolby Volume Dolby Volume Dolby Volume Dolby Volume Dolby Volume Dolby Volume Dolby Volume Dolby Volume Dolby Volume Dolby Volume Dolby Volume Dolby Volume Dolby Volume Dolby Volume Dolby Volume Dolby Volume Dolby Volume Dolby Volume Dolby Volume Dolby Volume Dolby Volume Dolby Volume Dolby Volume Dolby Volume Dolby Volume Dolby Volume Dolby Volume Dolby Volume